About Me
Michael Zucchi
B.E. (Comp. Sys. Eng.)
also known as Zed
to his mates & enemies!
< notzed at gmail >
< fosstodon.org/@notzed >

X-MAS 2018
I wanted a nice quiet hassle-free xmas this year so I had it
alone. My nephew (who migrated from the philippines and wont
fucking leave) is away for the week so I had the house to myself.
The rest of the family don't live in Adelaide anymore and mum can
deal with my crazy twin brother on her own.
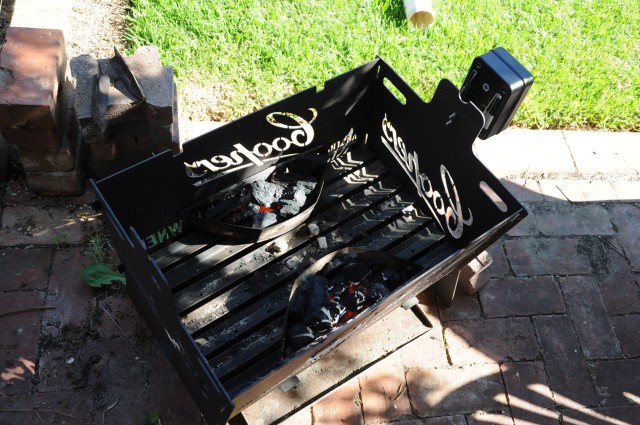
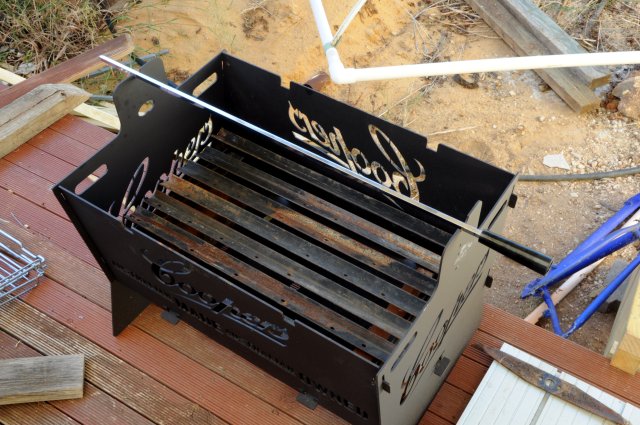
For the fist time I fired up the coopers
bbq I won a
few months ago. I used the fire
grate I made
a few weeks ago and the fire holders from the weber. Another
modification I made was to add a socket to the battery powered
motor so I ran it from a plugpack instead of a pair of D cells.
It's pretty gutless but worked fine.
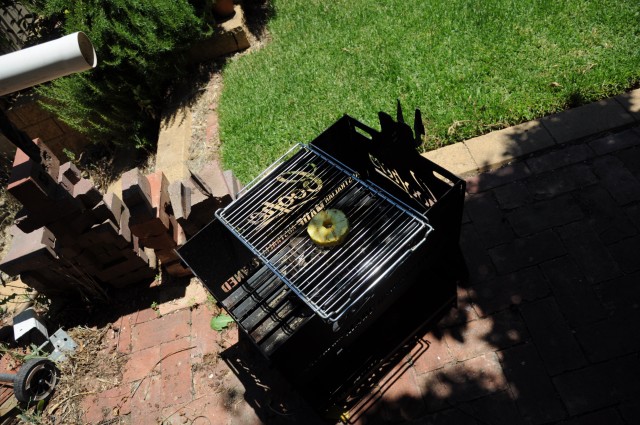
Fire started. To avoid flareups I was going to put the fire on
the sides but it wasn't necessary.
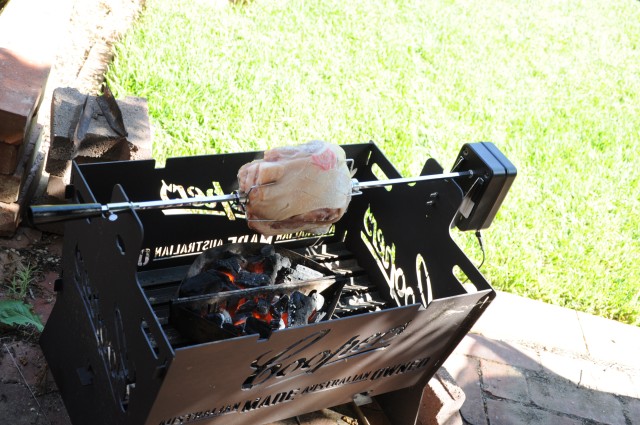
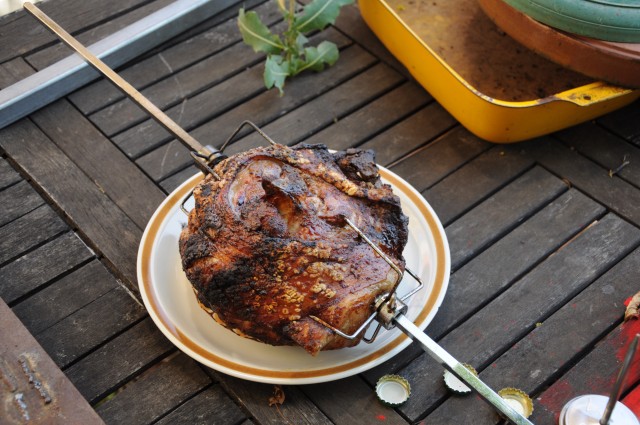
And the pork shoulder on going. I wasn't sure if the fat would
get out of hand but it worked very well, very little smoke and
only small flareups each rotation with the heat directly under the
meat.
I skewered simply the pork with lemongrass stalks and coated it in
ample salt which is my go-to basic pork roast.
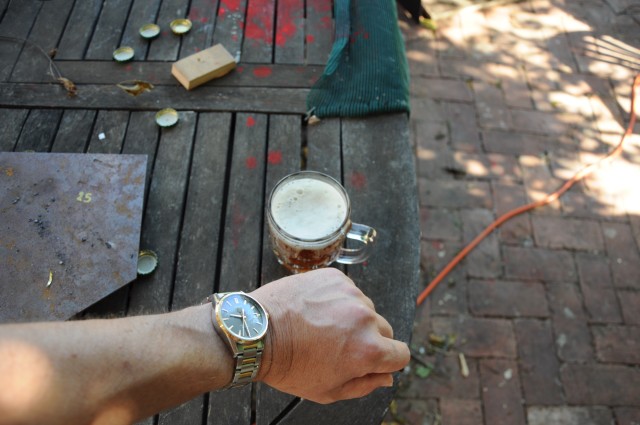
What's the time? Oh it's beer time!
Actually I normally start beer at 10am on xmas day but i'd been up
since 6 (I did the last coat on the speakers, setup the bbq, and
made bread) and ran out of other things to do and it just seemed
about right.
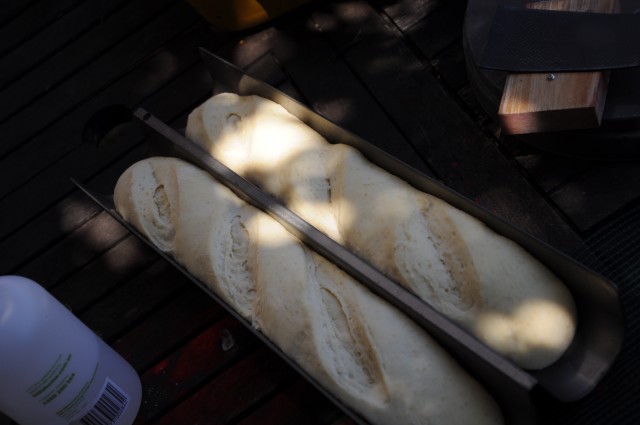
The bread proofing. I added some semolina and didn't let it rise
as much as I normally do - made very excellent dense bread.
About 2 hours later and it's done. Actually it's a bit overdone
as it cooked faster than I expected but a shoulder is forgiving of
being overcooked and regardless, the cracking was great.
I used a bit more charcoal than I would have in the weber but it
was a fun way to cook the meat and i'll definltely do it again.
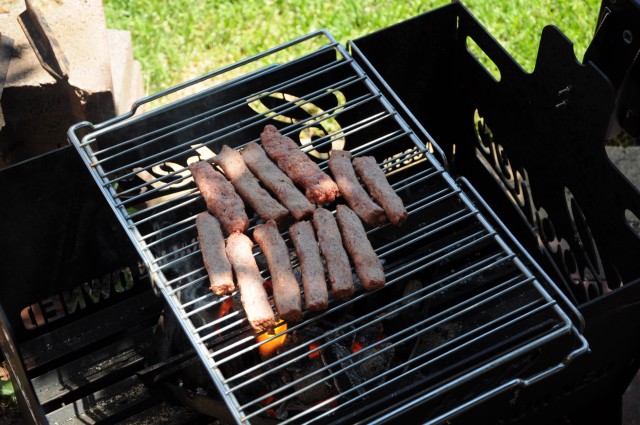
As I usually do with the weber I try to use up the remaining
left-over heat to cook whatever else I have on hand. In this case
some frozen skinless (spicy) sausages I made a few days ago. I
used too much fat in them and they were a massively disgusting
mess to make but they tasted pretty good.
Meanwhile the oven did its work. Just hitting midday at this point.
Last bit of heat. I also did a thick bit of rump.
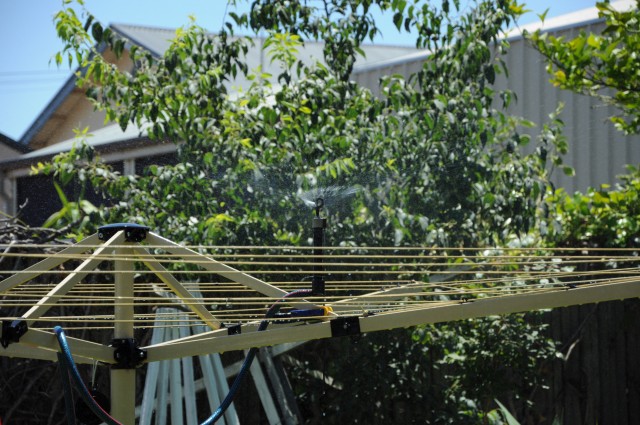
Fucking hot day (40C) so I had the outdoor a/c going! Inside the
house was very cool but it was too nice a day for that.
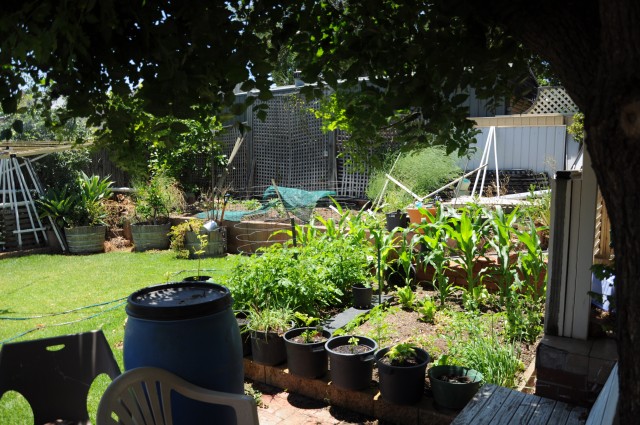
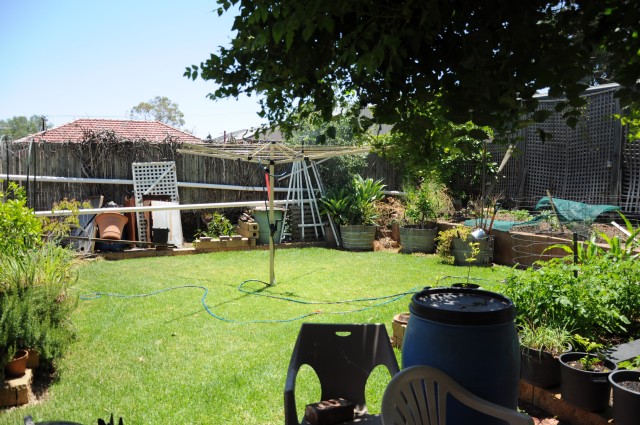
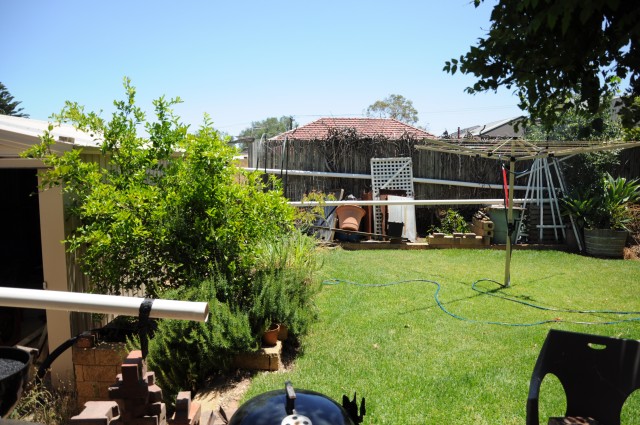
A `panroama' of the back yard.
I'm rather proud of that lawn, I grew it from a few rhizomes I
took from the nature strip out on the road.
So that was xmas 2018. I didn't really drink much - i was too
chock-full of food and too tired, but I had a few beers and a few
gin and tonics (with cucumber from the garden).
But all-in-all about as low-stress and enjoyable as one could hope
for.
Making biltong made easy
After a few iterations i've managed to get biltong making down to
a pretty streamlined, 'somehwat lazy' process. It relies on the
butcher (aka supermarket) doing the brining.
First get the spices ready. This is both important and a bit
arbitrary. You can find recipes on the net but the main
ingredients are coriander seed and black pepper (and those
starting with 'one whole freshly butchered springbok' aren't very
practical).
Here's a simple one. It was enough for two small batches.
Recipe for Biltong Spices
| Amount | Ingredient |
|---|
| 1 cup | coriander seed |
| 1 tbsp | black pepper |
| 1 tbsp | allspice |
| 1 tsp | fennel seed |
| 1 handful | dried thai birds-eye hot chillies |
Actually I didn't write it down so these numbers might be a bit
off but it's about right. Thigs like allspice, fennel seeds,
ginger, cinnamon, paprika, and so on can add a nice tweak to the
basic recipe. I always add hot chillies as a matter of course, of
course.
Not terribly important here but an Australian metric tablespoon is 4x
teaspoons (20ml), not the usual 3 in the rest of the western
world.
Ideally give them all a bit of a dry-roast in a pan or the oven to
bring out the flavours. It isn't necessary but its worth it and
it smells great. Basically just keep stirring over low-medium
heat until they become aromatic and the chillies gain a bit of
colour. Here i've just started roasting them.
Then powder them. If you have the time and the equipment using a
mortar and pestle will produce a more aromatic powder; but i
usually just use a blender and keep going until it's done.
Don't breath it in if you've used any really hot chillies.
I also have a small precious supply of dried habaneros i made a
few years ago and I threw a couple of those into the blender.
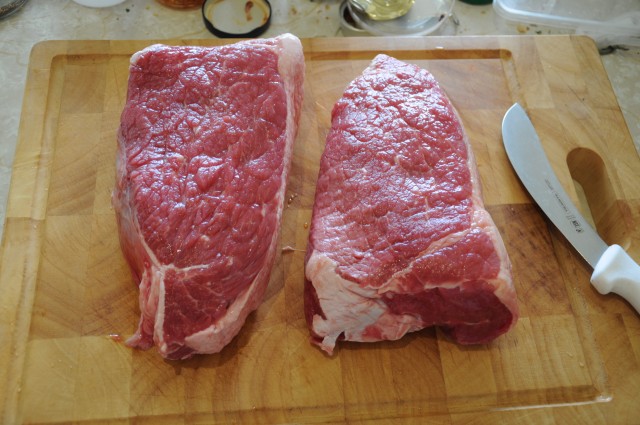
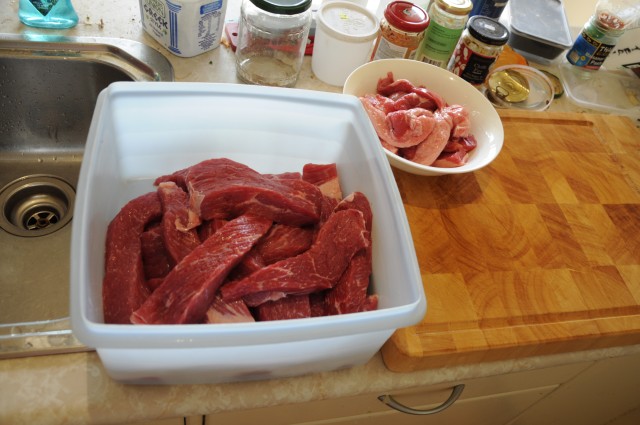
Next the meat. I wait till corned silverside is on special
($8/Kg) at my local Foodland and grab a couple of them. I try to
get the largest ones they have (>1Kg), and given the packaging
is often opaque its a bit hit and miss as to the quality you get -
ideally good solid meat with little fat and gristle. Here i've
just unpackaged them and wiped off the slimey brine residue, these
are good cuts to use. Each one here is about 1.5Kg.
Corned silverside - corned beef - done this way is apparently an
Australian thing (according to my butcher brother), so if you're
from some backward arsed country that doesn't have this you'll
have to do it the long way.
So you basically just slice it into roughty 2cm thick blocks and
trim off most of the fat. It's reasonably easy to slice squarely
because the brining makes it go stiffer than raw meat. I usually
fry up the trimmings - its sort of like shit bacon, chewy but
tasty.
So that's the hardest and messiest bit out of the way. If making
it from scratch you would then brine this meat before moving to
the next stage. And you have to be concerned about brine
concentration or amount of salt (none of the recipes I found ever
say how MUCH salt to use), and so on. I haven't found the
pre-pickled meat to be completely consistent but it's always
edible once completed. Sometimes it can be a bit on the salty
side, but that just means you drink more beer.
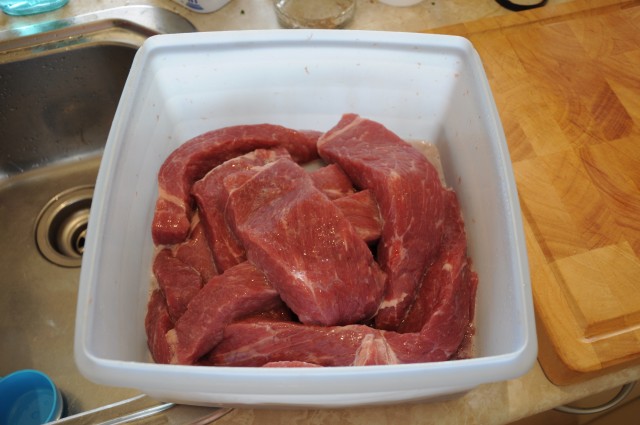
`dip the slices of brined meat in vinegar'
aka fuck that. Pour half a cup of vinegar into the container, put the lid on, and shake the shit out of it. Drain.
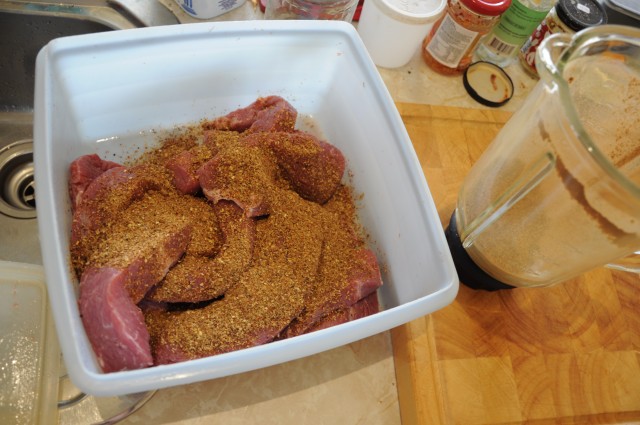
'roll in the spices to cover evenly'
Pour about 1/2 a cup of the spice mix over the meat ...
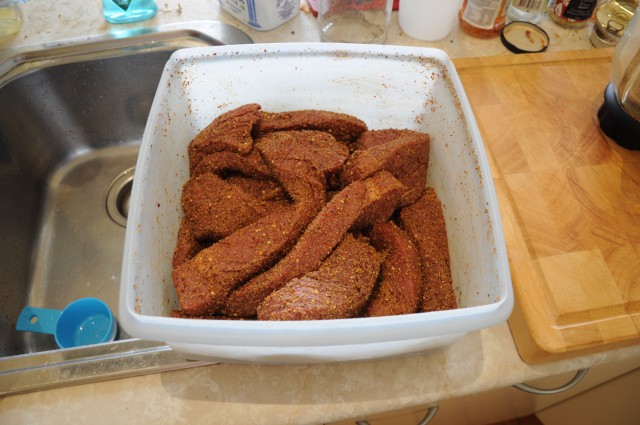
Cover, and shake the shit out of it again. Done.
I used to have a bowl of vinegar i'd dip it in, then a tray of
spice to do the coating. Messy as fuck and unreliable.
Actually i'm still working on getting the ideal coating, I always
seem to put too much on because when you're applying it it doesn't
look like much but when it's dry it's heavily coated and falling
off. Next time I do it I might also try leaving it in this state
in the fridge overnight to let the flavours seep in a bit more
before starting to dry.
It took a while (literally years!) but i found a small local
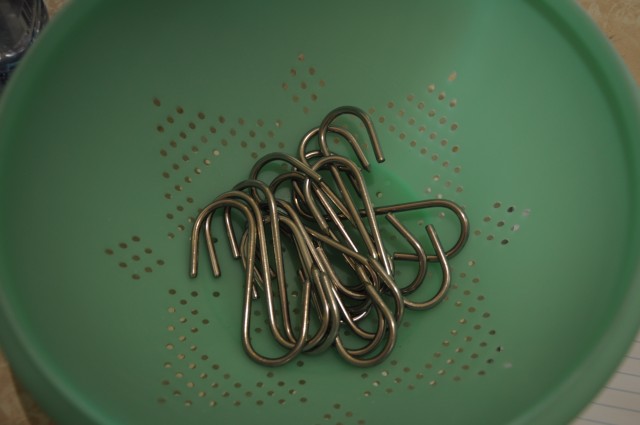
caterers shop that sold small stainelss steel butchers hooks.
Previously i'd used fishing line (fucking pain to work with) then
some stainelss steel wire I fashioned into hooks (which was ok
until i found the proper ones). I bought out the shop at the time
and got 13, which was just enough for this batch.
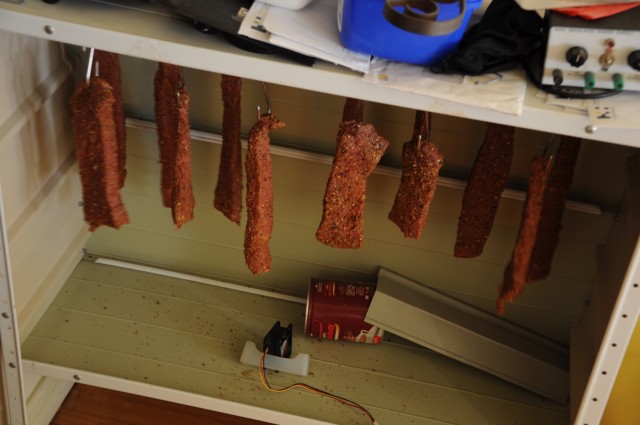
Hang them up on the hooks. I have a small cpu fan running off an
old nokia charger to keep the air flowing to help speed up drying
and a fly-screen to keep the bugs out. I used to have a small 20W
incandescent lightglobe to help with the drying but they keep
burning out and it isn't necessary in summer.
They're ready for 'picking' 1-2 weeks later depending on the
weather and how thick you cut the meat. It will lose about 50% of
it's original weight and be very dry and hard - you need
a biltong
cutter to get through it. I've tried stopping a bit earlier
so it isn't so hard but the flavour is muted and it wont
keep anywhere near as long.
Cut into as thin slices as you could be bothered with, consume
with beer. If it's too thick it'll take a lot of chewing, if it's
too thin just cutting it becomes a chore!
It lasts forever in the fridge. I made a batch just before
getting gout a few years ago so didn't touch it for about a year -
it was still ok when I finally got through it all.
Speaker Boxes and Music Players
I finally got around to mostly finishing the speakers I was making
out of recovered drivers. Here's a bit of a photo-diary of the final stages.
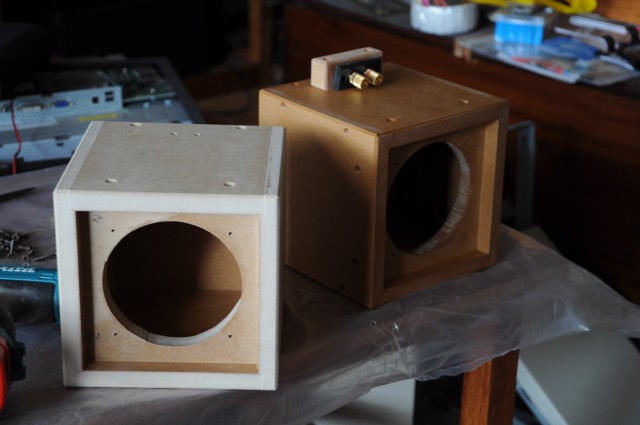
Here we have the completed woodwork. It has been glued and sanded square. I'm mostly happy with how it turned out but I could have done a bit more sanding; I was over it by then. In each case I pretty much practiced on one and got better on the other one, hence a few differences here and there. The one on the left is unpainted and the one on the right has a coat of sanding sealer and also the binding post mounting mechanism.
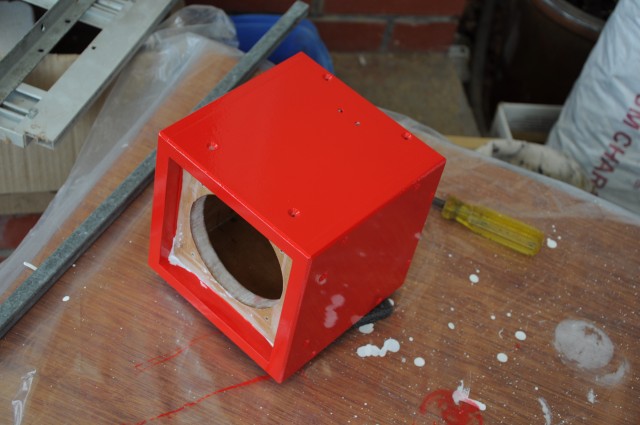
Three undercoats, lots of sanding and two overcoats and it's ready to be put together.
Given the paint was so expensive ($90) I did a bit of a shit job in the end; I just got sick of dealing with everything. First I had a cheap throwaway brush which I should've just thrown away before I even started. Then the paint was too thick for the weather and needed more thinning, then I tried using a small roller - but again i got some cheap junk which left behind piles of dust and shit, and because I hadn't used a roller before I didn't apply it as well as I might have.
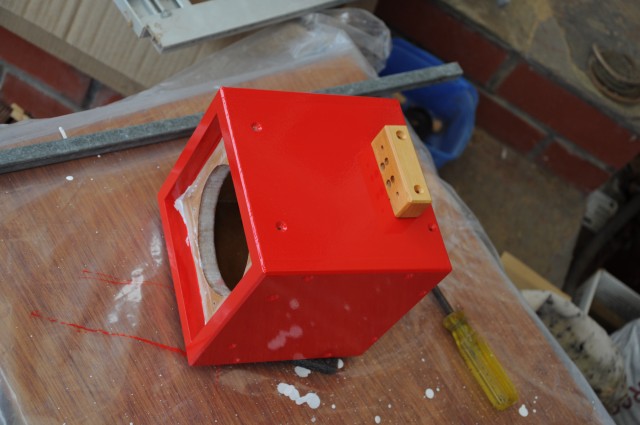
The next shot just shows the mounting point for the binding posts.
Even this I kinda fucked up. I tried using the drill press to drill the screw holes to mount it but to avoid scratching the paint I had it on a small block of foam. It moved when I wasn't looking and I drilled it in the wrong spot. It's hidden but I know it's there.
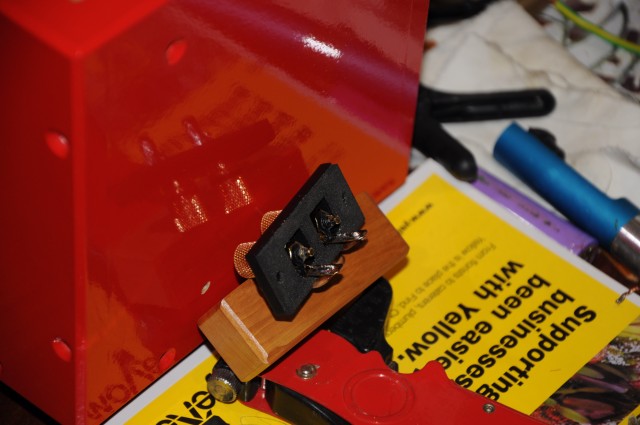
Soldering the wires.
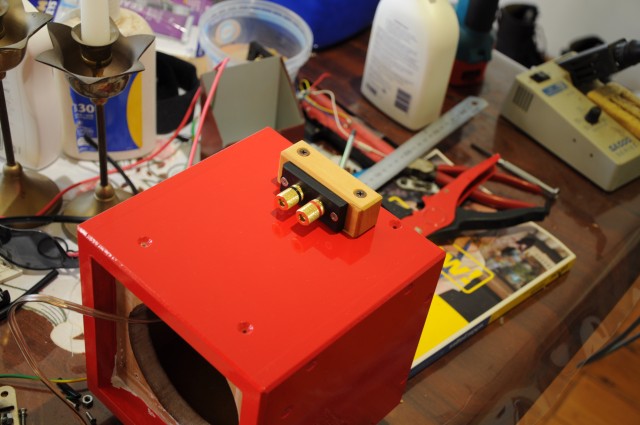
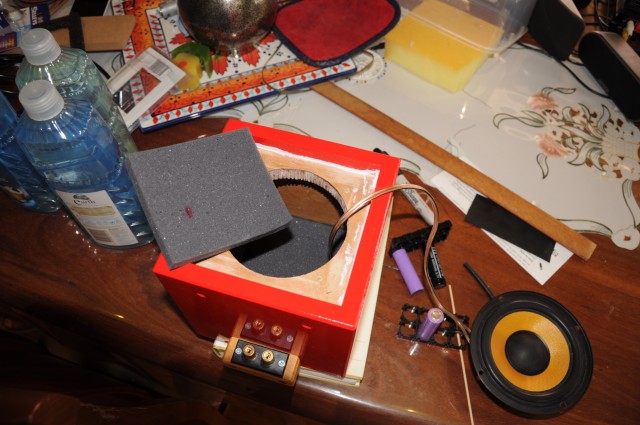
Completed binding posts.
Connecting the driver.
Inserting the acoustic foam. I have 25mm at the read and 12.5mm down the sides - about as much as could fit in the small box.
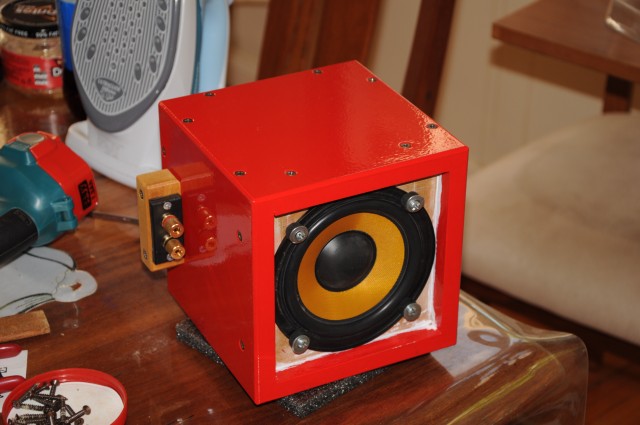
A completed speaker (so far). The screws (all 24 of them) for the box are really only aesthetic as the box is very well glued. They did help when setting the glue though.
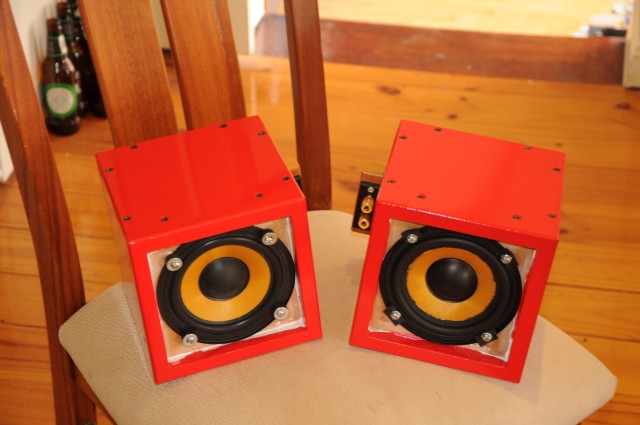
The pair. I've only redone the rubber surround on the right one so far, the one on the left is still a bit scratchy with high volume as a result. The mounting rubber washers/etc is still work in progress.
I'm still yet to get some fabric for the grilles. I did a quick peruse through lincraft but couldn't find any suitable, next time i'll ask and there's a couple of other places to try.
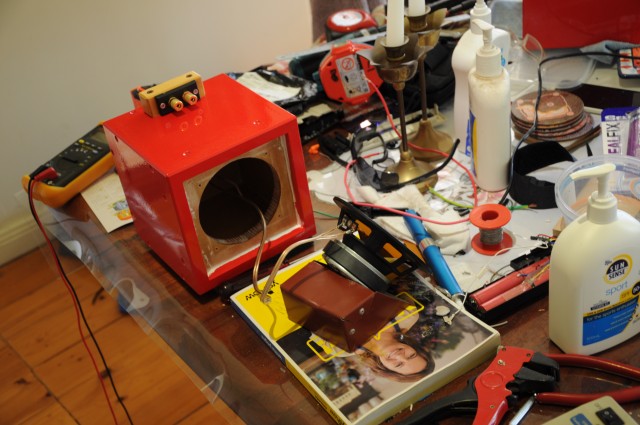
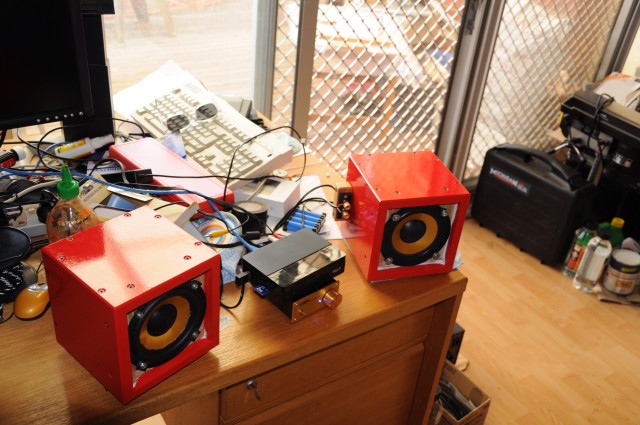
And finally a shot in testing. The plan is to put the electronics
in another box with a battery pack. I've got the bits for the
battery but am still working on the mechanics.
How do they sound? Well ok. They're not going to break any
technical records; there's no engineering behind the boxes other
than being a sealed box with a bit of foam in it. Each only has a
woofer so the top-end is very retarded. The bottom end isn't too
bad but it does have an echoey effect with some mid-tones, then
again so do any other small speakers i've tried (including the
$1000/pair units I just installed in the dining room). Quite ok
for a bit of outside doof though!
It's been a good little project to get away from the screen so
far, although finishing it off will not be.
Electronics and Software
I was looking around for hardware for the player but since I have
the mele doing nothing I thought I may as well use that. Most of
the other prototyping boards around now are either too high
powered or missing some necessary bits; although the nanopi boards
look quite attractive (on a side-note I can't believe how
expensive raspberry pi shit is in australia). As this is
nominally a 'portable' system based on recycled speakers (with no
tweeters!) the audio quality isn't terribly important, the
on-board dac/codec sounds good enough to me. I'm also considering
an old phone or an old 7" tablet I have, although it's far less
attractive to me if they can only run android (fuck that shit;
yeah fuck you too google).
After spending most of a day on it I managed to get debian running
on the mele. I tried
the sunxi wiki
and building my own kernel and bootloader but without any debug
console I couldn't tell if it was working or not. I got
this server image to
work in the end, using the jessie image.
While trying to build using the sunxi instructions I discovered
that the ubuntu
maintainers have
a really broken idea about what a cross-compiler should do.
And they're really quite rude about it, hiding their rudeness
behind the `code of conduct'.
To avoid dragging in gobs of junk and other poettering snot I
built a basic SDL (1.2) and a cut-down ffmpeg (1.0) from source
and have a basic console music player working. With a little more
work I can control it with the mele airmouse although without a
screen it's going to be difficult to do too many interesting
things. Something to poke about with.
Dropper Fire Grill, and Firefox suxors too
So this came about because I was fighting with firefox and needed
to get away from a screen for a while. I wrote a couple of
plugins (oh sorry, 'addons', no hang on, web-extensions, WHATEVER
THE FUCK YOU WANT TO CALL IT MOZILLA) and the experience was sour
(can't you tell?).
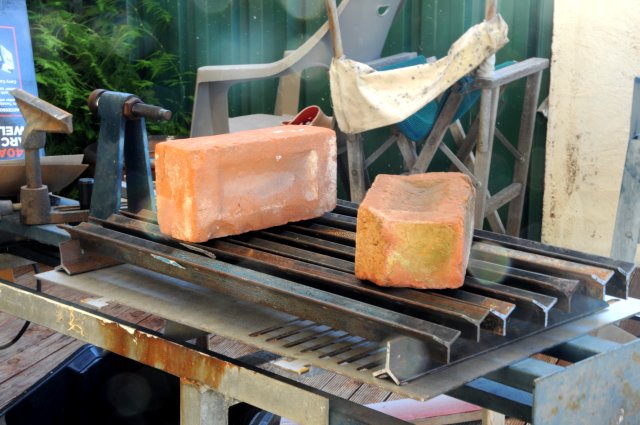
The aforementioned BBQ/firepit thing I haven't gotten around to
using yet, one reason is because I wanted to make a fire grate
first because it's a bit too deep.
So a few droppers, a bit of hacksawing and some angle grinding
later here it is. It just slots together with no fastening or
welding.
It's even adjustable! No brick, brick flat, or brick on side!
Actually it might just work better as an esky, but i'll see.
More on the firefox plugins later, they're just for overriding
site fonts and site colours. There do exist such plugins but they
no longer work for some reason. OF course there's not much use
distributing the source becuase you NEED A FUCKING MOZILLA ACCOUNT
JUST TO INSTALL THEM.
Putting things back together
My brother was here a few weeks ago and I took the opportunity of having transport (I don't drive - just never got a license) to get a few things that are a little difficult to transport on the bicycle.
One was to take my old VAF DC-7 Rev 1.0 speakers and get them
reconditioned. It wasn't exactly cheap but they replaced the old
drivers (required a bigger hole) and i'm not sure what else. But
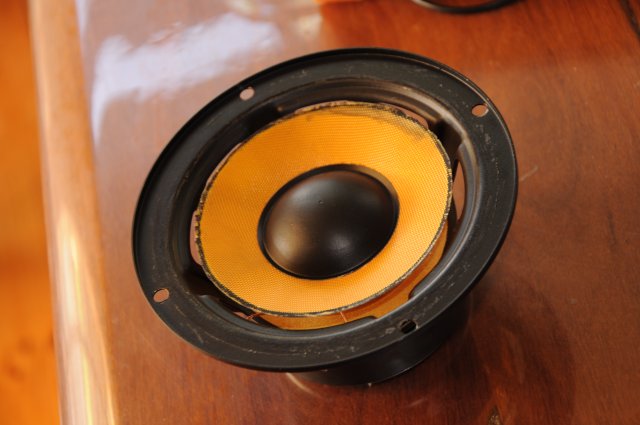
I asked to keep the old drivers just to muck around with, perhaps
build a 'portable speaker' type thing out of them. They are a bit
scratchy from uh, over-use, but I noticed the main problem is the
surrounds had perished. I looked up some info about replacing
them and ended up ordering some cheapies from China - i'm not sure
I can recover them regardless and it's not worth the cost if I
fail.
Part of the probess is removing the old rubber, and about all I
can say about it is you have to be patient. I used a very sharp
chisel and it took a couple of hours just to remove one, although
the final 1/4 went much faster than the first once I got the
technique sorted out.
Tools
Another thing I got was a welder, small drill press and some other
tools. And that lead to a bit of a spending spree that continued
after he left, buying a bunch of other workshop tools. They're
mostly cheap bits and pieces because i'm not sure how much use
i'll get out of them.
It wasn't the reason I got the welder but the first thing I
thought of making was a belt buckle for a very wide kilt belt. I
had asked a small leather work place (shoe repair, belts) shop in
the city whether they could make wide belts but they couldn't and
directed me to a saddlesmith at the other end of town. I dropped
in one day and asked about it - yeah he could make any width belt,
but he didn't have any buckles suitable. So the next weekend I
got the welder out and turned a couple of pieces of wine barrel
ring into a rather large belt buckle.
The welding is pretty shithouse but I haven't welded for years and
the grinding and polishing hides most of it. The buckle has a
loop through which the belt connects and a single pin which
selects the size. The end of the belt comes around out the front
(or can go behind) and a loop holds it in place.
The front finish is a sort of coarse brushed/dented appearance
from using an angle grinder, wire brush and polishing wheel. I'm
still not sure on the finish but I will probably clear coat it.
The belt I got made up is 70mm wide and the loop which connects to
the buckle uses press-studs so I can make more buckles and easily
replace them. 70mm is about the widest that suits the kilts I
have which is just as well because I didn't really know what it
would look like till it was made.
Not particularly cheap either at $99 but at least it's locally
made and very solid leather - it should last forever. My existing
belt was relatively 'cheap' one from utkilts that uses velcro to
adjust the length. But the finish is wearing already (mostly
creases), the velcro is coming off around the back, and the buckle
- while ok - is a bit cheap. The actual bits are made in Pakistan
I believe but the shipping costs from USA are outrageous -
although they seem to have gotten slightly better, but to get the
same belt ($26) and buckle ($17) again would cost $77 when
shipping is added anyway, and they don't handle GST (I have no
idea whether this means you get hit with import hassles above the
$7 GST cost). And that's the absolute cheapest/slowest option, it ranges up to $130!
Actually I have an idea for another buckle mechanism that I might
try out when I get time, if I do that I might get a 60mm belt
made. The other idea would be a lower profile, hide the tail of
the belt (wrap under), and possible be hole-less if I can create a
binding mechanism that wont damage the front surface of the belt.
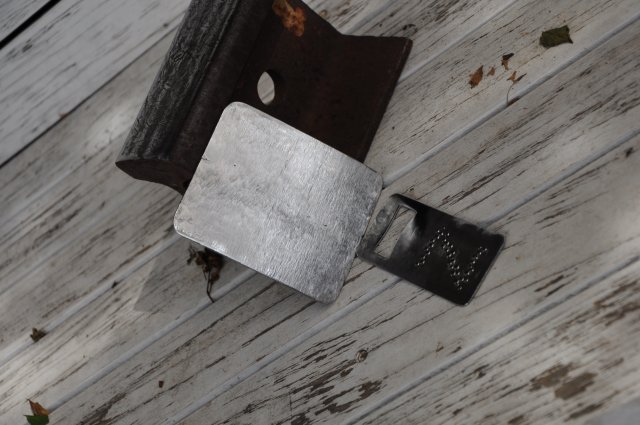
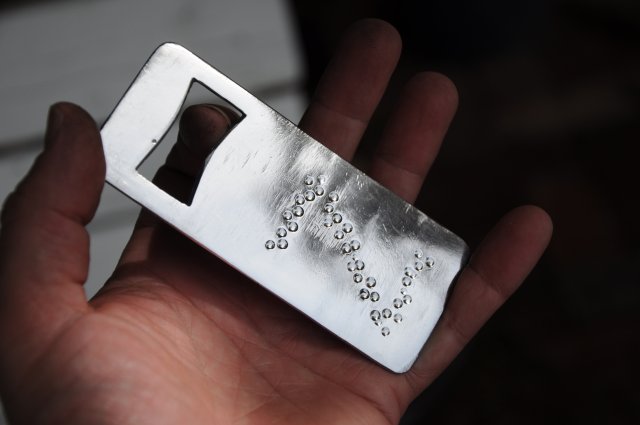
And today I turned one of the practice pieces of barrel strap into
a bottle opener. I drilled some holes and filed out the opening
shape by hand.
The finish is a little shit because I cut a bit deep using a
sanding disc on an angle grinder and gave up trying to sand it
out, although it is a lot shinier than it appears in the photo.
Partly I was experimenting with finishes and patterns and i'm
happier with the pattern here, or at least the general approach.
I created a round ended punch from an old broken screwdriver and
used a small portable jackhammer (/ hammer drill) to pound in the
dots. Because i'm just cold working it's a bit difficult to do
much in the pattern department.
Gets me away from the computer screen anyway, i'm kinda burnt out
on that. I'm not really doing enough hours lately for the guy who
pays me (for various reasons beyond our control he's got more
money than hours I want to work!), although the customers who pay
him are quite happy with the output!
I'm at the point where I finally need to get some glasses. I had
another eye test last week and while I can still survive without
it it's to the point that i'm not recognising people from afar and
squinting a bit too much reading at times. I need a separate
reading and distance script unfortunately so I got a pair of
sunnies for distance and reading glasses for work. They would've
helped with the fabrication above! It's going to take a while to
get used to them, and/or work out whether I get progressive lenses
or whatnot, for example I can't read games very well on my TV, but
that's farther away than the reading glasses work at, sigh. I
guess i'll find out in a week or so.
Pulling things apart
I pulled an old deskjet printer apart the other day. It wasn't a
particularly expensive machine and it broke years ago; it's just
been sitting in the corner of my room collecting dust for the day
I threw it out or took out the useful bits. I guess what I found
most interesting is despite it being a disposable item just how
well put together it was.
- The main guide bar is a very solid piece of machined stainless steel. I always thought it was just a tube.
- Almost all parts could be removed by hand apart from a handful of pieces held by torx screws.
- All the metal parts could be easily removed from the plastic parts - springs, pins, rails and so on. Similarly
Basically it looks like it was designed to be repairable. Can't
imagine the equivalent today would be.
Flymo
I also have a more recent machine that still runs, a mains powered
electric hover mower. It's one that has the motor on a separate
spindle to the blade which is driven by a belt. For a few years
it's been 'running' rough due to bung bearings, I had looked at it
before but it looked irrepearable. The whole base-plate, clutch
and drive pulley assembly can be bought as a FRU but it must be
ordered from England. The last time I tried I couldn't get the
payment to go through and so i've just been living with a mower on
the edge of self-destruction.
Today it was getting so bad I finally had another look at it. And
lo! I managed to get the bearings out, although it took about 2+
hours with the tools I have at hand and an awful lot of swearing!
Anyway the two bearings should be easy to source and hopefully
it'll be back up and running once I put it back together. It
would be a pity to get a whole new mower just because a couple of
small cheap parts failed, and repairing it would've been
prohibitively expensive. Hate wasting stuff.
Apart from all that I took a few days off and have been doing a
lot of gardening, preparing vegetable gardens and whatnot.
Hopefully a year or so basically fallow will work in my favour, I
need some more exotic chillies and home-grown tomatoes can't be
beat.
Beer for the Win!
So apparently I won one of these things.
Just in time for summer!
I might have a beer to celebrate! I spent the morning pulling out
weeds so I earned it!
Fast incremental Java builds with openjdk 11 and GNU make
This post wont match the article but I think i've solved all the
main problems needed to make it work. The only thing missing is
ancestor scanning - which isn't trivial but should be
straightforward.
Conceptually it's quite simple and it doesn't take much code but
bloody hell it took a lot of mucking about with make and the javac
TaskListener.
I took the approach I outlined yesterday, I did try to get more
out of the AST but couldn't find the info I needed. The module
system is making navigating source-code a pain in Netbeans (it
wont find modules if the source can't). Some of the 'easy' steps
turned out to be a complete headfuck. Anyway some points of interest.
Dependency Tracking
Even though a java file can create any number of classes one
doesn't need to track any of the non top-level .class files that
might be created for dependency purposes. Any time a .java file
is compiled all of it's generated classes are created at the same
time. So if any java file uses for example a nested class it only
need to track the source file.
I didn't realise this at first and it got messy fast.
Modified Class List
I'm using a javac plugin (-Xplugin) to track the compilation via a
TaskListener. This notifies the plugin of various compilation
stages including generating class files. The painful bit here is
that you don't get information on the actual class files
generated, only on the source file and the name of the class being
generated. And you can't get the actual name of the class file
for anonymous inner classes (it's in the implementation but hidden
from public view). In short it's a bit messy getting a simple and
complete list of every class file generated from every java file
compiled.
But for various other reasons this isn't terribly important so I
just track the toplevel class files; but it was a tedious
discovery process on a very poorly documented api.
When the compiler plugin get the COMPILATION finished event it
uses the information it gathered (and more it discovers) to
generate per-class dependency files similar to `gcc -MD'.
Dependency Generation & Consistency
To find all the (immediate) dependencies the .class file is
processed. The ClassInfo records provide a starting point but all
field and method signatures (descriptors) must be parsed as well.
When an inner class is encountered it's container class is used to
determine if the inner class is still extant in the source code -
if not it can be deleted.
And still this isn't quite enough - if you have a package private
additional class embedded inside the .java file there is no
cross-reference between the two apart from the SourceFile
attribute and implied package path. So to determine if this is
stale one needs to check the Modified Class List instead.
The upshot is that you can't just parse the modified class list
and any inner classes that reference them. I scan a whole package
at a time and then look for anomilies.
One-shot compile
Because invoking the compiler is slow - but also because it will
discover and compile classes as necessary - it's highly beneficial
to run it once only. Unfortunately this is not how make works and
so it needs to be manipulated somewhat. After a few false starts
I found a simple way that works:
The per-module rules are required due to the source-tree naming
conventions used by netbeans (src/[module]/classes/[name] to
build/modules/[module]/[name]), a common-stem based approach is
also possible in which case it wouldn't be required. In practice
it isn't particularly onerous as I use metamake facilities to
generate these per-module rules automatically.
I spent an inordinate amount of time trying to get this to work
but kept hitting puzzling (but documented) behaviour with pattern
and implicit rule chaining and various other issues. One big one was
using concrete rules (made files) for tracking stages, suddenly
everything breaks.
I resorted to just individual java invocations as one would do for
gcc, and trying the compiler server idea to mitigate the costs.
It worked well enough particularly since it parallelises properly.
But after I went to bed I realised i'd fucked up and then spent a
few hours working out a better solution.
Example
This is the prototype i've been using to develop the idea.
modules:=notzed.proto notzed.build

SRCS:=$(shell find src -name '*.java')
CLASSES:=$(foreach mod,$(modules),\
 $(patsubst src/$(mod)/classes/%.java,classes/$(mod)/%.class,$(filter src/$(mod)/%,$(SRCS))))

all: $(CLASSES)
        lists='$(foreach mod,$(modules),$(wildcard status/$(mod).list))' ; \
        built='$(patsubst %.list,%.built,$(foreach mod,$(modules),$(wildcard status/$(mod).list)))' ; \
        files='$(addprefix @,$(foreach mod,$(modules),$(wildcard status/$(mod).list)))' ; \
        if [ -n "$$built" ] ; then \
                javac -Xplugin:javadepend --processor-module-path classes --module-source-path 'src/*/classes' -d classes $$files ; \
                touch $$built; \
                rm $$lists ; \
        else \
                echo "All classes up to date" ; \
        fi

define makemod=
classes/$1/%.class: src/$1/classes/%.java
        $$(file >> status/$1.list,$$<)

$1: $2
        if [ -f status/$1.list ] ; then \
                javac --module-source-path 'src/*/classes' -d classes @status/$1.list ; \
                rm status/$1.list ; \
                touch status/$1.built ; \
        fi
endef

$(foreach mod,$(modules),$(eval $(call makemod,$(mod),\
  $(patsubst src/$(mod)/classes/%.java,classes/$(mod)/%.class,$(filter src/$(mod)/%,$(SRCS))))))

-include $(patsubst classes/%,status/%.d,$(CLASSES))
In addition there is a compiler plugin which is about 500 lines of
standalone java code. This creates the dependency files (included
at the end above) and purges any stale .class files.
I still need to work out a few details with ancestor dependencies
and a few other things.
Copyright (C) 2019 Michael Zucchi, All Rights Reserved.
Powered by gcc & me!

