About Me
Michael Zucchi
B.E. (Comp. Sys. Eng.)
also known as Zed
to his mates & enemies!
< notzed at gmail >
< fosstodon.org/@notzed >

New PC Gets a Box
I finally built a box for the
computer I
bought back in December.
I made it out of 12mm MDF. MDF really sucks, it's heavy and it's
fragile but its' cheap and available - here in Adelaide you
can't get much (for any decent price) and I don't have the
machinery to dress wood anyway.
Because you need to take the lid off to get to the insides you
can't just screw into the MDF directly, partly with 12mm board.
So you need to get some way of strengthening the wood.
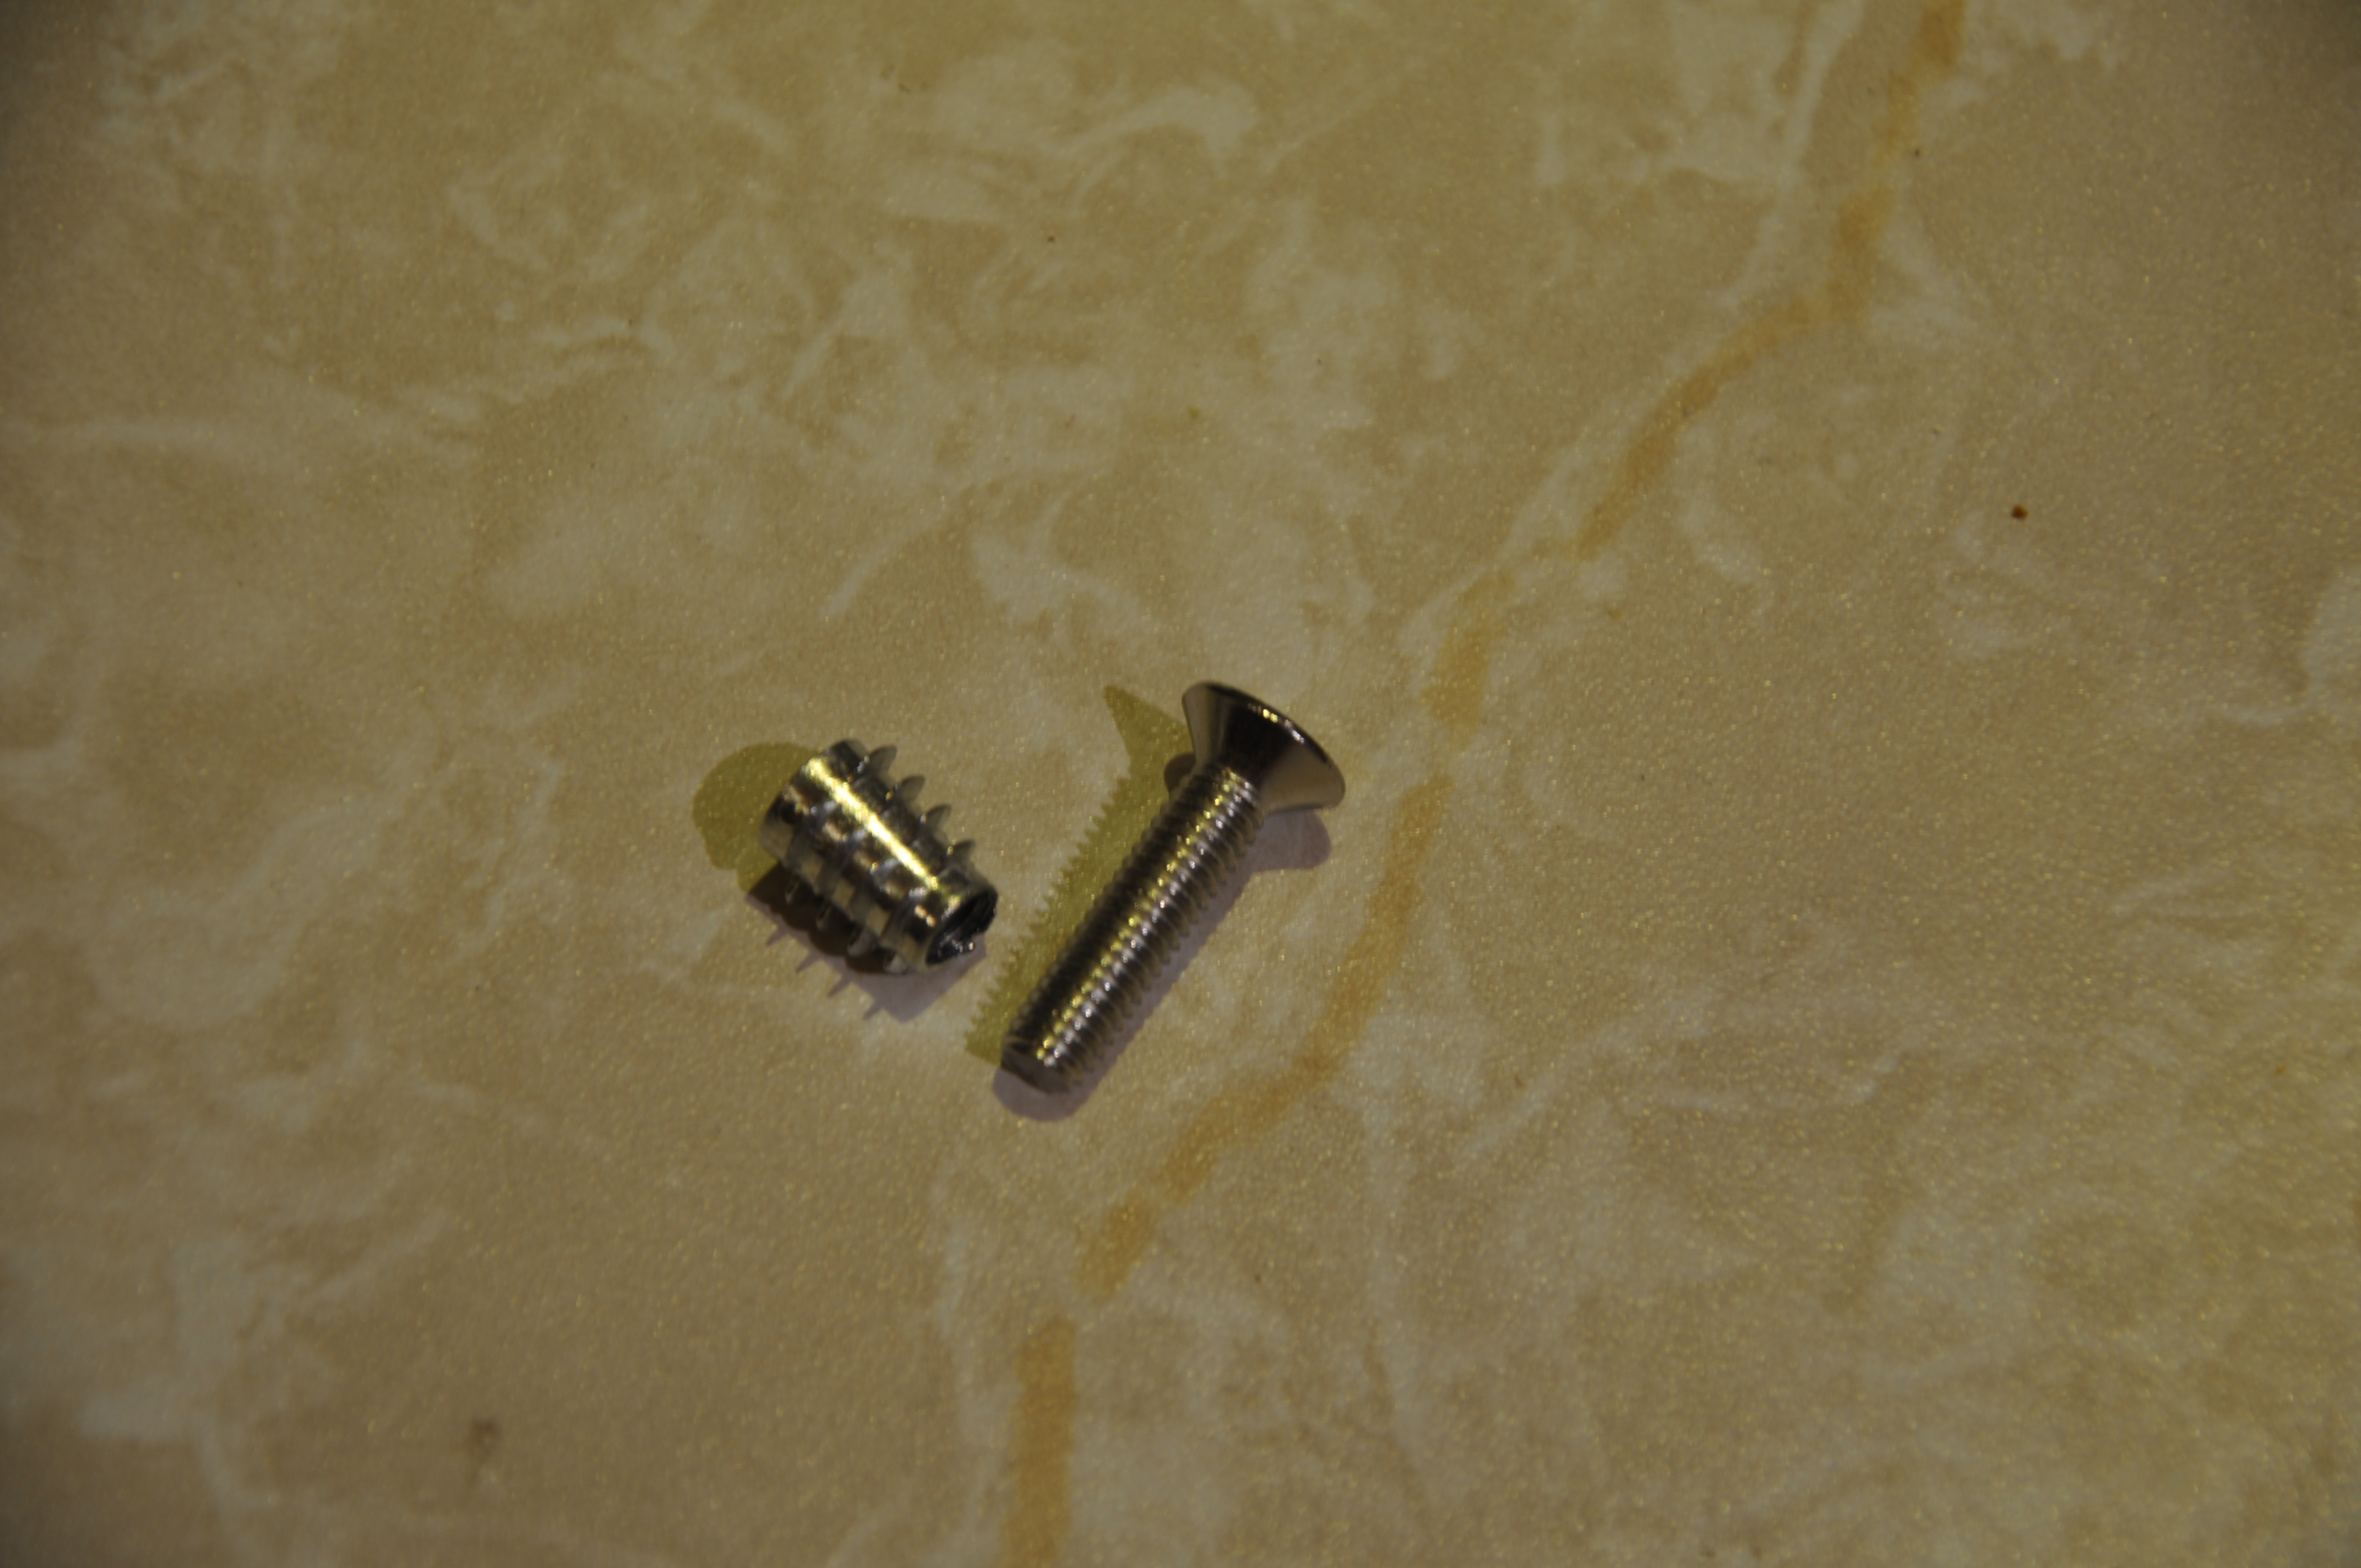
The only part I could find locally was an M6 screw insert but it
requires a 9mm hole so it's too wide for the 12mm MDF. So I had
to create wooden lugs to mount these. I was going to try using
MDF but it just seemed like too much risk with such shitty wood
and it would make drilling the holes more difficult and require
more days for glue to set and so on. I used some salvaged scrap
and mounted them using 2 screws to the MDF (and glue).
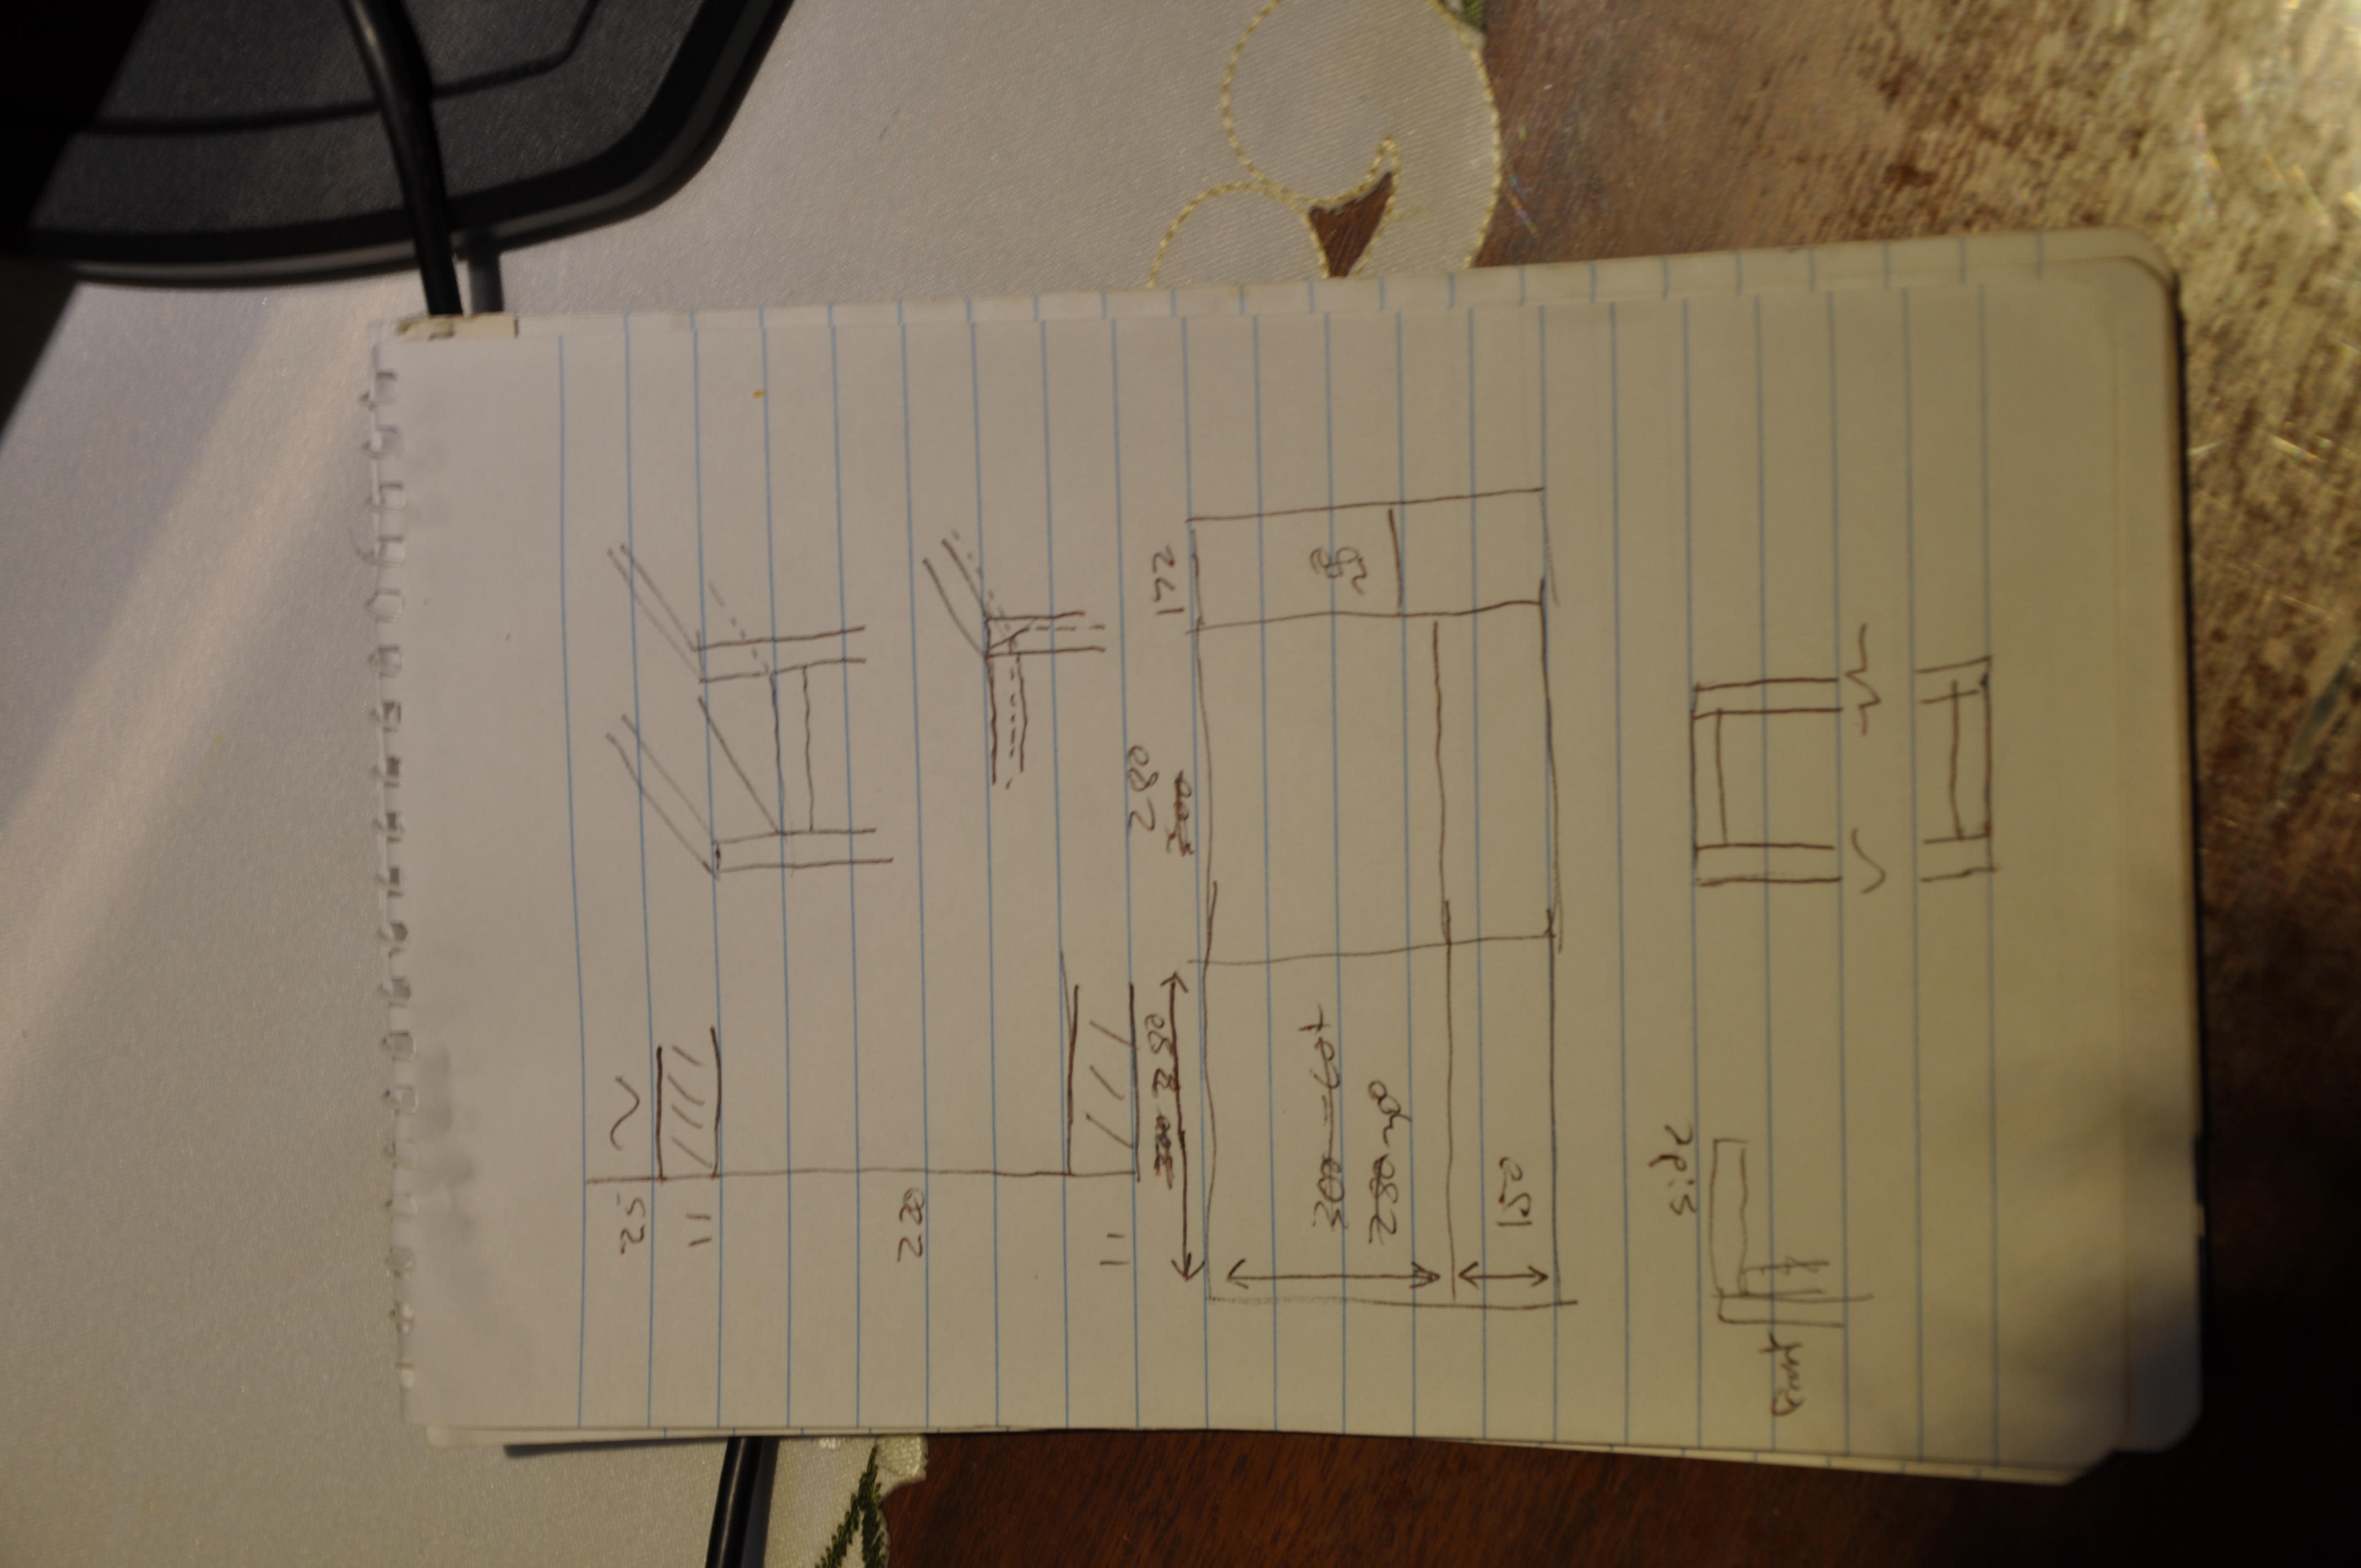
I started with a 450mmx1800mm piece and used under half - I got
my brother to buy it when I was on crutches and I hadn't worked
out a design yet. I cut 2x280mm pieces, which I then cut a
150mm strip from each - these became the sides and top and
bottom. Then I cut one more 174mm strip which became the front
with a small piece of scrap. Basically the sides go the full
length of the case, and front end-caps everything.
So I didn't take any photos until I had the box nearly done so
I'll briefly describe the steps. First I cut all the pieces and
sanded down the edges. In particular the top and bottom pieces
had to be true and square on at least 3 sides. I worked out
where I was going to mount the top fans and cut the holes for
those using a jigsaw, a compass helps to centre the circle
properly.
I don't have any corner clamps so instead i used a square and a
square piece of wood (the 'scrap' from the cutting) to align one
piece at a time, glue and screw, clamp, and leave overnight to
set. I did that for the bottom first. Then I did it with the
top, also ensuring it was parallel to the bottom and square to
the front. And finally the front could just be screwed and
glued on. Fool: I didn't roughen up the flat of the MDF
enough so the glue isn't as strong as it should be - after all
the painting and sanding the rear top began to split off but
only a few mm worth (I'd kept the screws out while I was
painting).
I had intended to use some dowels, I even bought an overpriced
dowel jig for the purpose - but I bought the wrong sized dowels
(I think they were on the wrong hook in the shop and I didn't
check) and the dowel jig was absolute junk. I got one OK hole
and then it wouldn't sit in the right place. Helped by the
fucking shitty 'dowel drills' which I also bought which just
weren't straight. $130 down the drain basically. Fuck
Bunnings. Why does everything they sell have to be fucking
junk.
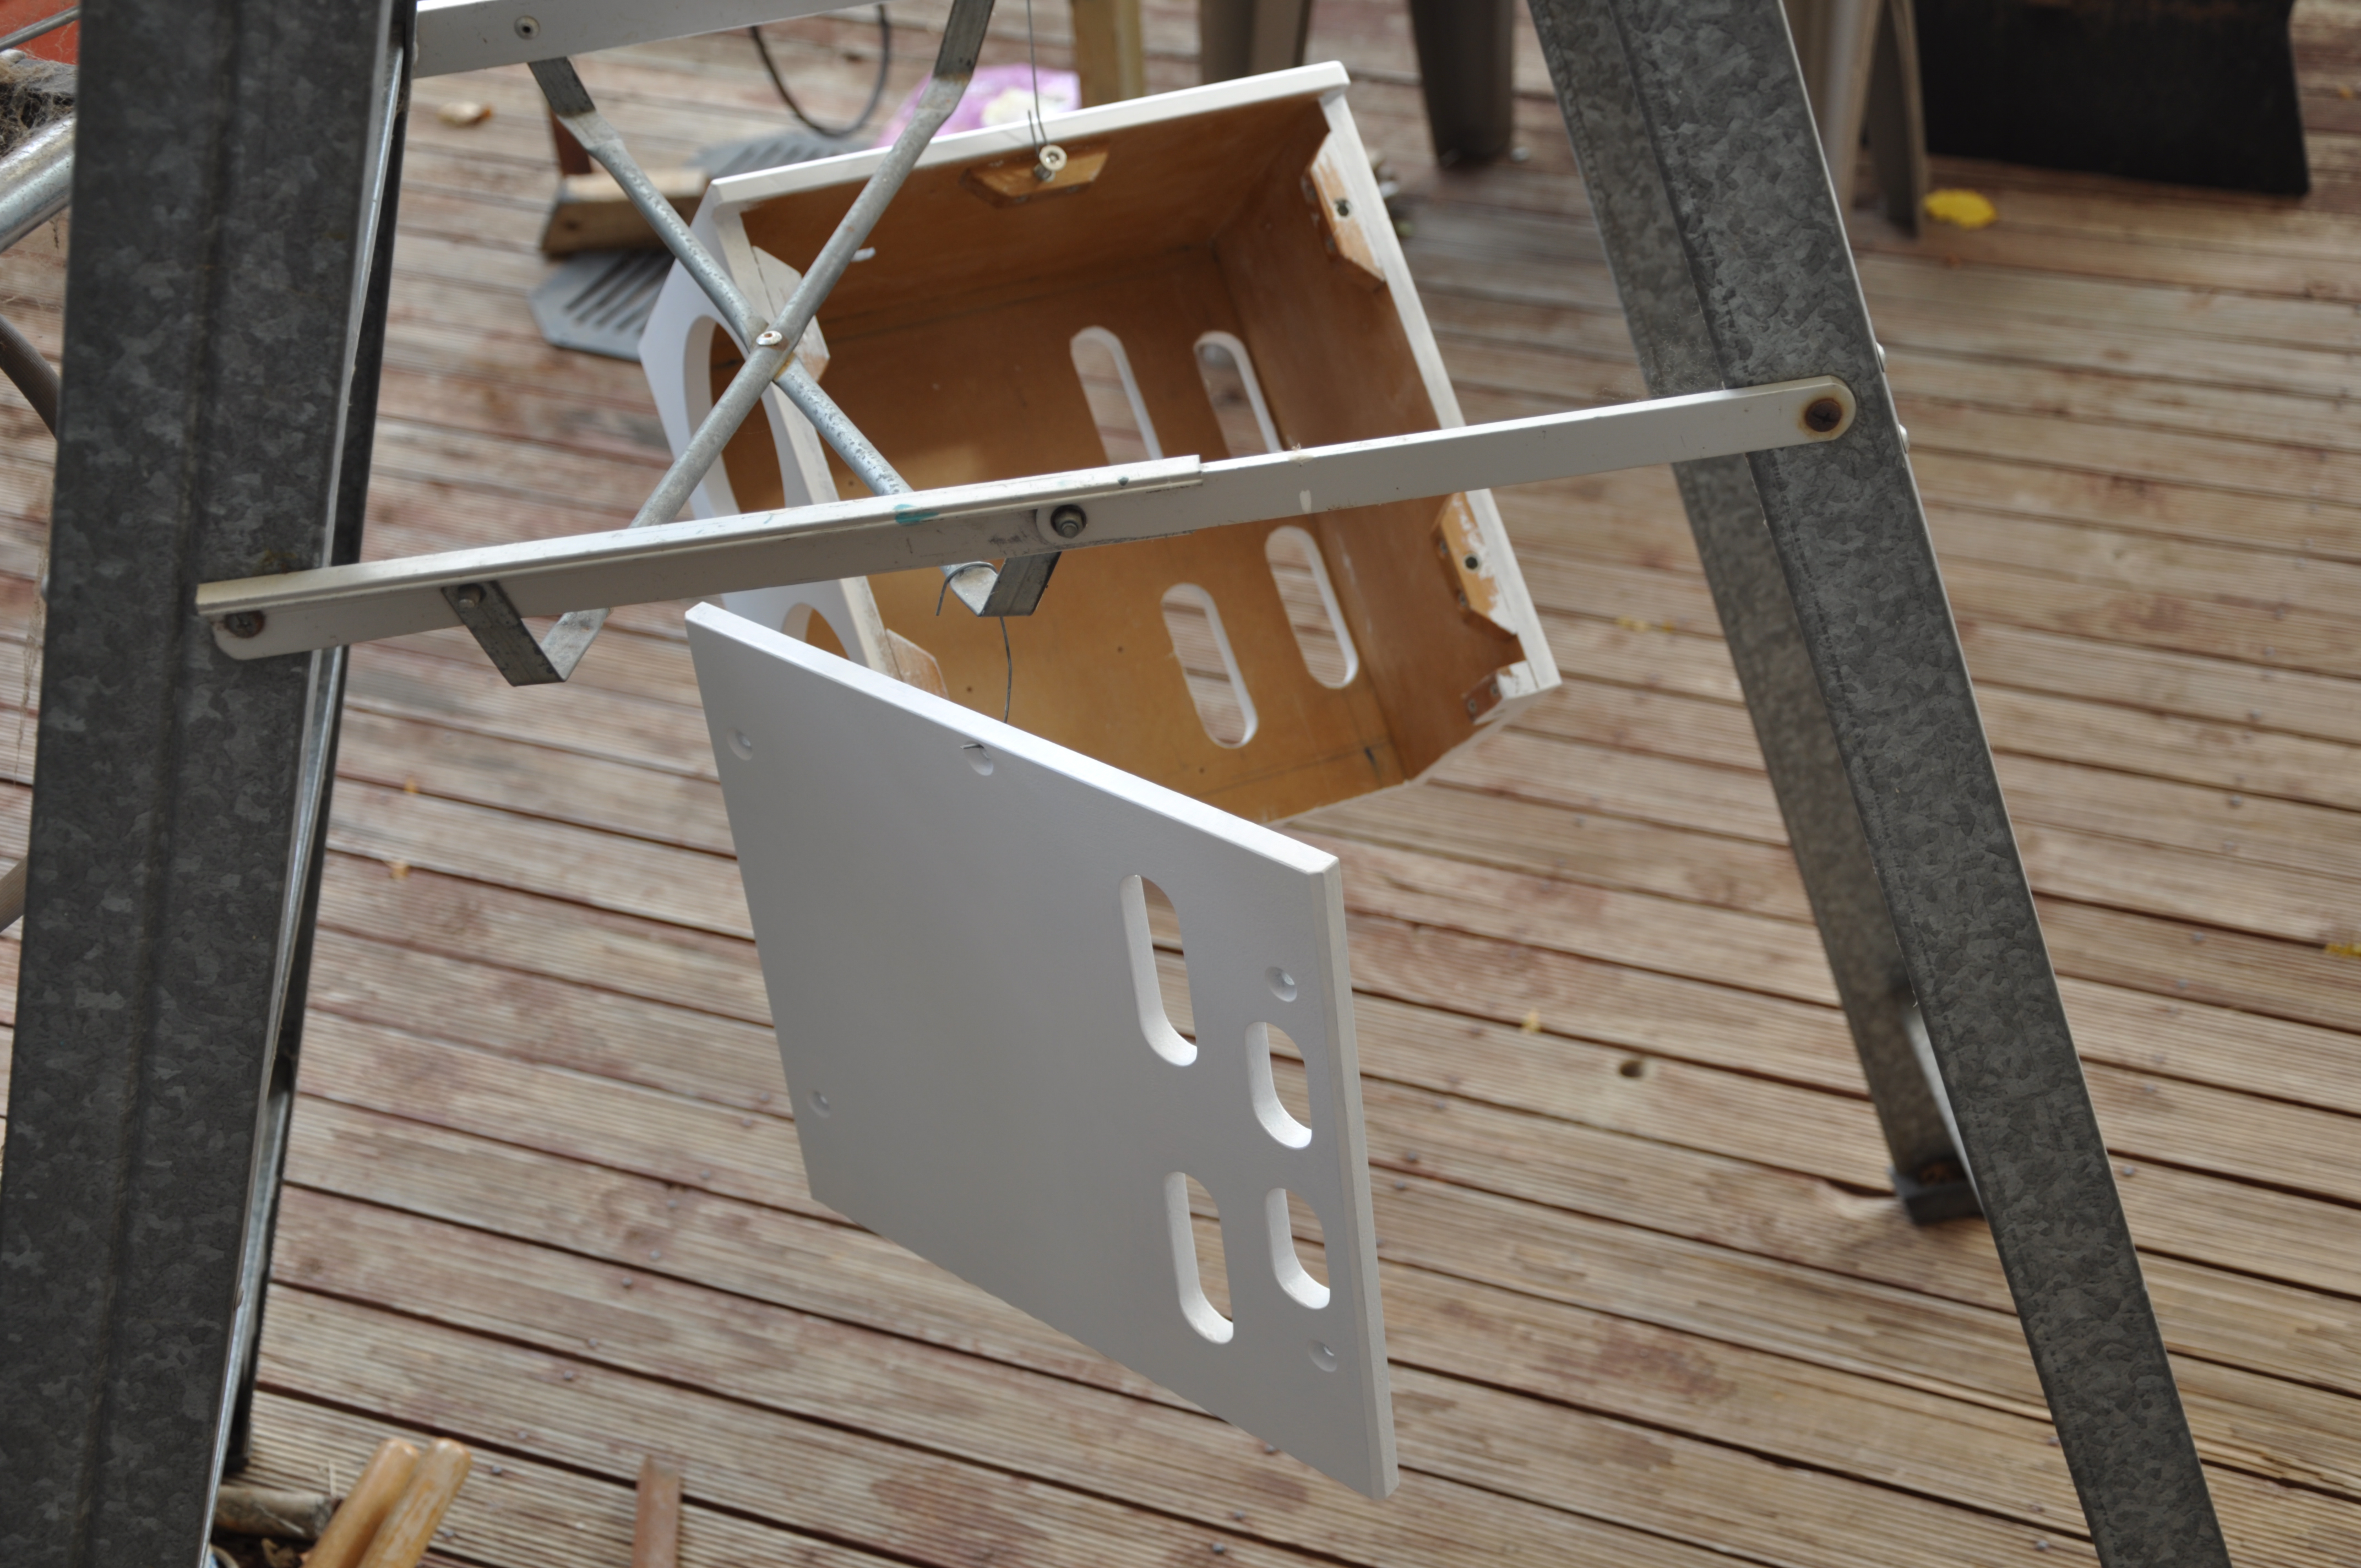
Once I had a box to work with I set about solving how to mount
the side panel. I cut a strip from a bit of old wood and then
made lugs out of them. For the threaded insert I did an 8.5mm
hole deep and a 9mm hole half way for an extra-snug fit. It was
tricky screwing them in straight. Idiot: I should've spent
more time squaring up the strips! Luckily it's good enough.
I decided to go with screws to mount the lugs, which I
countersunk. The screws are just at the limit of fitting
within the 12mm MDF but they seem OK. Later on I glued them
in place as well.
I drilled the holes in the front panel. First a couple by
measurements then I made a pin to drop into the inserts which
marked the spot. I should've got some dowel markers - should've
just got those instead of the shitty jig in the first place.
Mistakes were made, not the last. I countersunk them to match
the stainless steel bolts and then screwed it all together.
Then took a couple of afternoons to sand it all square.
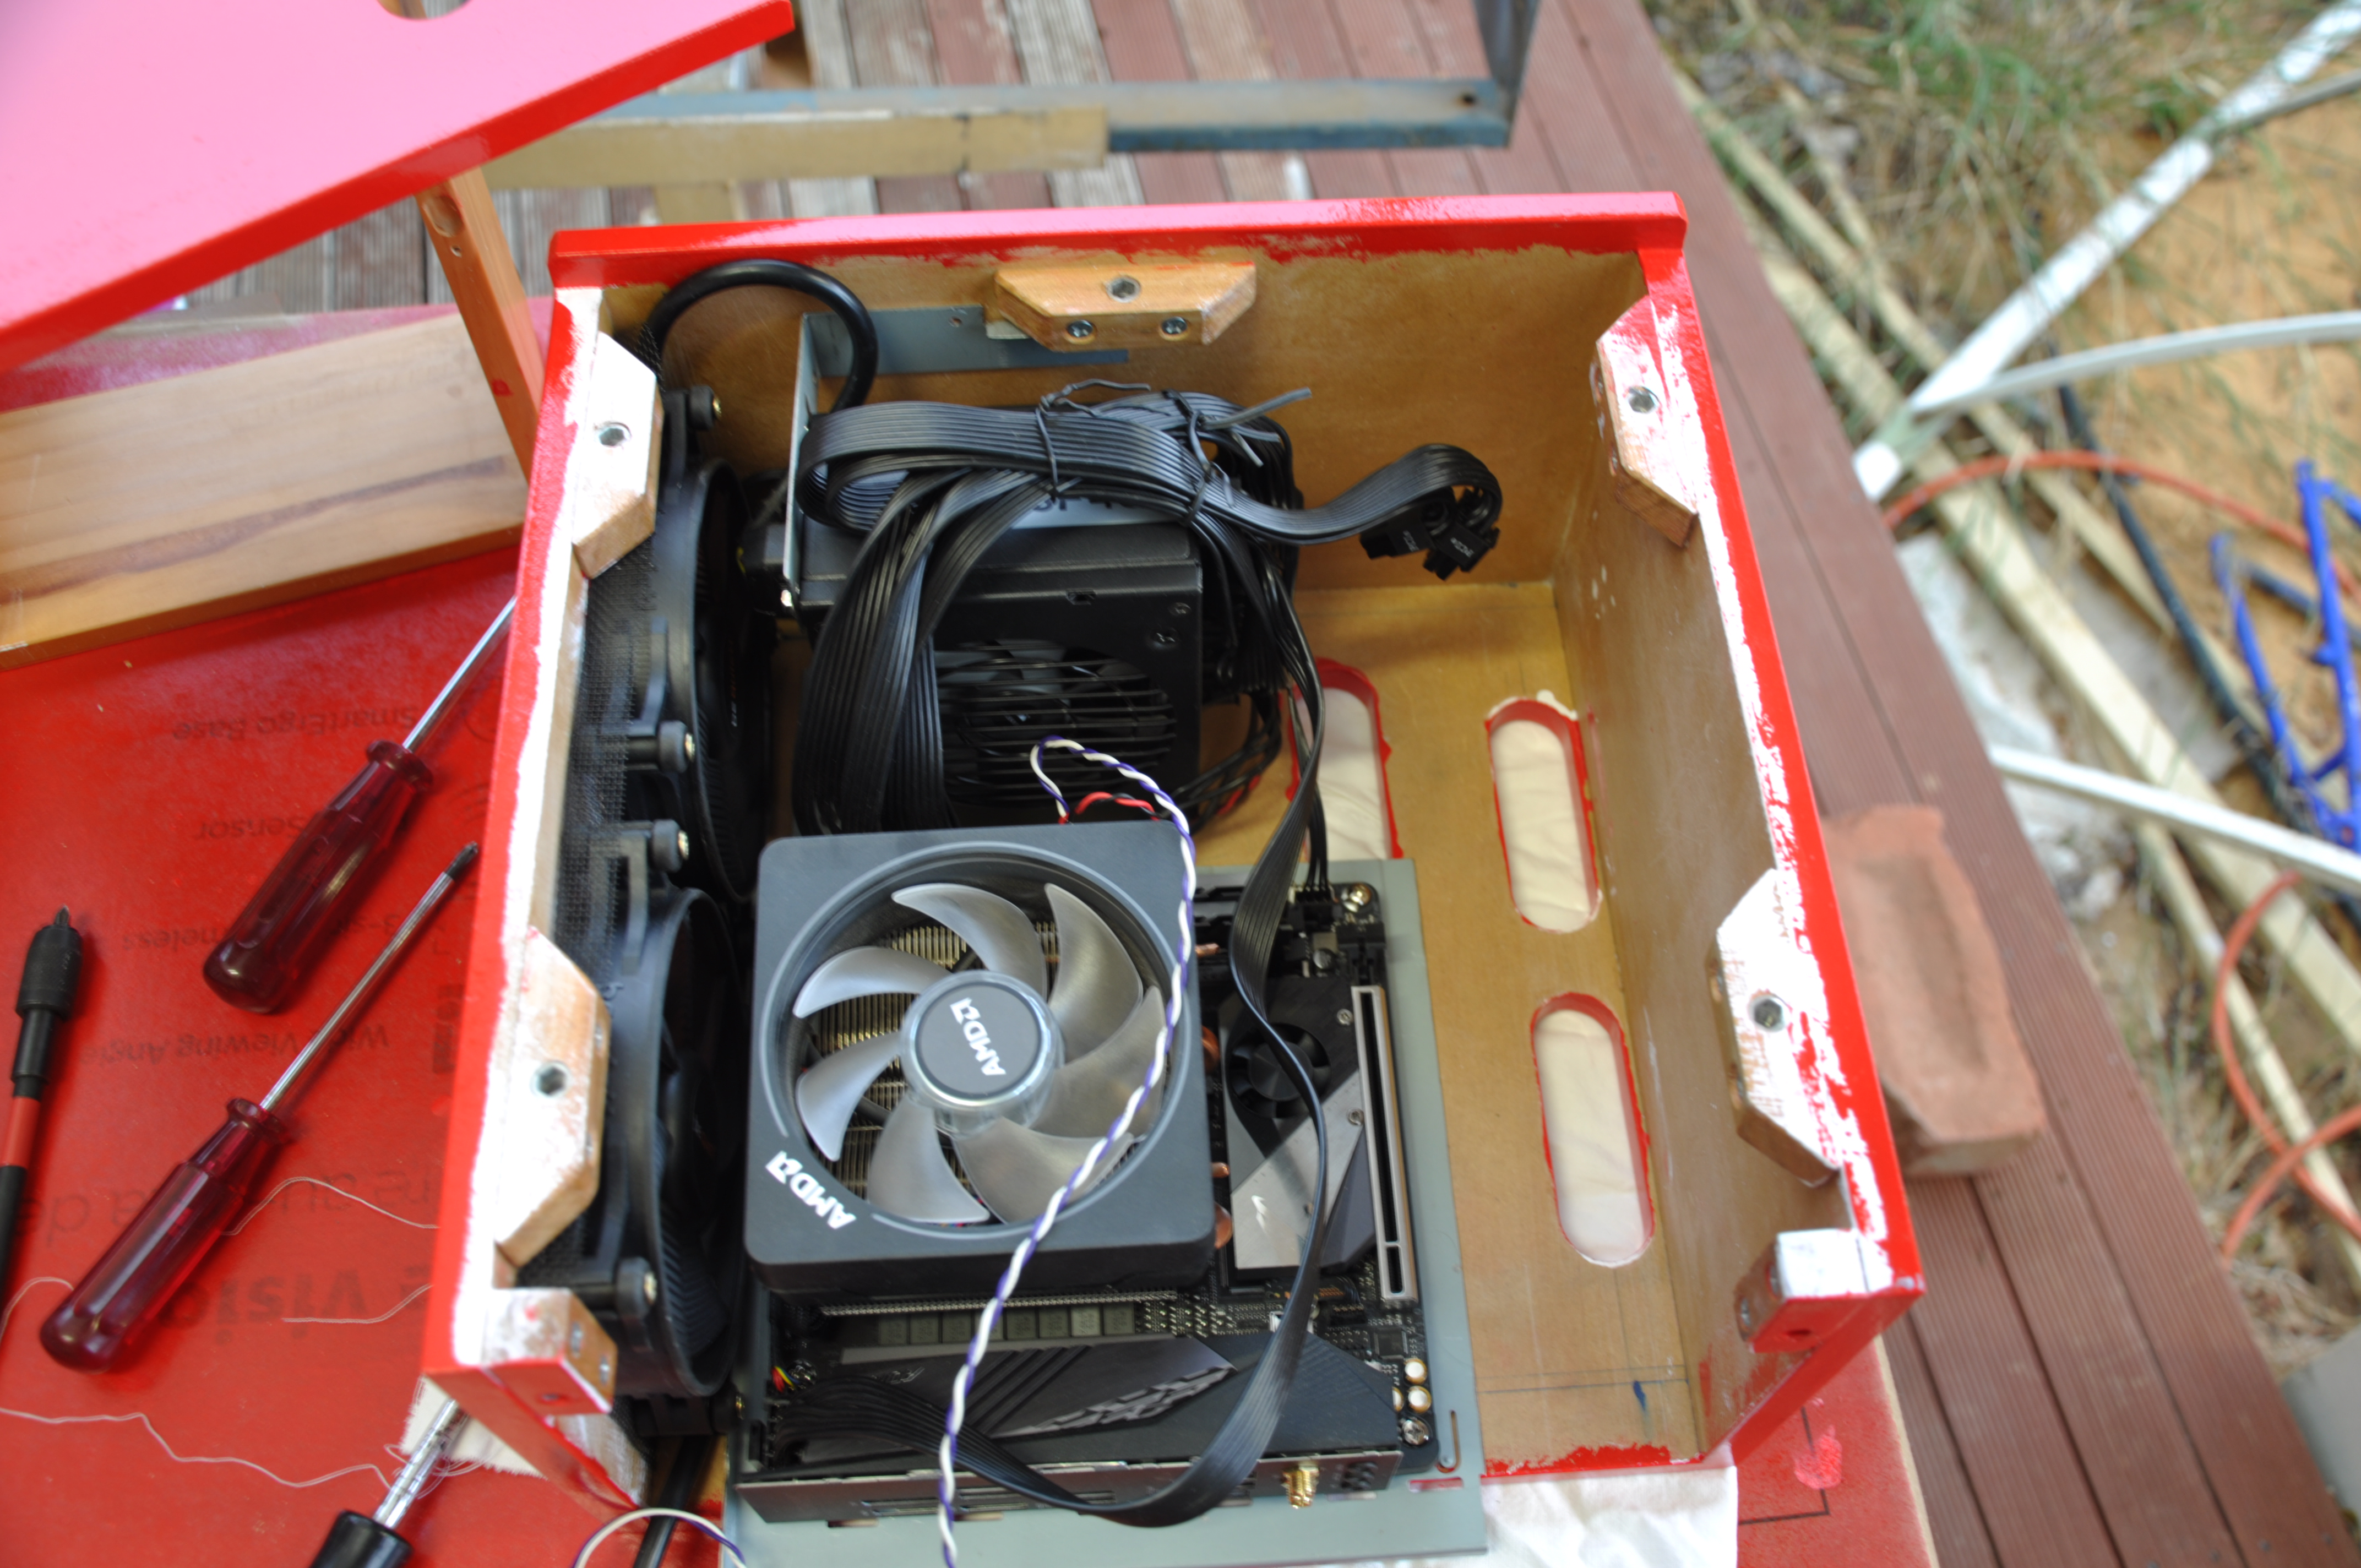
Next was positioning and mounting. The hard constraint was at
the top - where the fans go. At the bottom the GPU and the lugs
collide so that set another hard limit, and the PSU just had go
to where it fit. I think I should've positioned the mounting
board a bit further toward the bottom (right) but it's no big
deal and something that isn't too difficult to change.
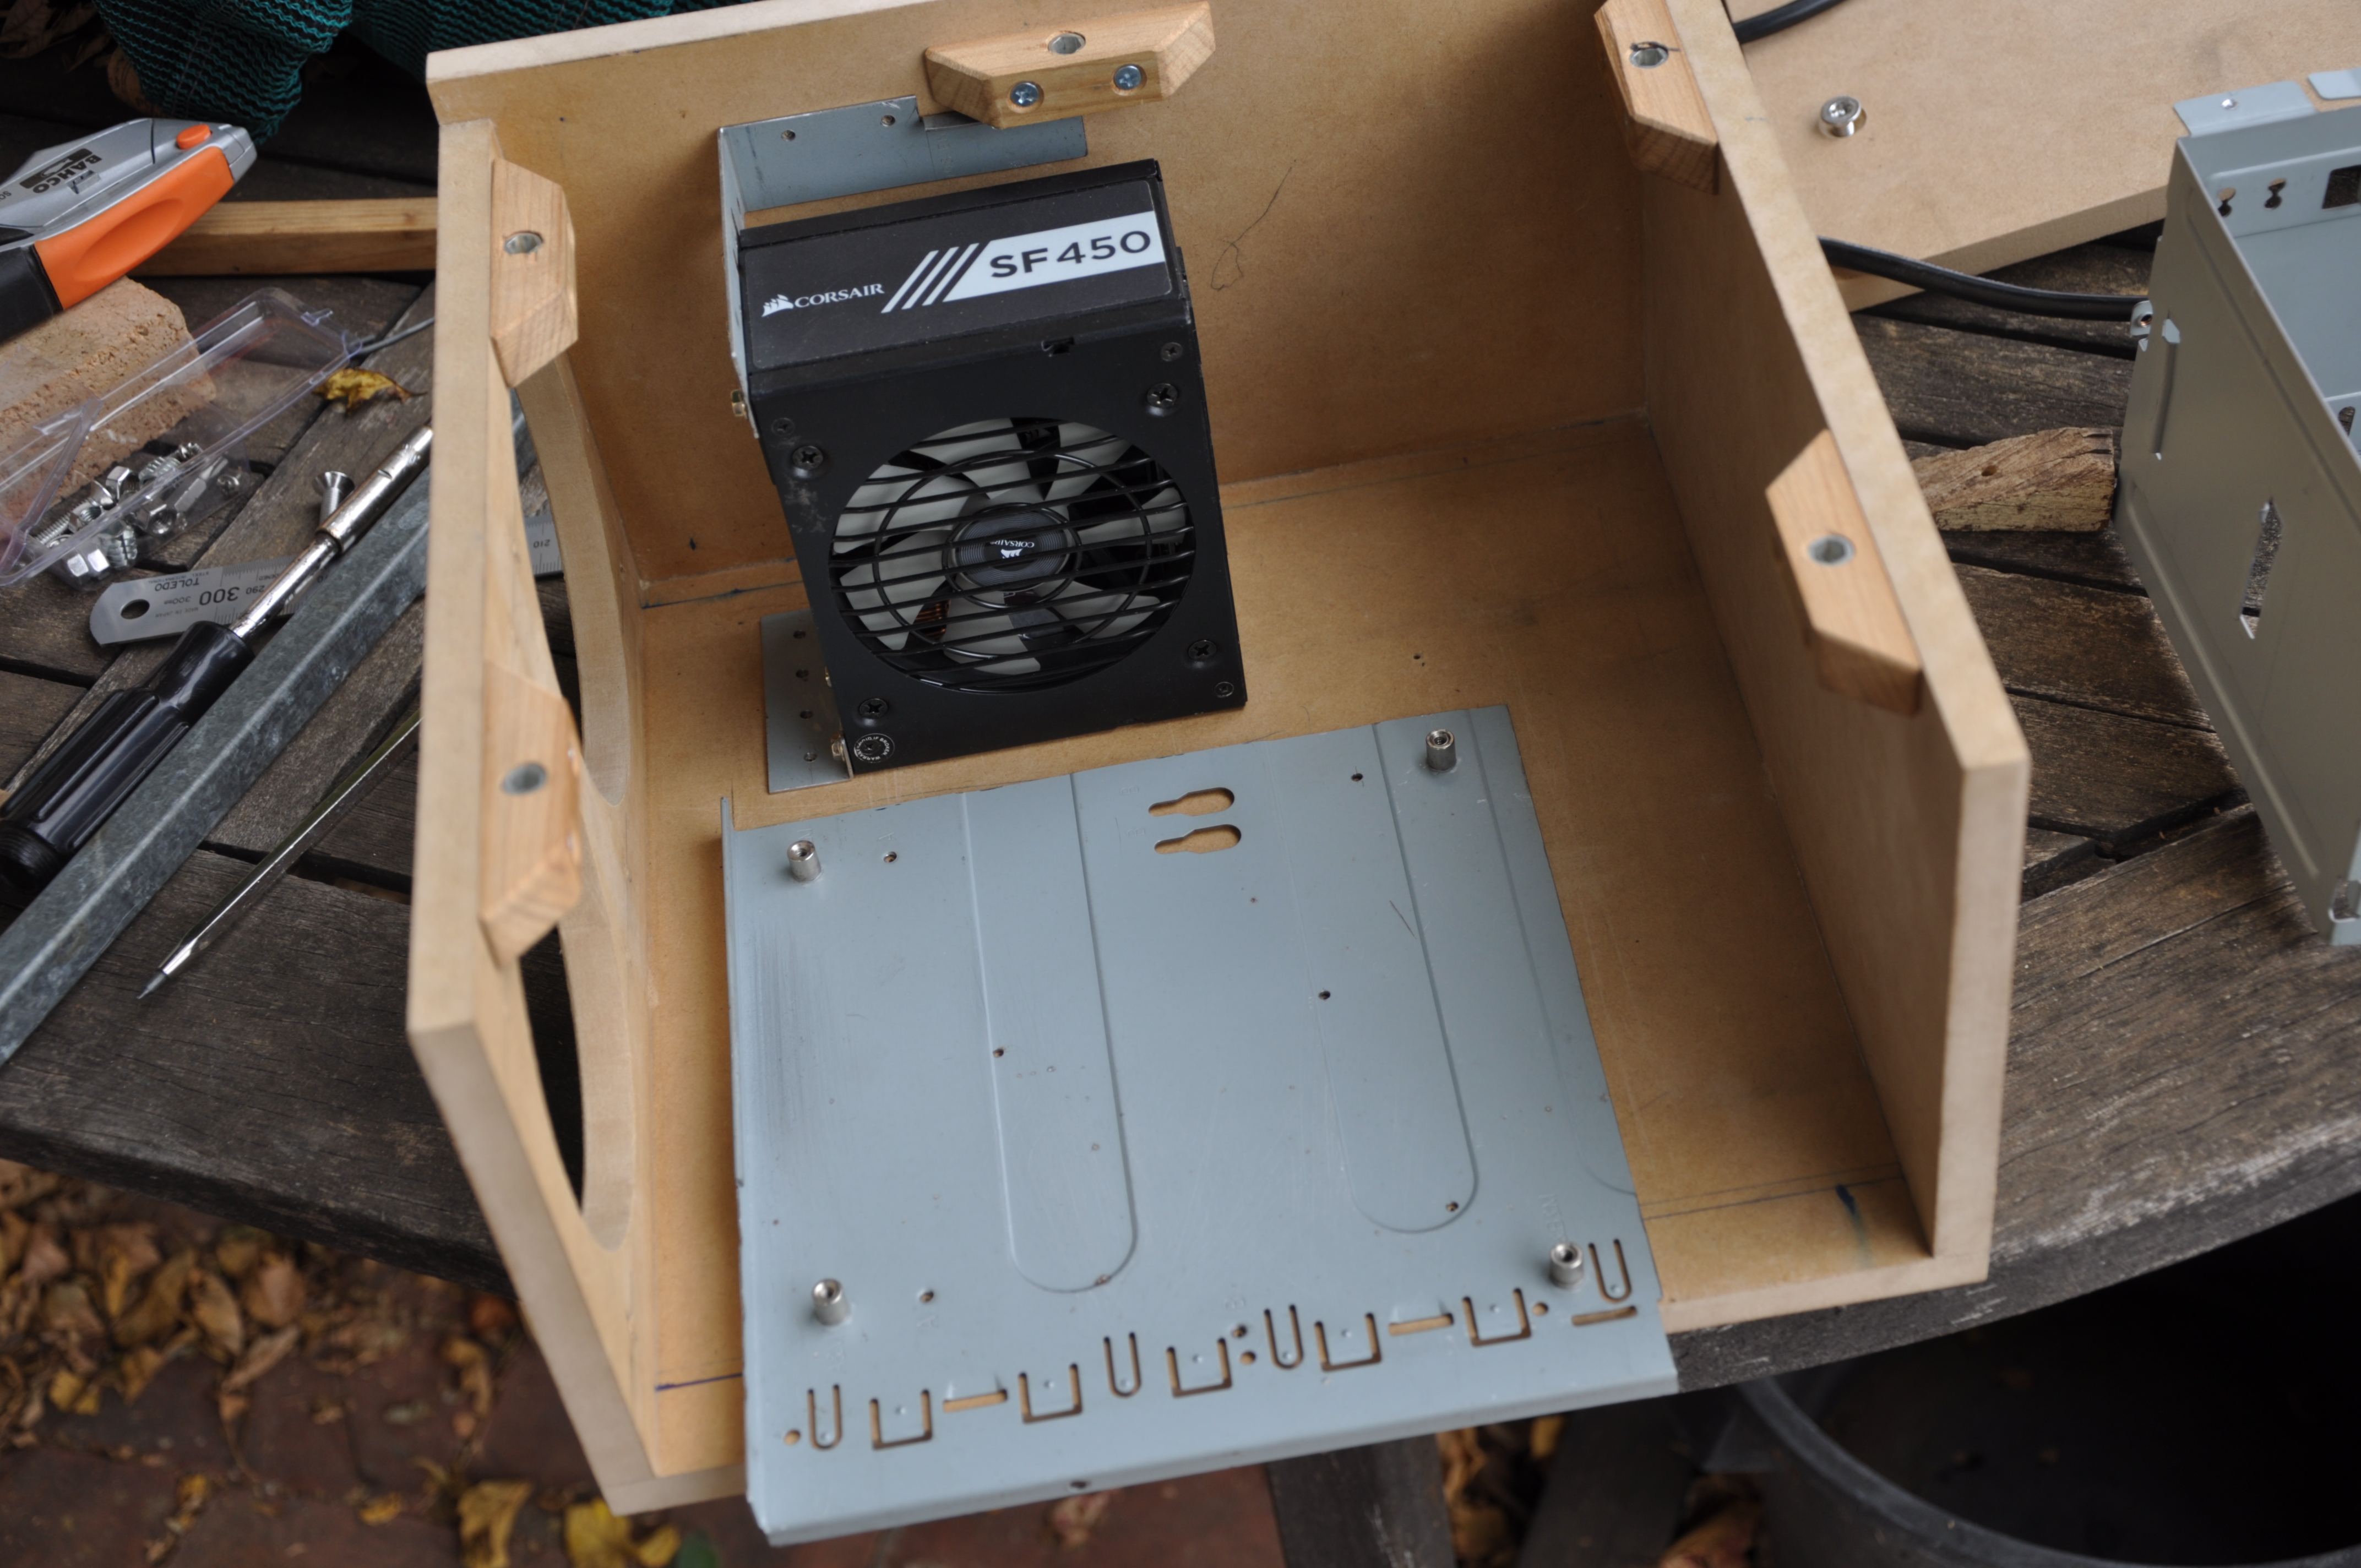
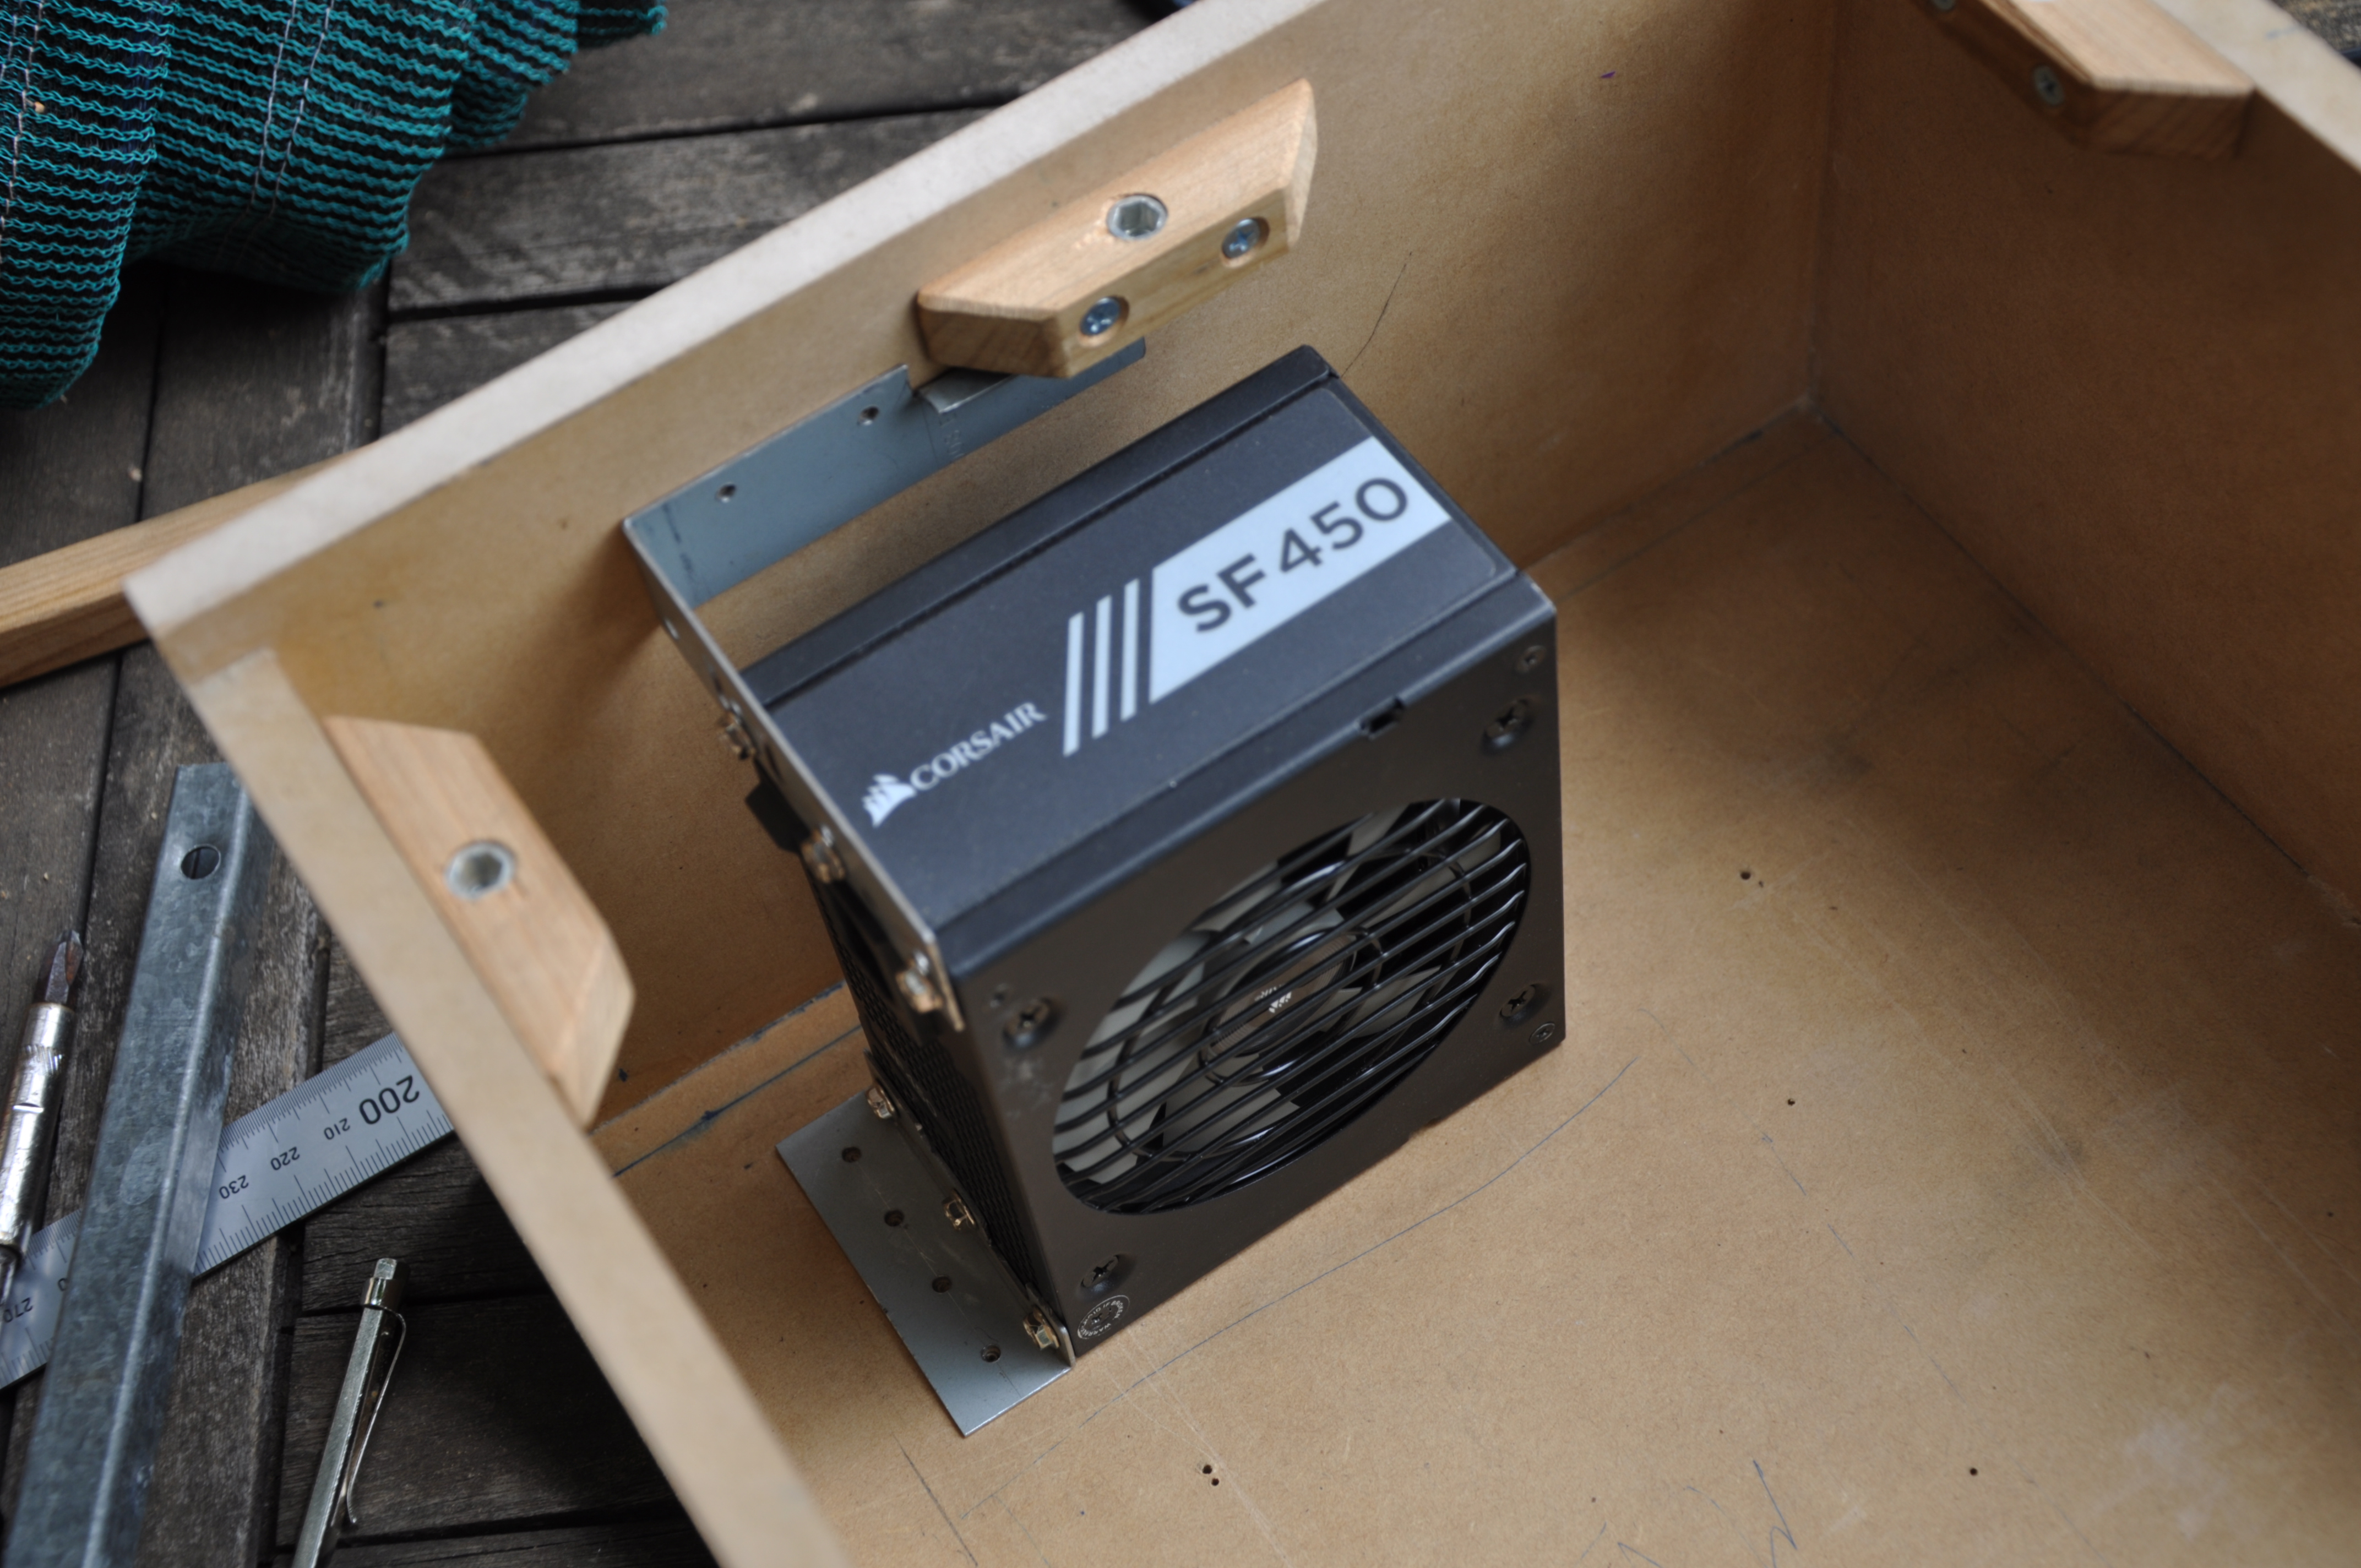
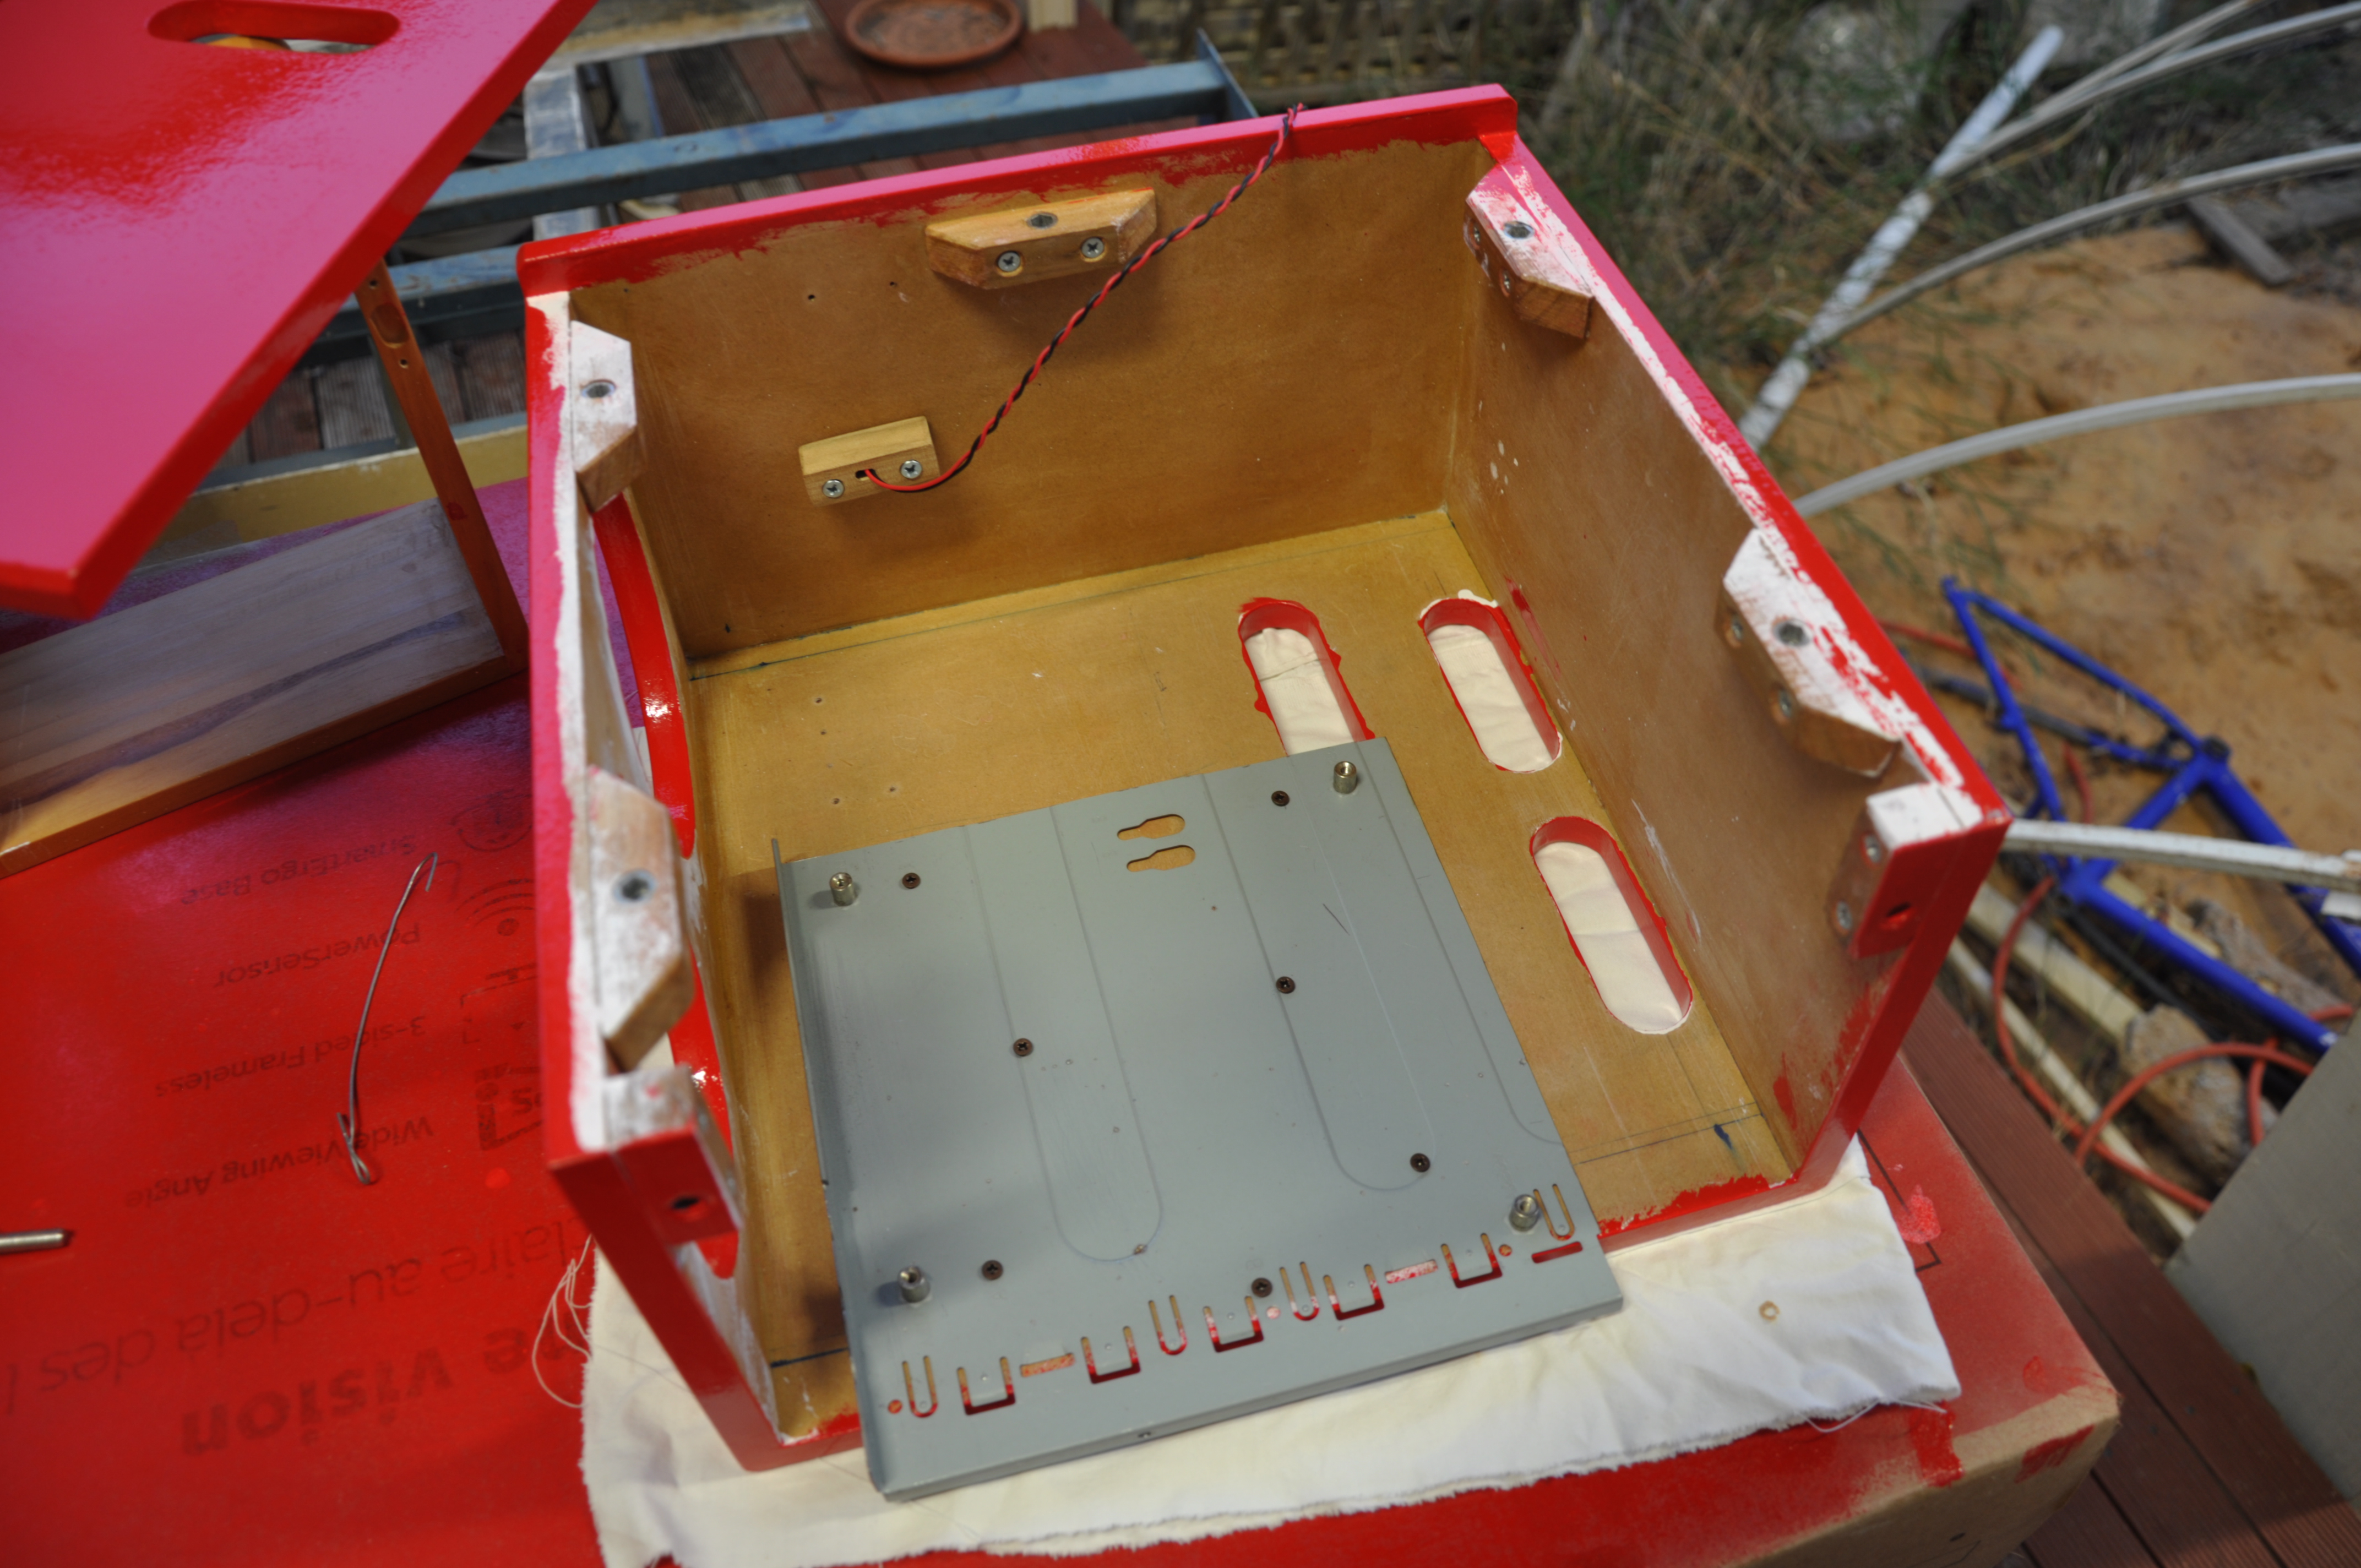
The base-plate was from an old PC I took apart years ago to build
a small case (which I never built), I'd chopped it up for an ITX
board with a single slot which just happened to be almost
exactly right but I did trim it a bit further to give more
options for the PSU. I just screwed it to the wood with tiny
screws.
The PSU was more work, I went through a couple of ideas but
settled on a pair of brackets. A small angle on the bottom and
a corner bracket for the top, leaving room for cables, airflow
and any front-panel stuff behind it. The power cord was quite a
problem, I had to hack away most of the cable support plastic
and even the front so the IEC plug pushed in far enough and the
wires didn't stick into the fan. At the time the modular power
cables from the output were pressing up against the GPU so I
couldn't move the PSU any further away from the fans - but with
some adjustments I made more room. So the PSU could potentially
be moved but I haven't done so and the IEC cable would still
need some hacking anyway.
It took me a while to work out how to create support for the PCI
bracket. A flat bit of metal? Some angle? The problem is that
the IO panel and the GPU and the rest of the design mean I can't
just use a piece of wood as the back plate as there isn't
enough support area or there's no way to then get the computer
together. And that means any PCI support wont be well supported
either. I toyed with using the PCI mounting plate from the
computer I'd chopped up but I couldn't quite work out a way to
mount it (actually in hindsight this is one reason the base
plate is where it is, it was just enough for 4 slots with the
board against the base). That probably would've worked but
instead I went with using a piece of square tubing. I cut a
slot out at the bottom of the tubing so that it slides onto the
end of the PCI bracket, and then I use another pair of lugs to
mount the bar to the case.
It's a bit tight and probably slightly out of position but it's
solid and supports the card well.
So I put it all together and started doing some heat testing. I
made some vents in the side panel based on the position of the
GPU and other constraints like the mounting lugs. The upper
vents align with the GPU vents on this particular GPU.
The idea is the bottom ones feed cold air to everything and the
higher ones can vent some GPU exhaust if they get hot. In
practice air just seems to come from all of them. My GPU fan
never goes above the bottom rate anyway, I don't play games so
it isn't doing much more than running the desktop now.
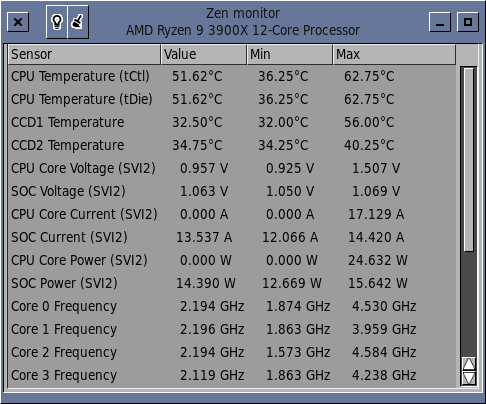
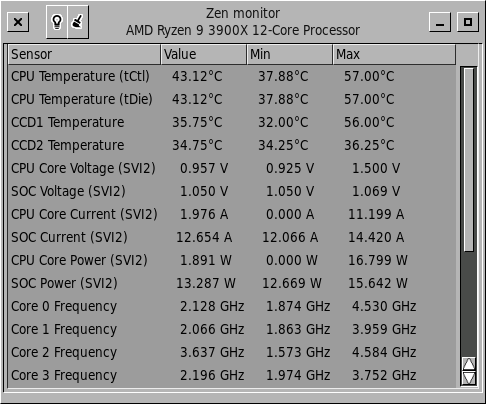
I normally run eco mode (65W) on the Ryzen 3900X, but I turned
that off to try it out. Running blender and the Mandelbrot
OpenCL stuff from the previous blog the CPU got up to about 81C
and the GPU in the 70s. There was a bit of a hot-spot near the
front end of the GPU but it didn't seem too bad.
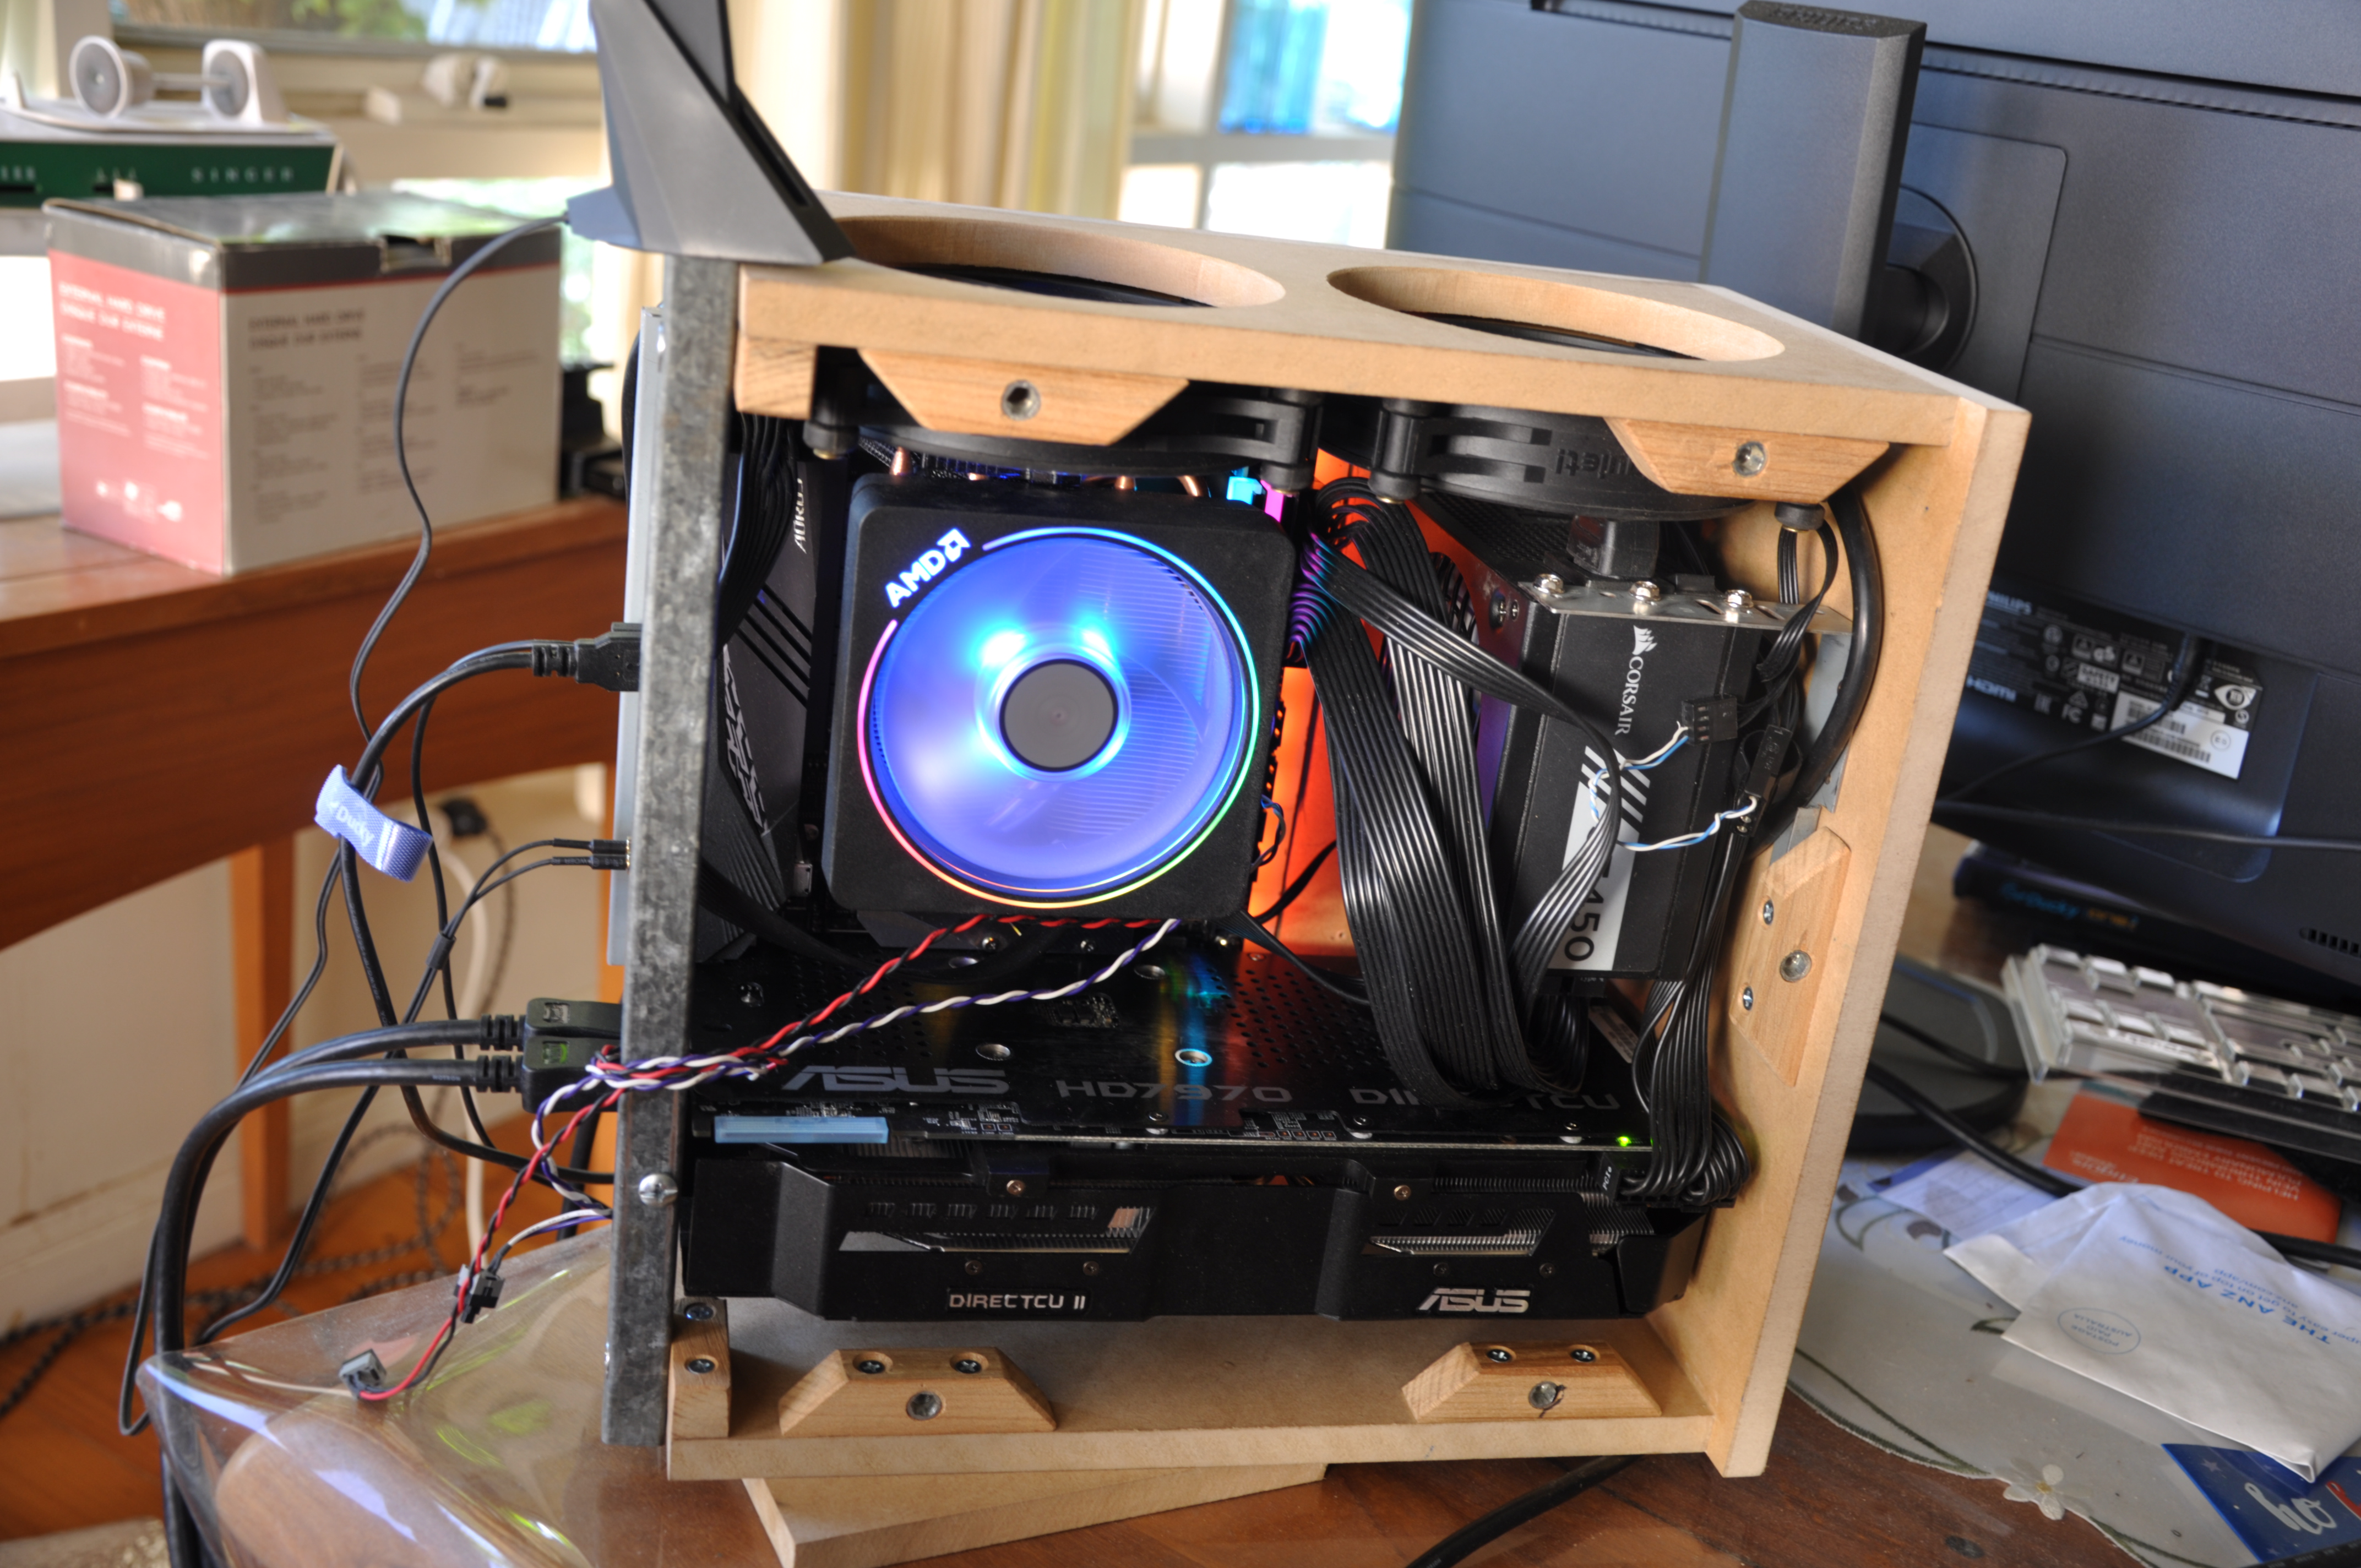
On the other hand the cables were stuffed in pretty badly,
particularly behind the PSU and up against the GPU. So I worked
out a way to fold them and tie them up and it improved airflow
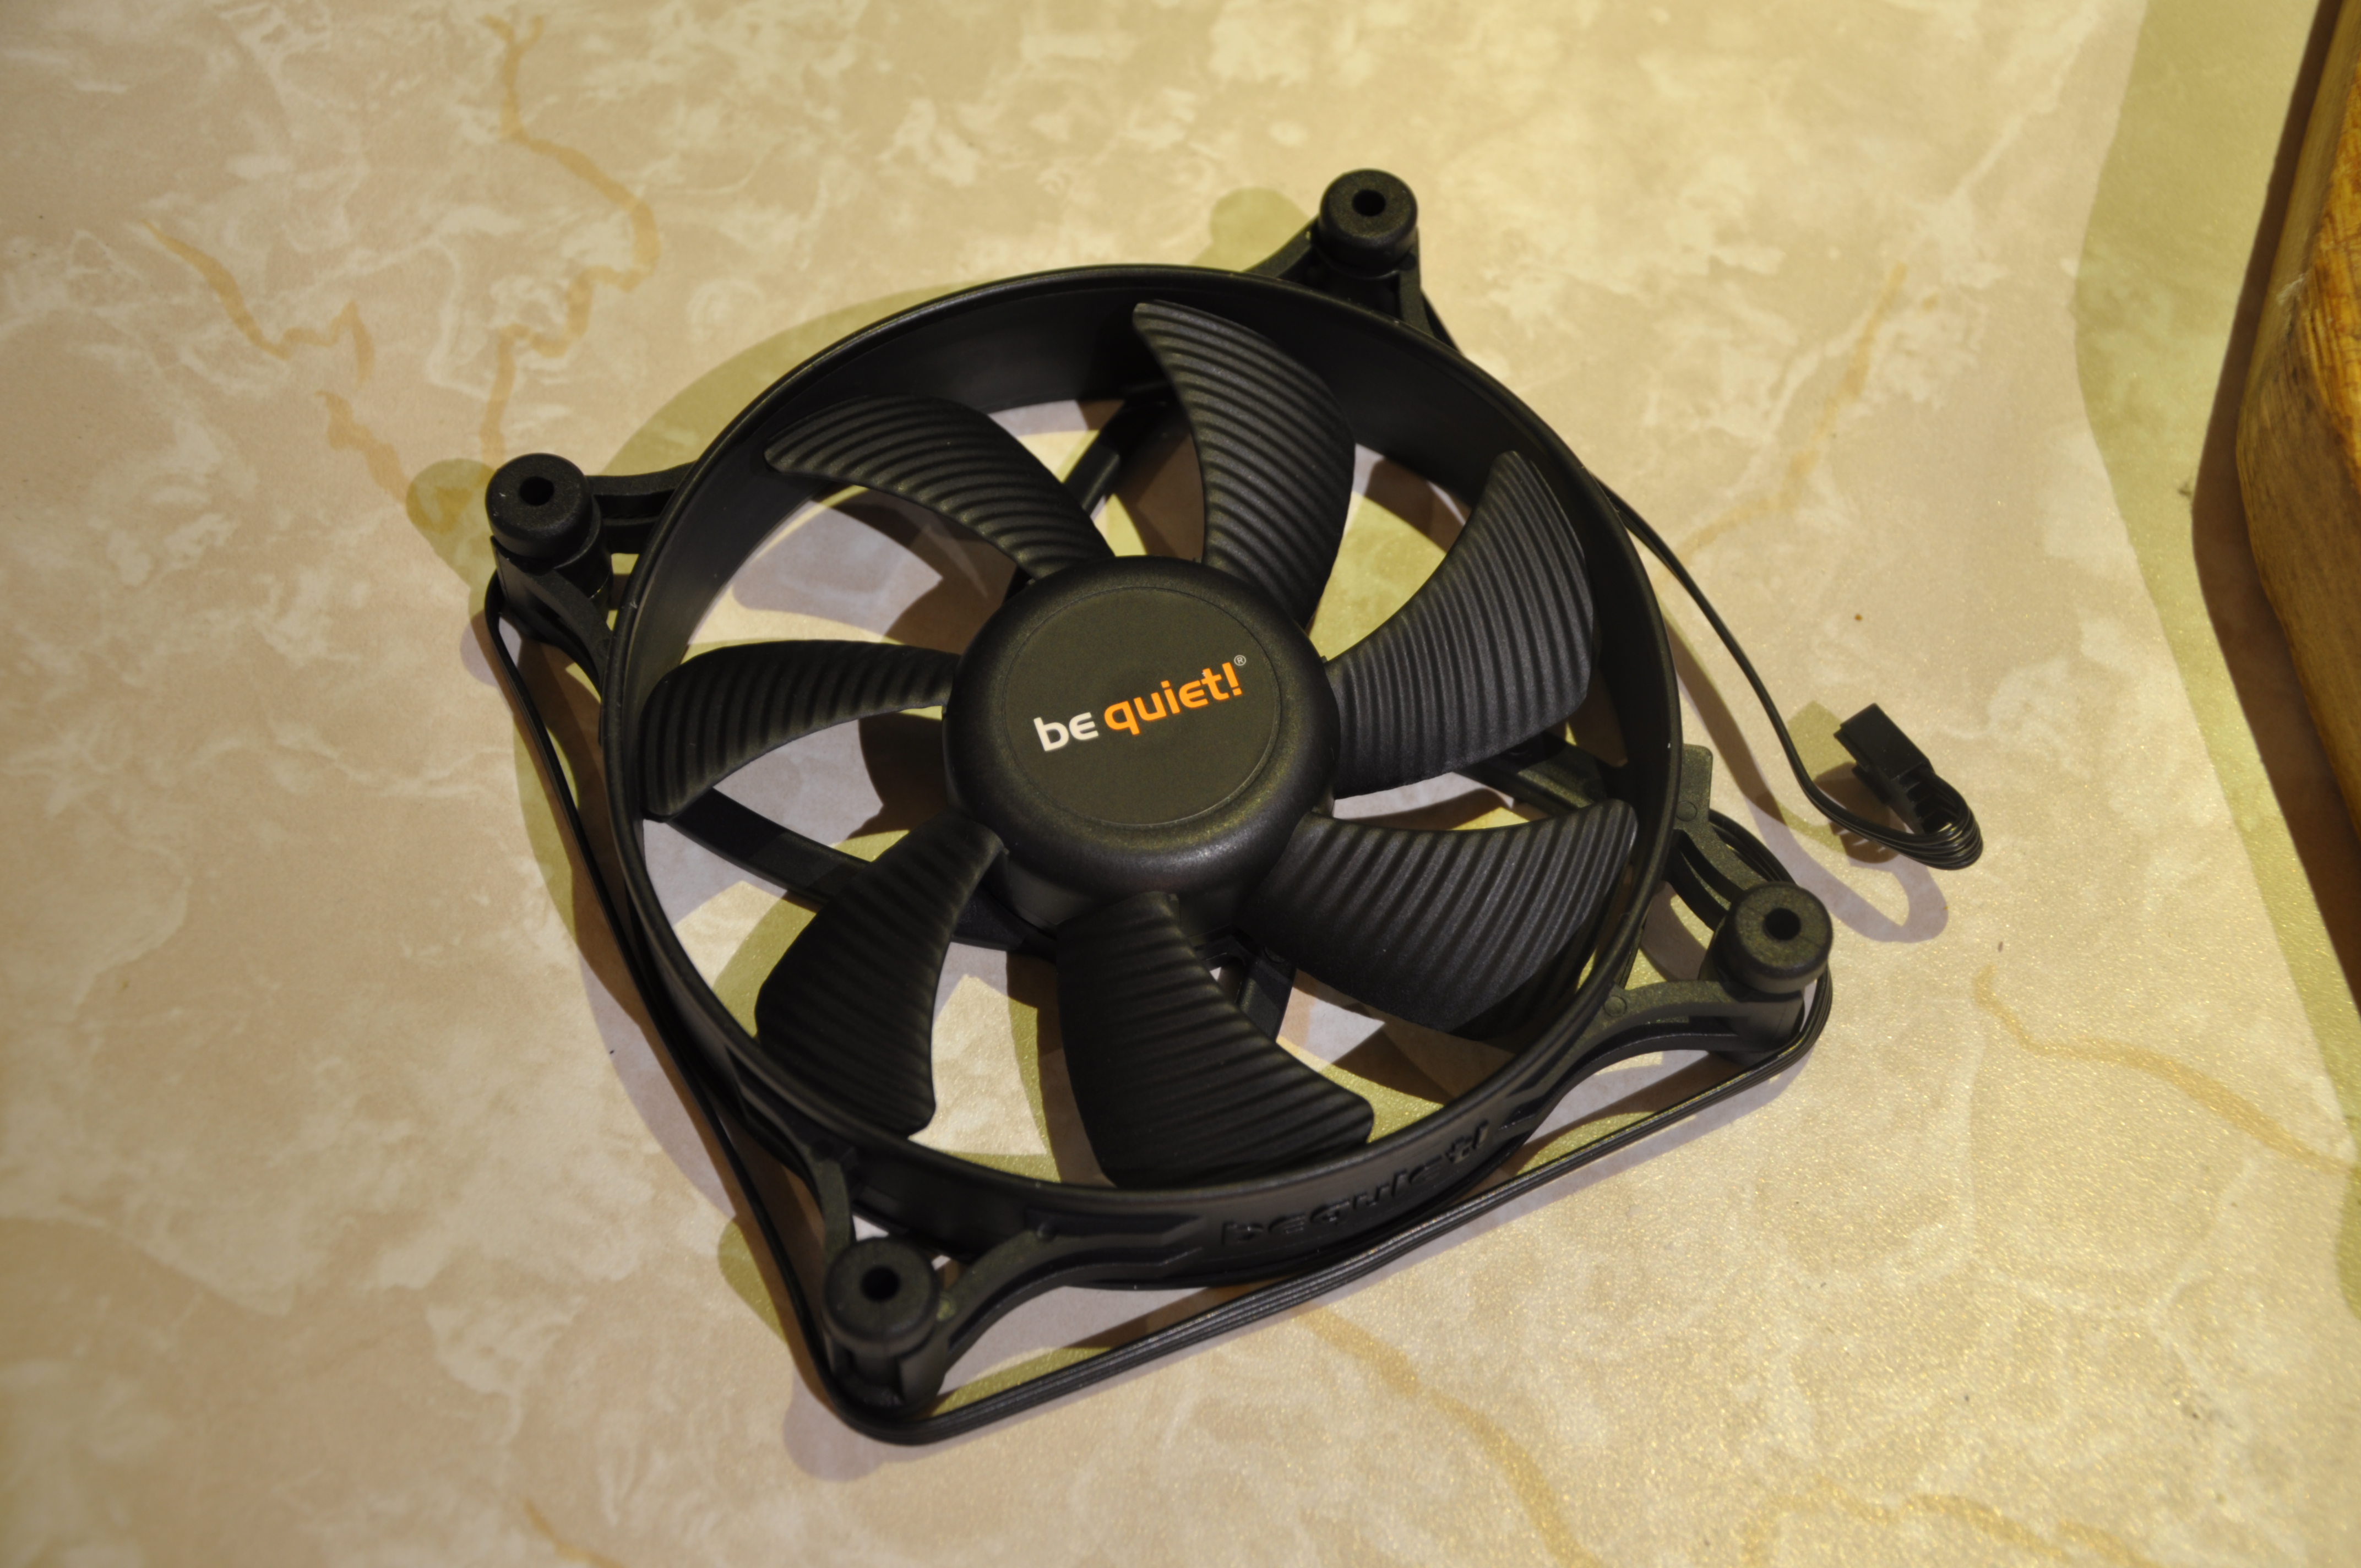
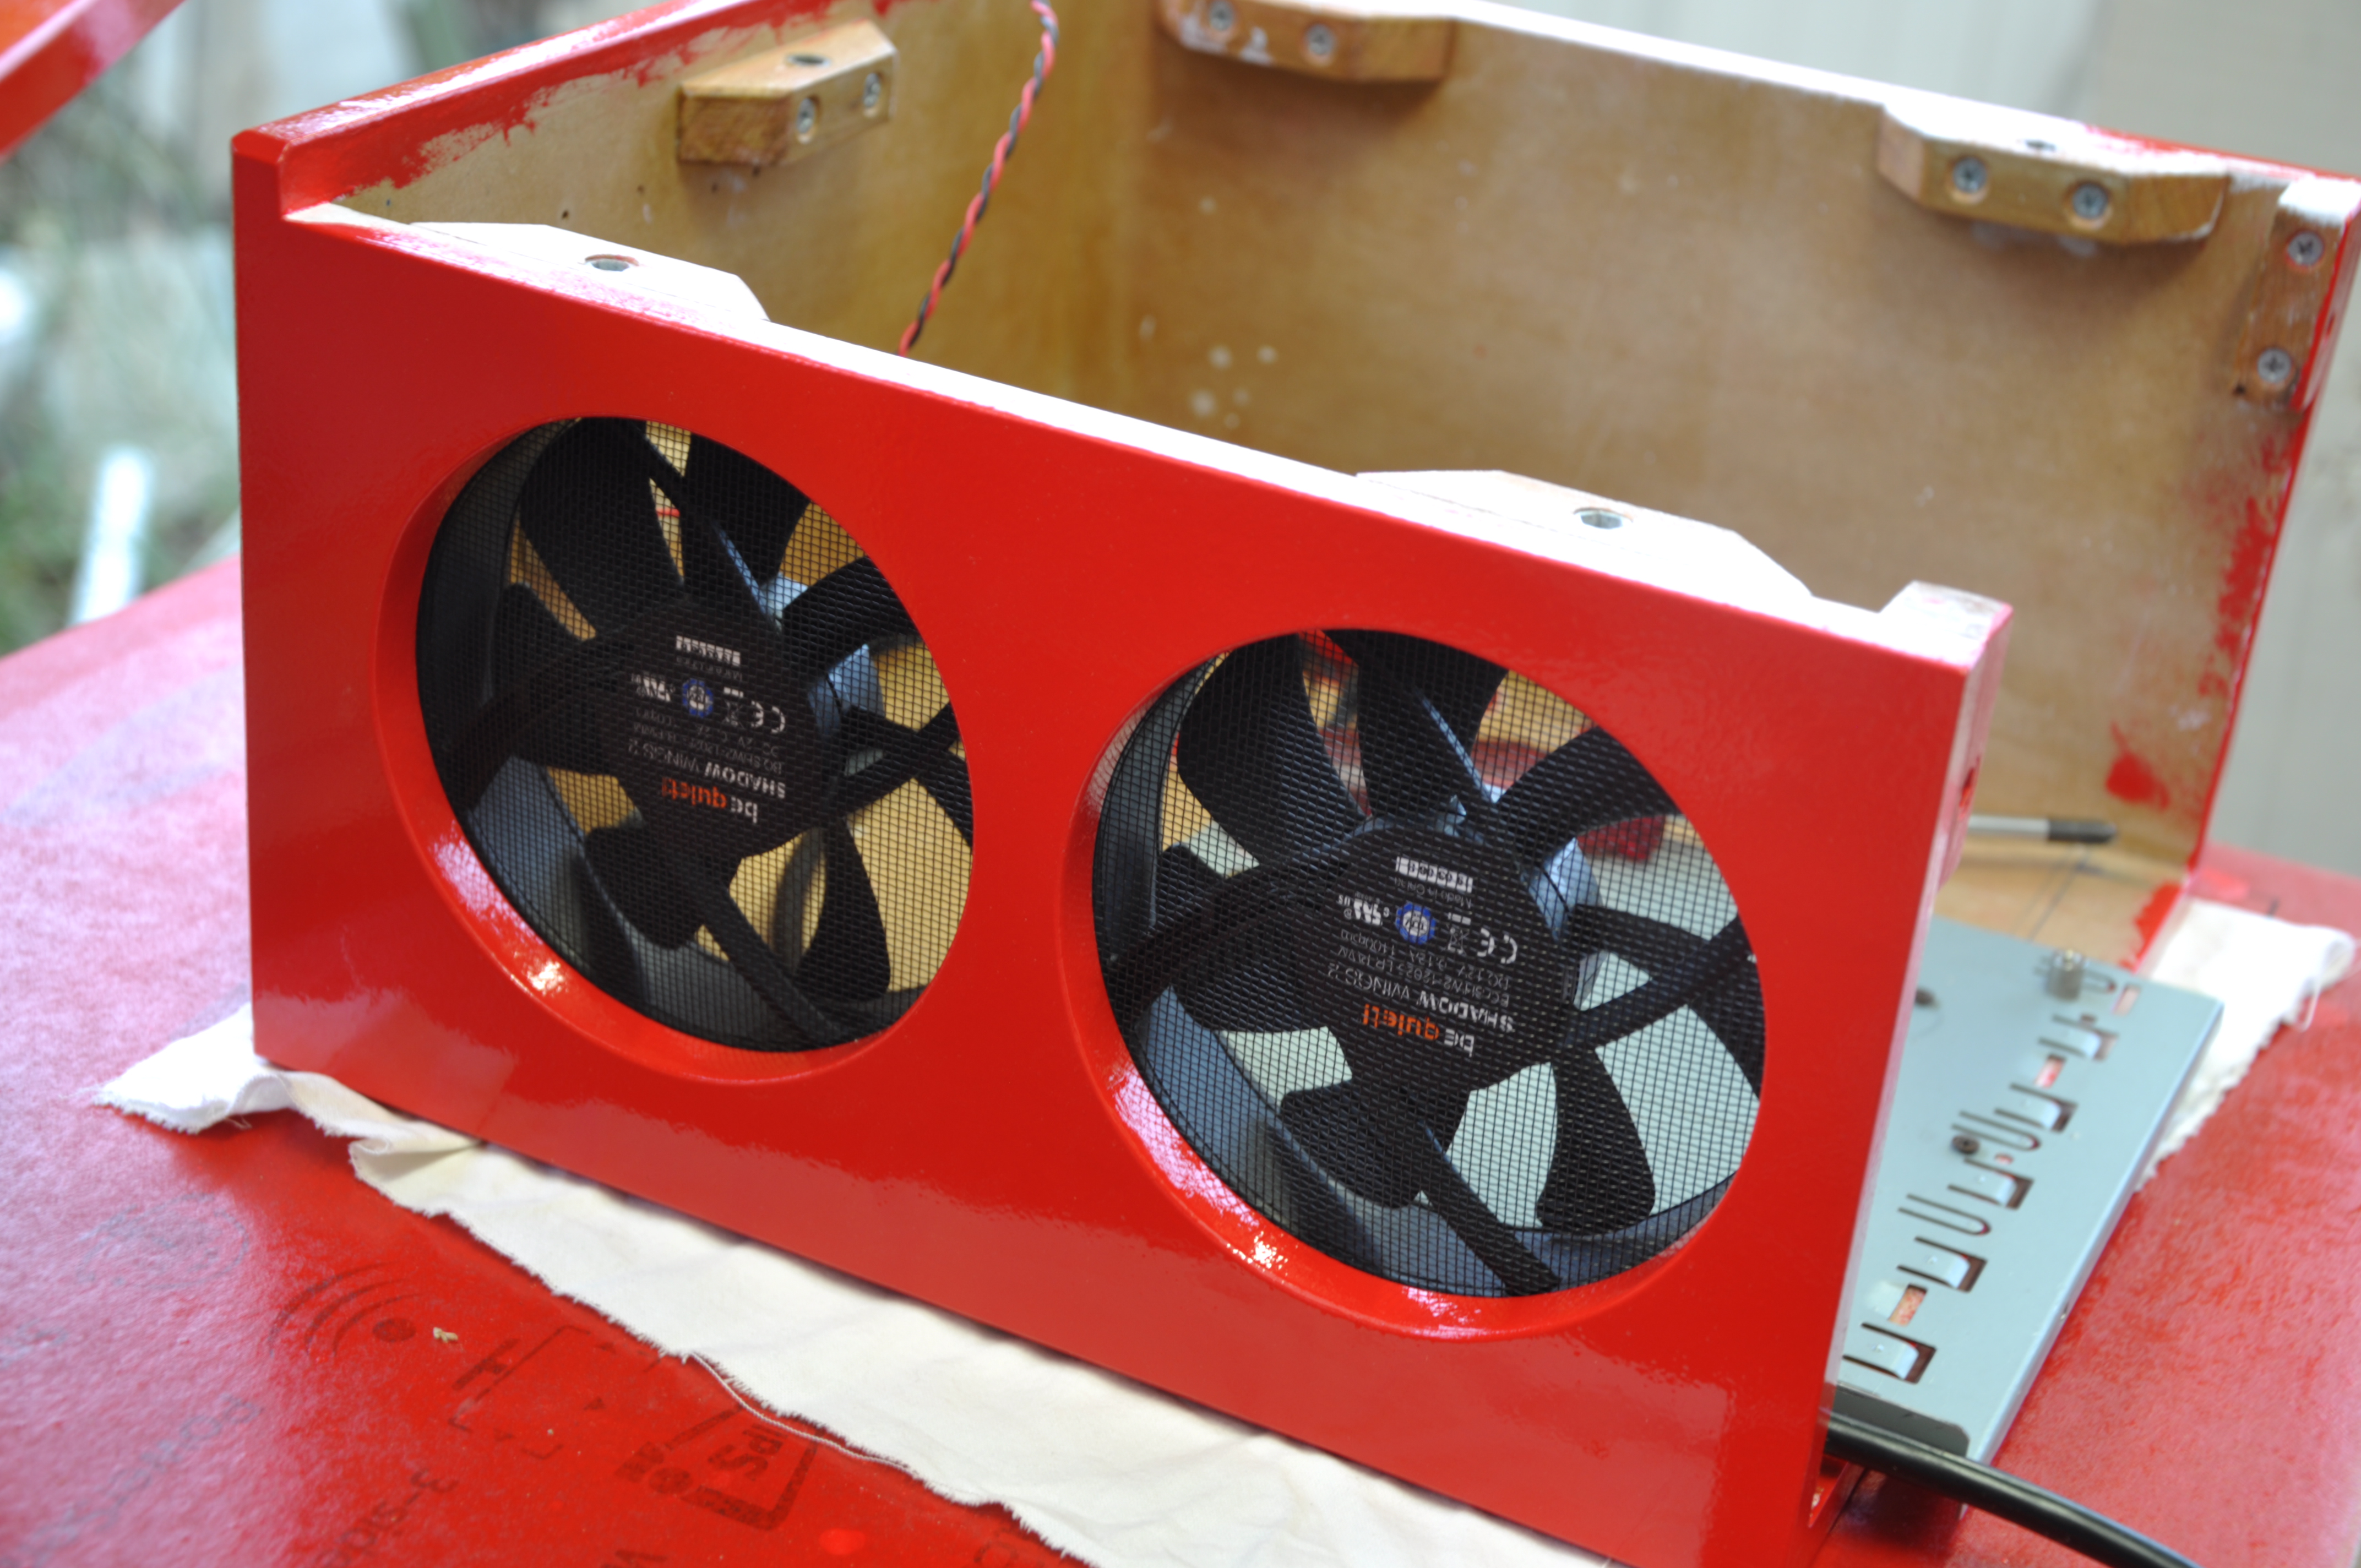
quite a bit. I also chopped up the HDD cable from the PSU and
soldered on one of the fans - this motherboard only has a single
fan header, and I got the PWM fans. It works better if they're
both on 'flat out' anyway - they're only low rpm fans and it
keeps the CPU cooler so it makes less noise. There's a shot
later with this one.
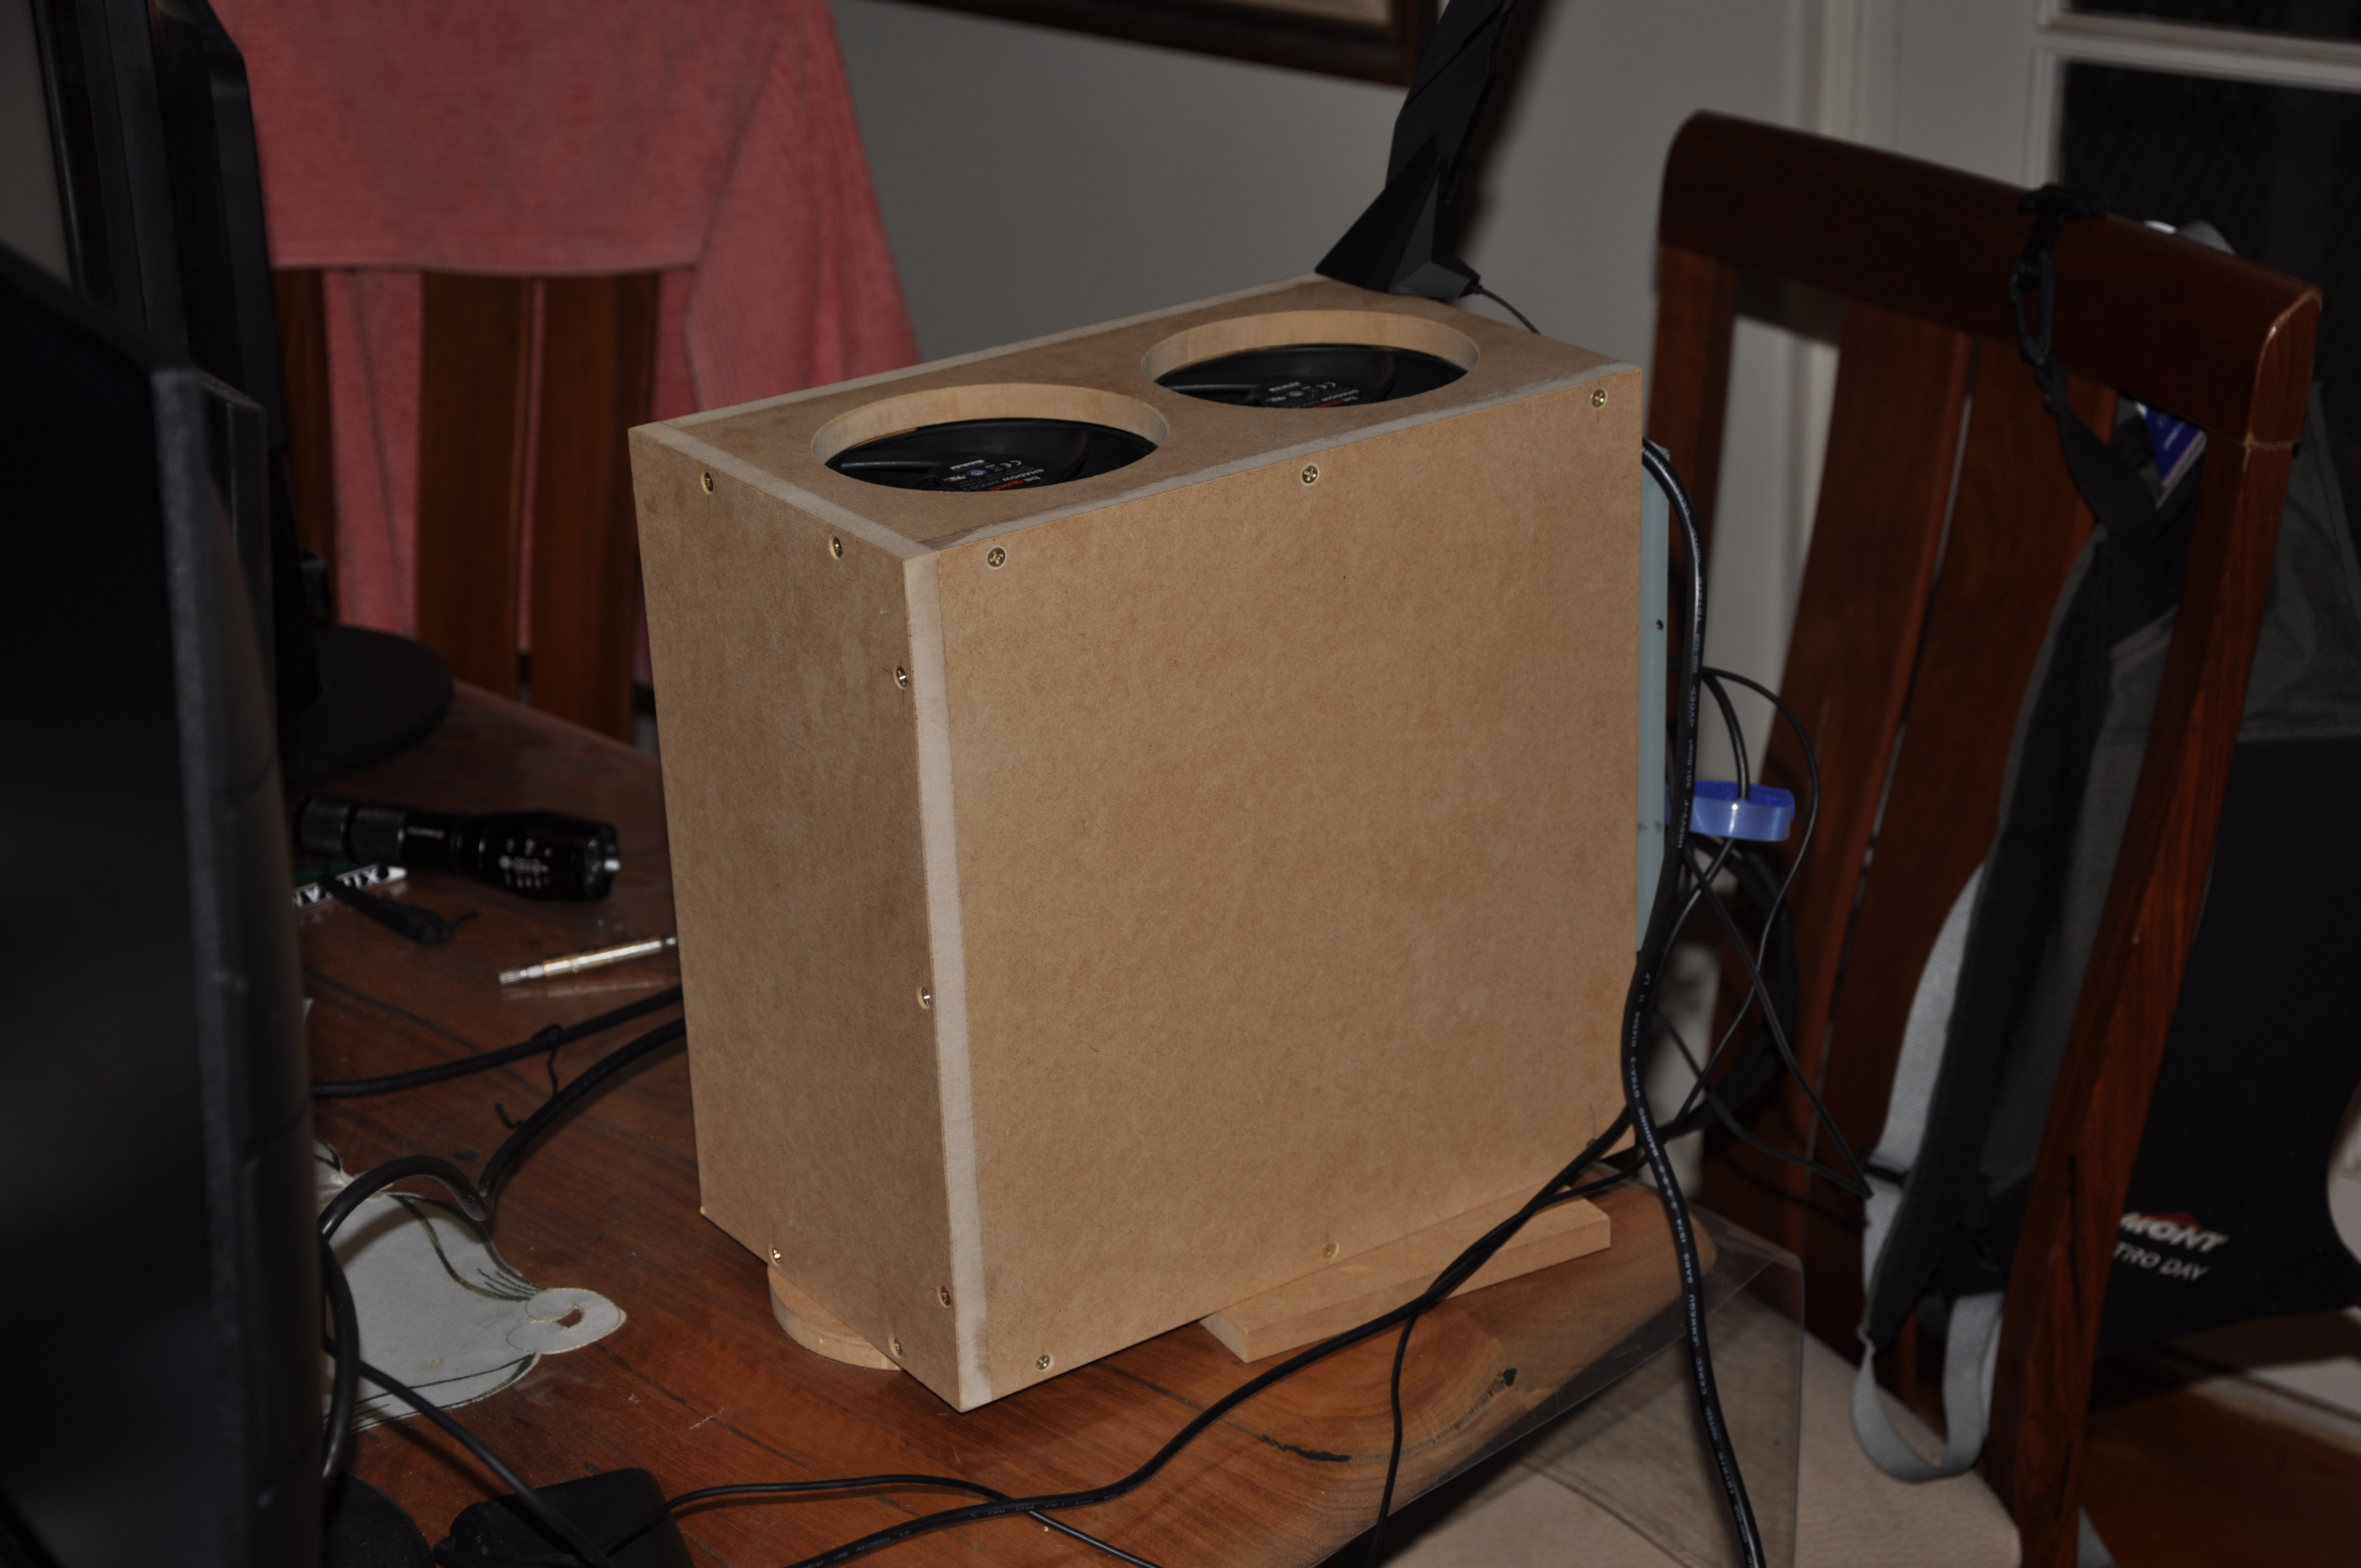
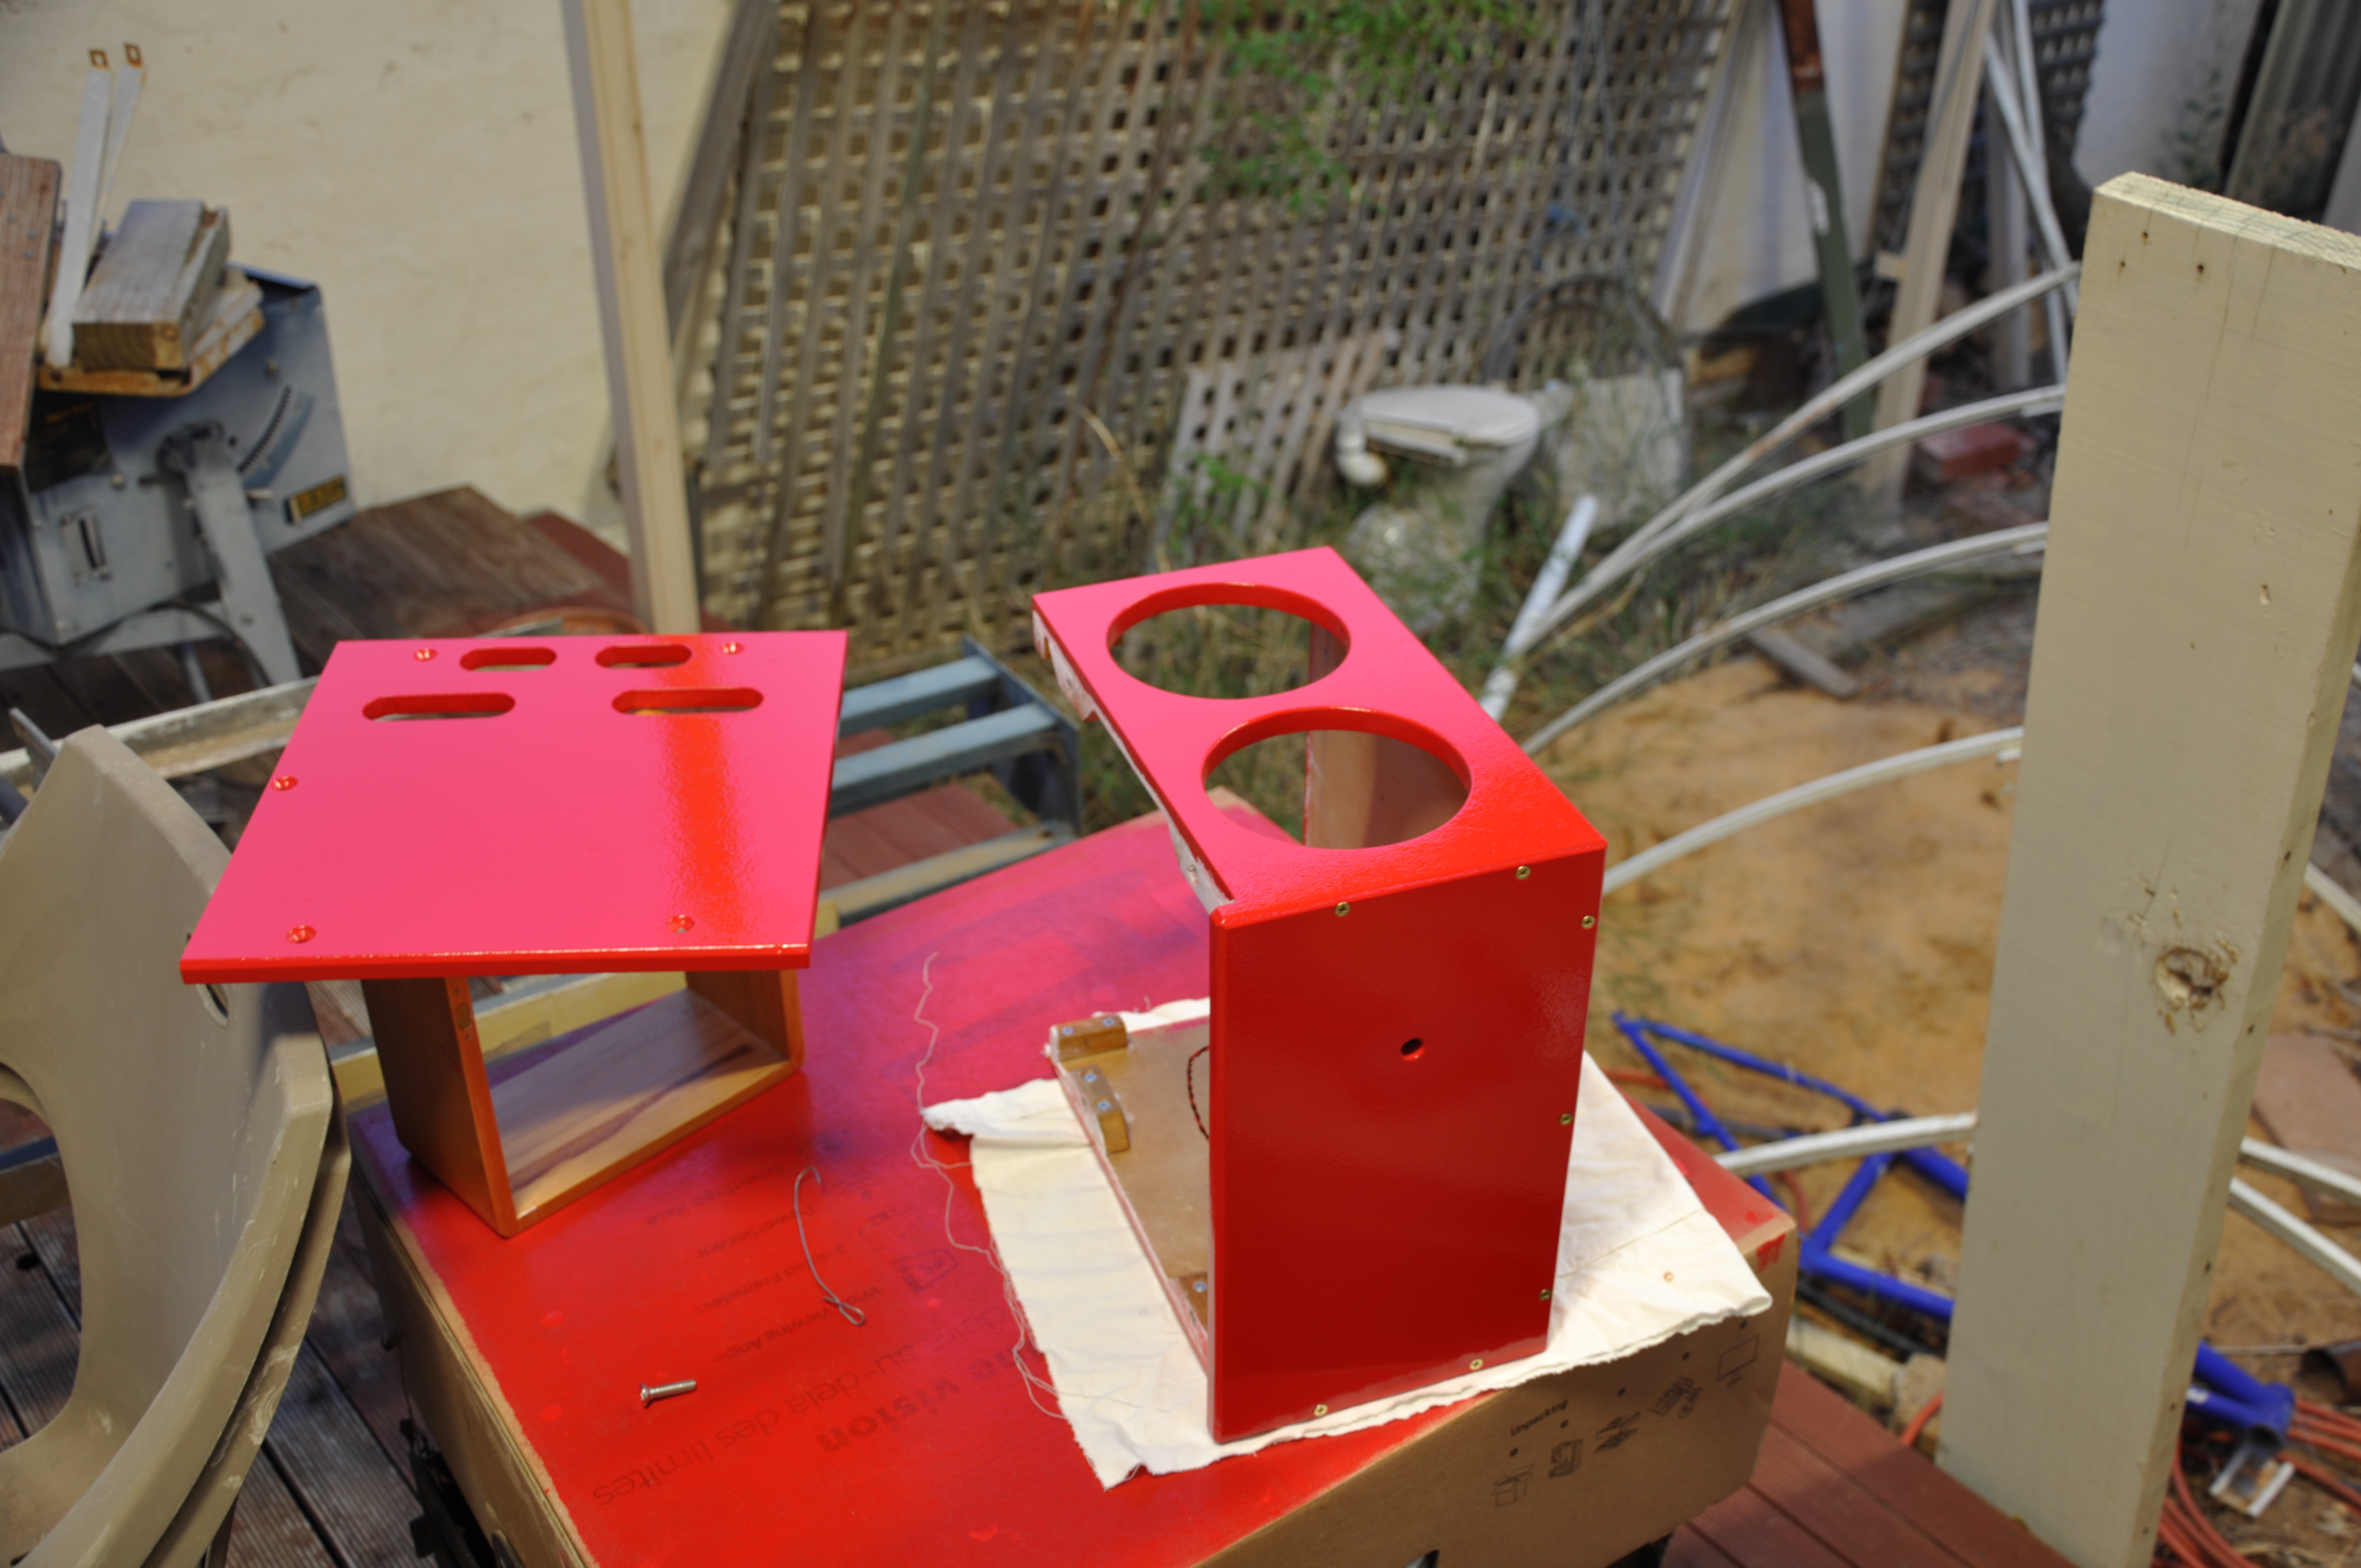
Painting. It sucks. You paint, you clean, you sand, you paint,
you clean, you sand. Makes a mess. Stinks. Expensive.
Actually before I painted it I detailed it.
- Added a 45° bevel to all the main edges. It's
simple, helps protect the edges and I think it looks nice. I
used a trimmer router for this.
- Added a smaller bevel to the case-side edges of the side
panel and the corresponding edges on the main box. To
protect the edges for a removable part but also to 'hide'
any small misalignment.
- Cleaned up the fan holes - made them round and square.
- Cleaned up the vent holes.
- Created a hole in the front for the power switch.
And I fucked it up quite badly. 1x coat of sanding sealer, 3x
white undercoats, and 3x enamel overcoats ... but the final
overcoat is full of dust and hair and bubbles and isn't even
enough. It could probably be fixed with a sand and recoat - but
I just gave up.
I worked out later at least one mistake I made, shaking up the
can rather than stirring it aerated the paint which came out
when I used a roller. Oops.
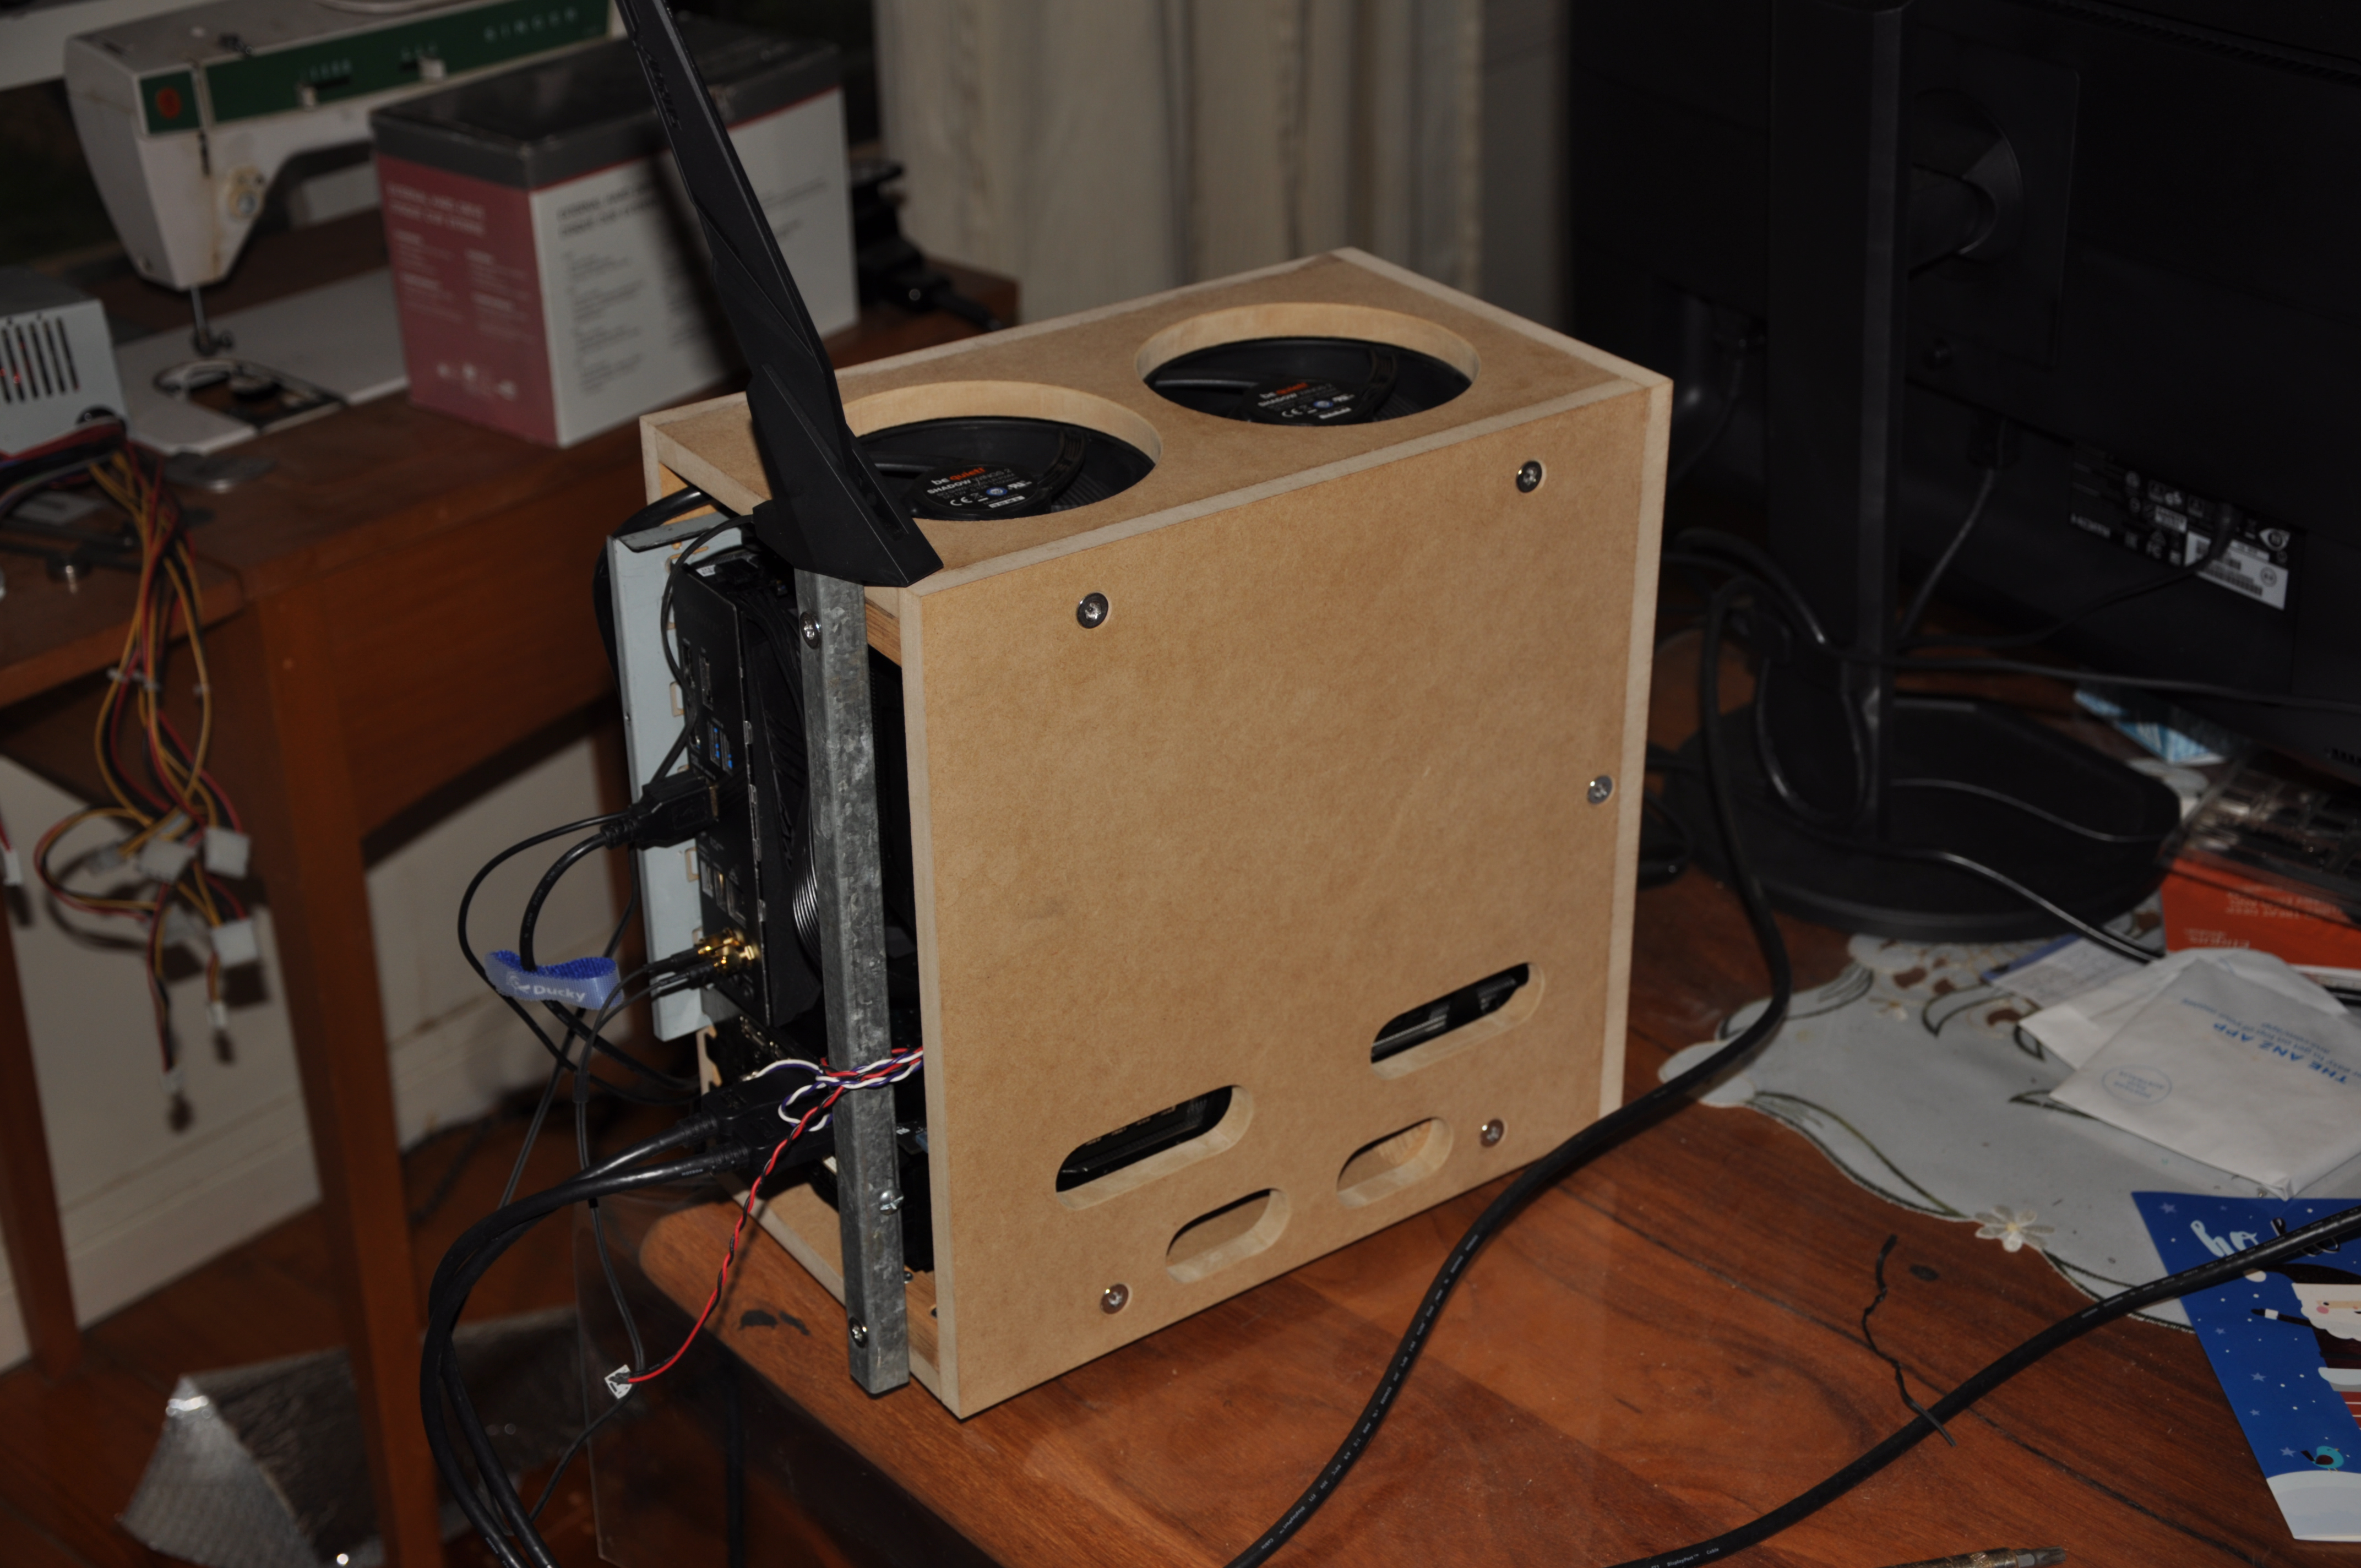
Before I painted it I decided to cut matching slots on the other
side panel, to help airflow a bit more but mostly for
aesthetics. And of course I totally fucked it up - I put the
upper slots in the wrong place because I measured from the
inside and not the outside. Fucking idiot! That really pissed
me off for days but what can you do eh? The base plate was
always going to cover some of the upper rear slot but I could've
cut some of it away, but I just gave up.
Here I've mounted the power button as well. I don't know what
to do for the button - it's a bit fiddly making anything that
will push onto it, but it works as a 'hidden push-button' hole in
the case anyway.
I decided I should probably cover the fans, don't want a stray
screw falling inside or something. I used some aluminium fly
wire.
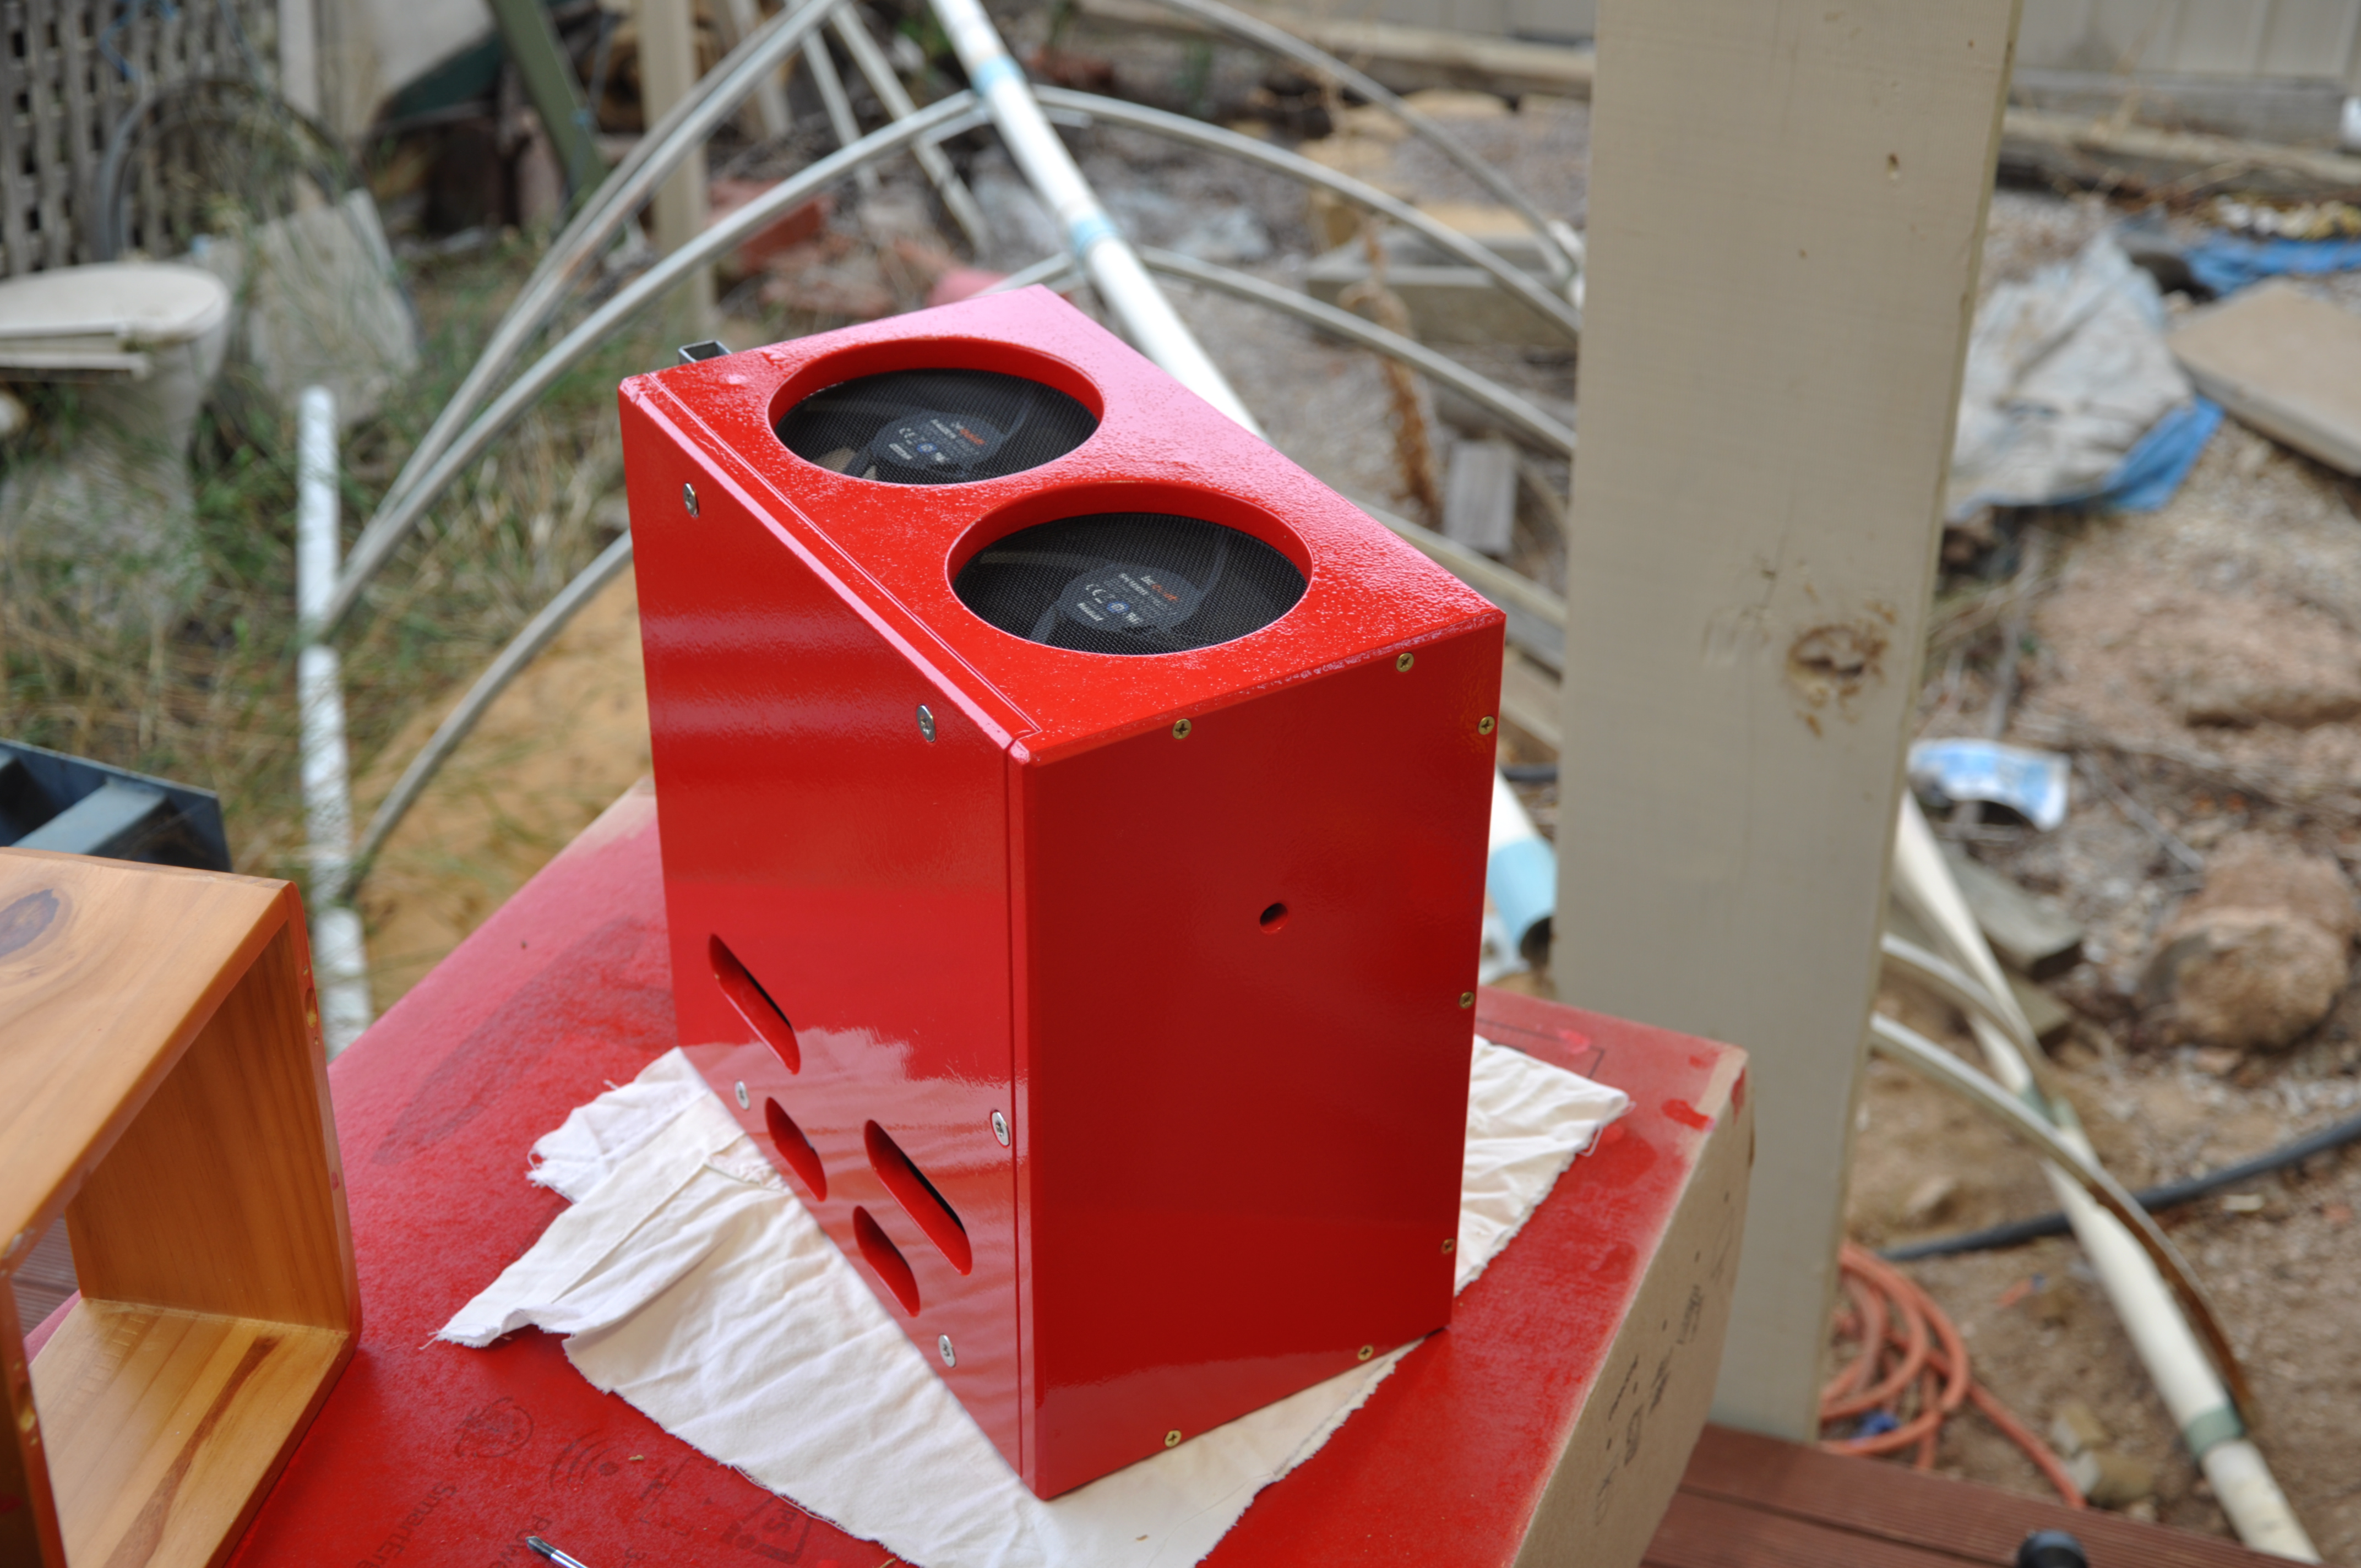
Nearly finished, fans, motherboard, power supply. Here the
cables have been tidied up. The reset switch is just hanging
out the back for now.
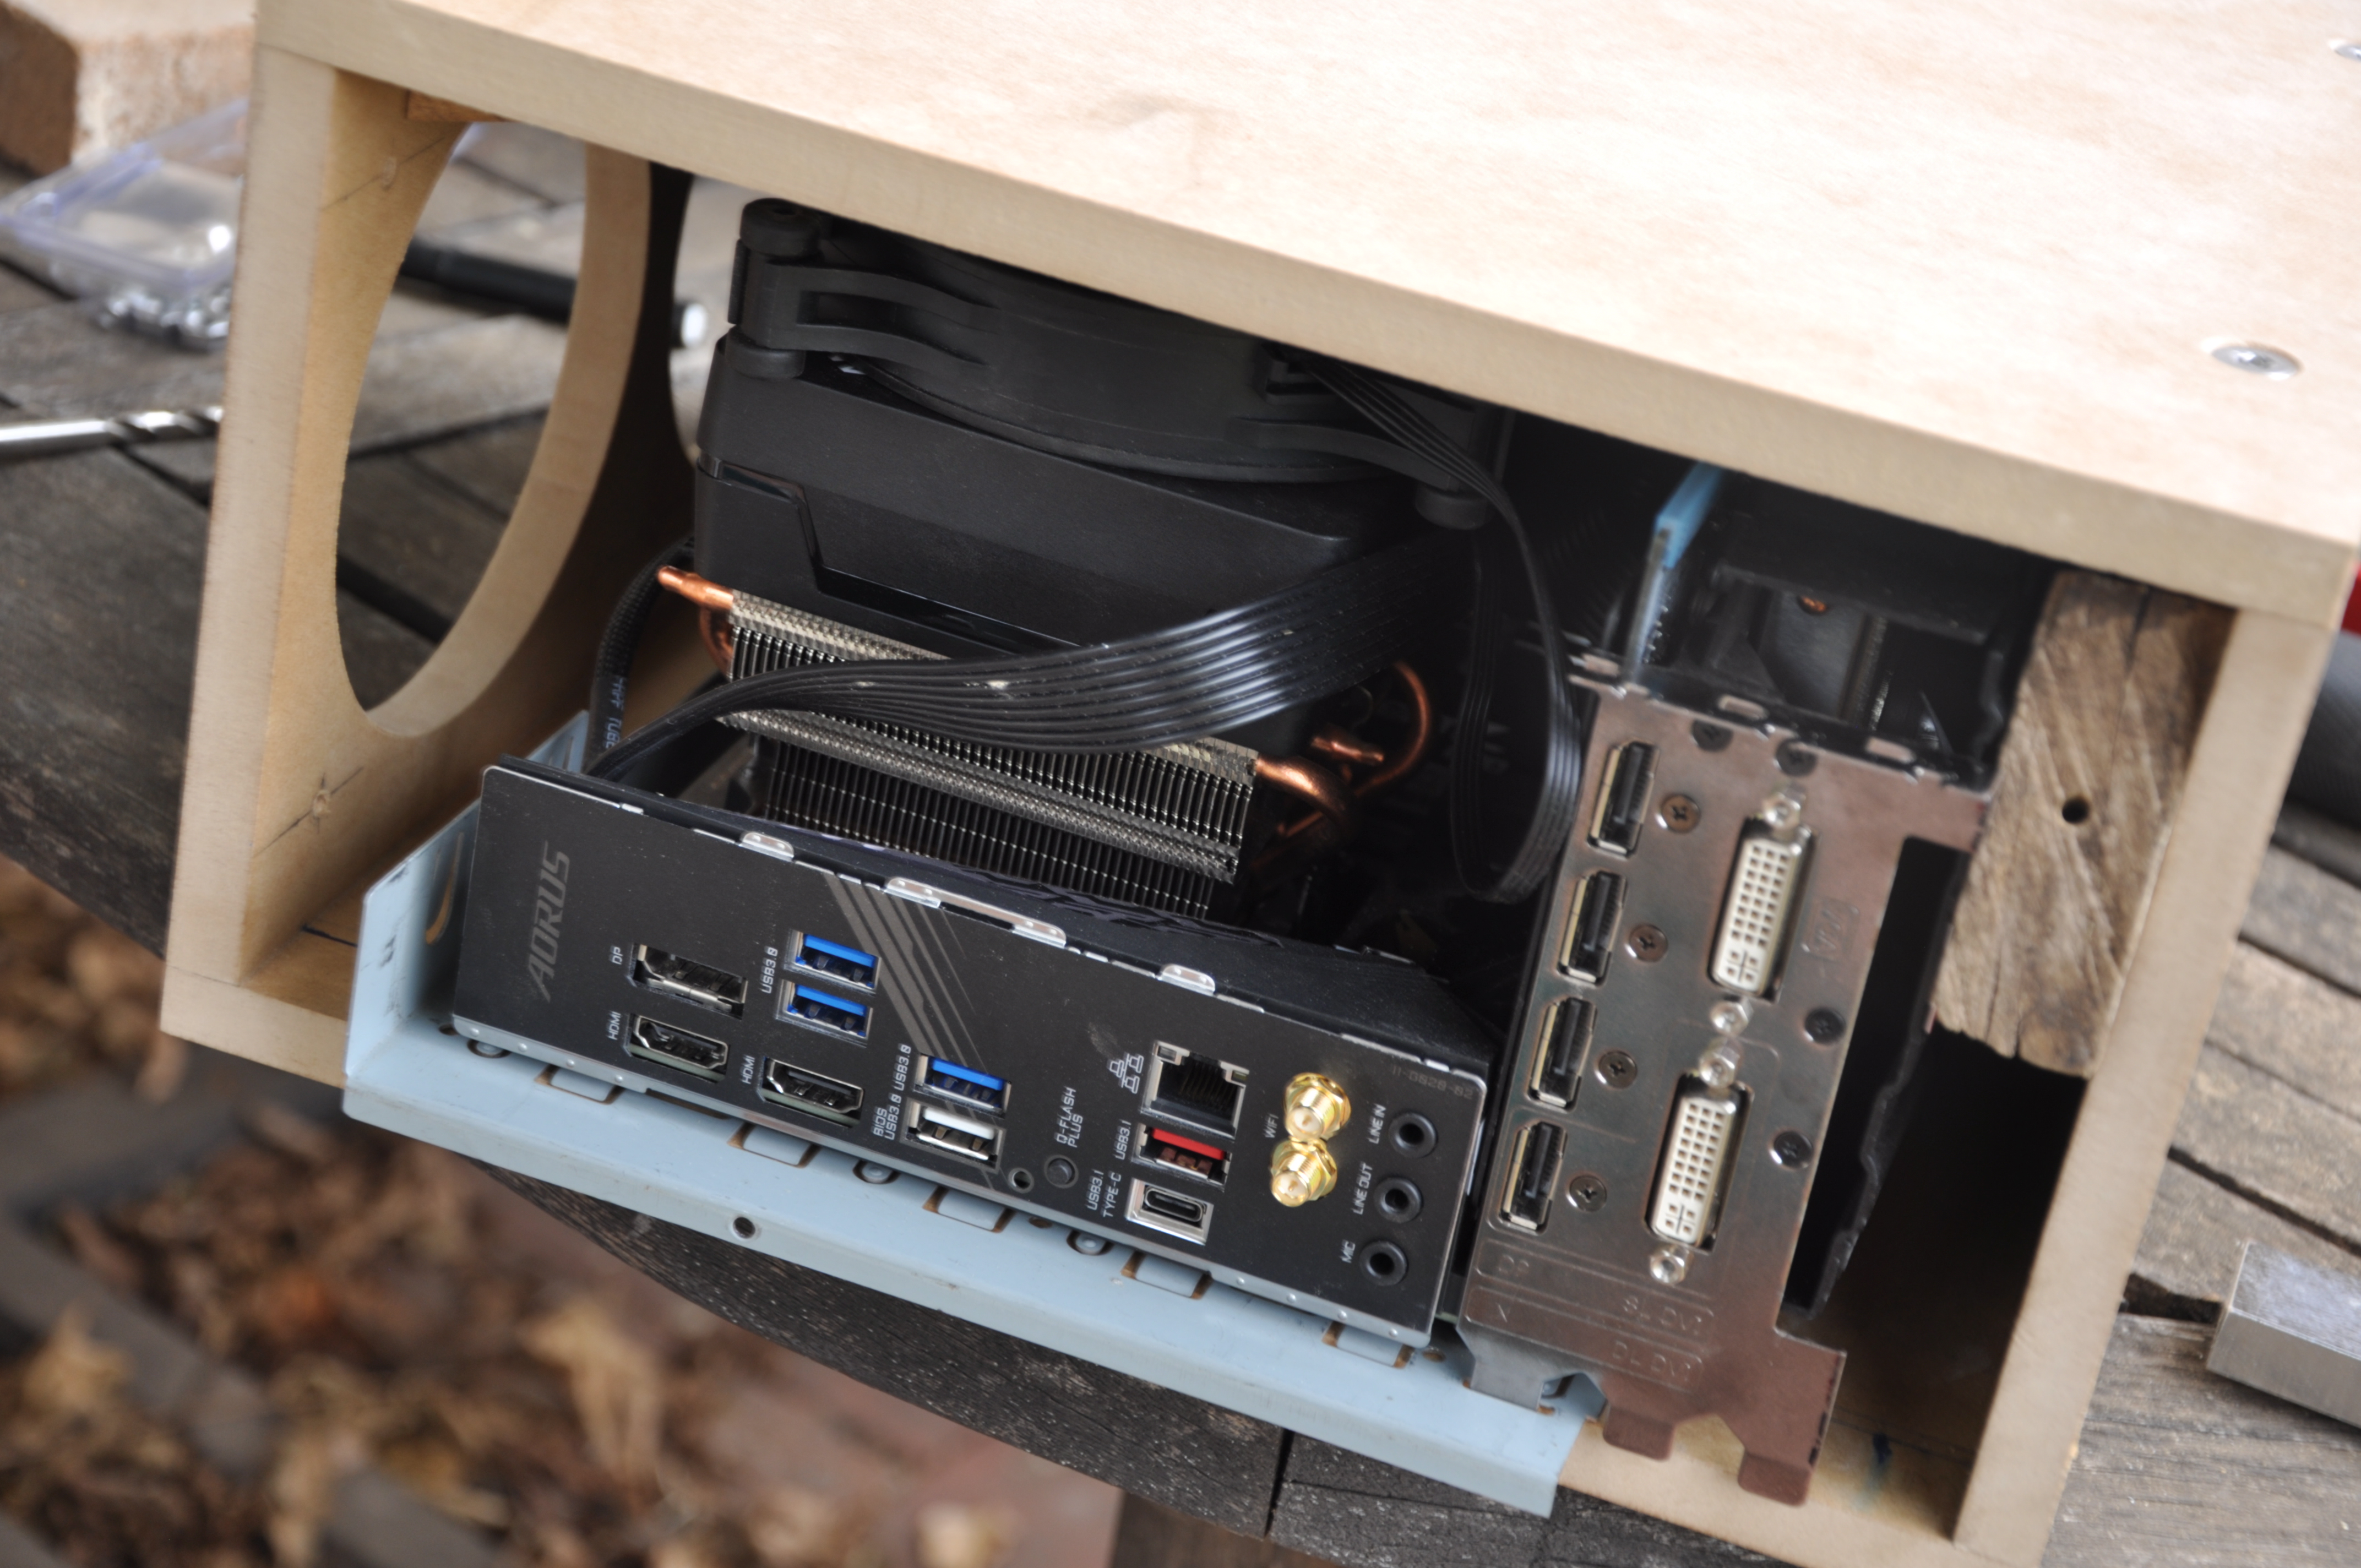
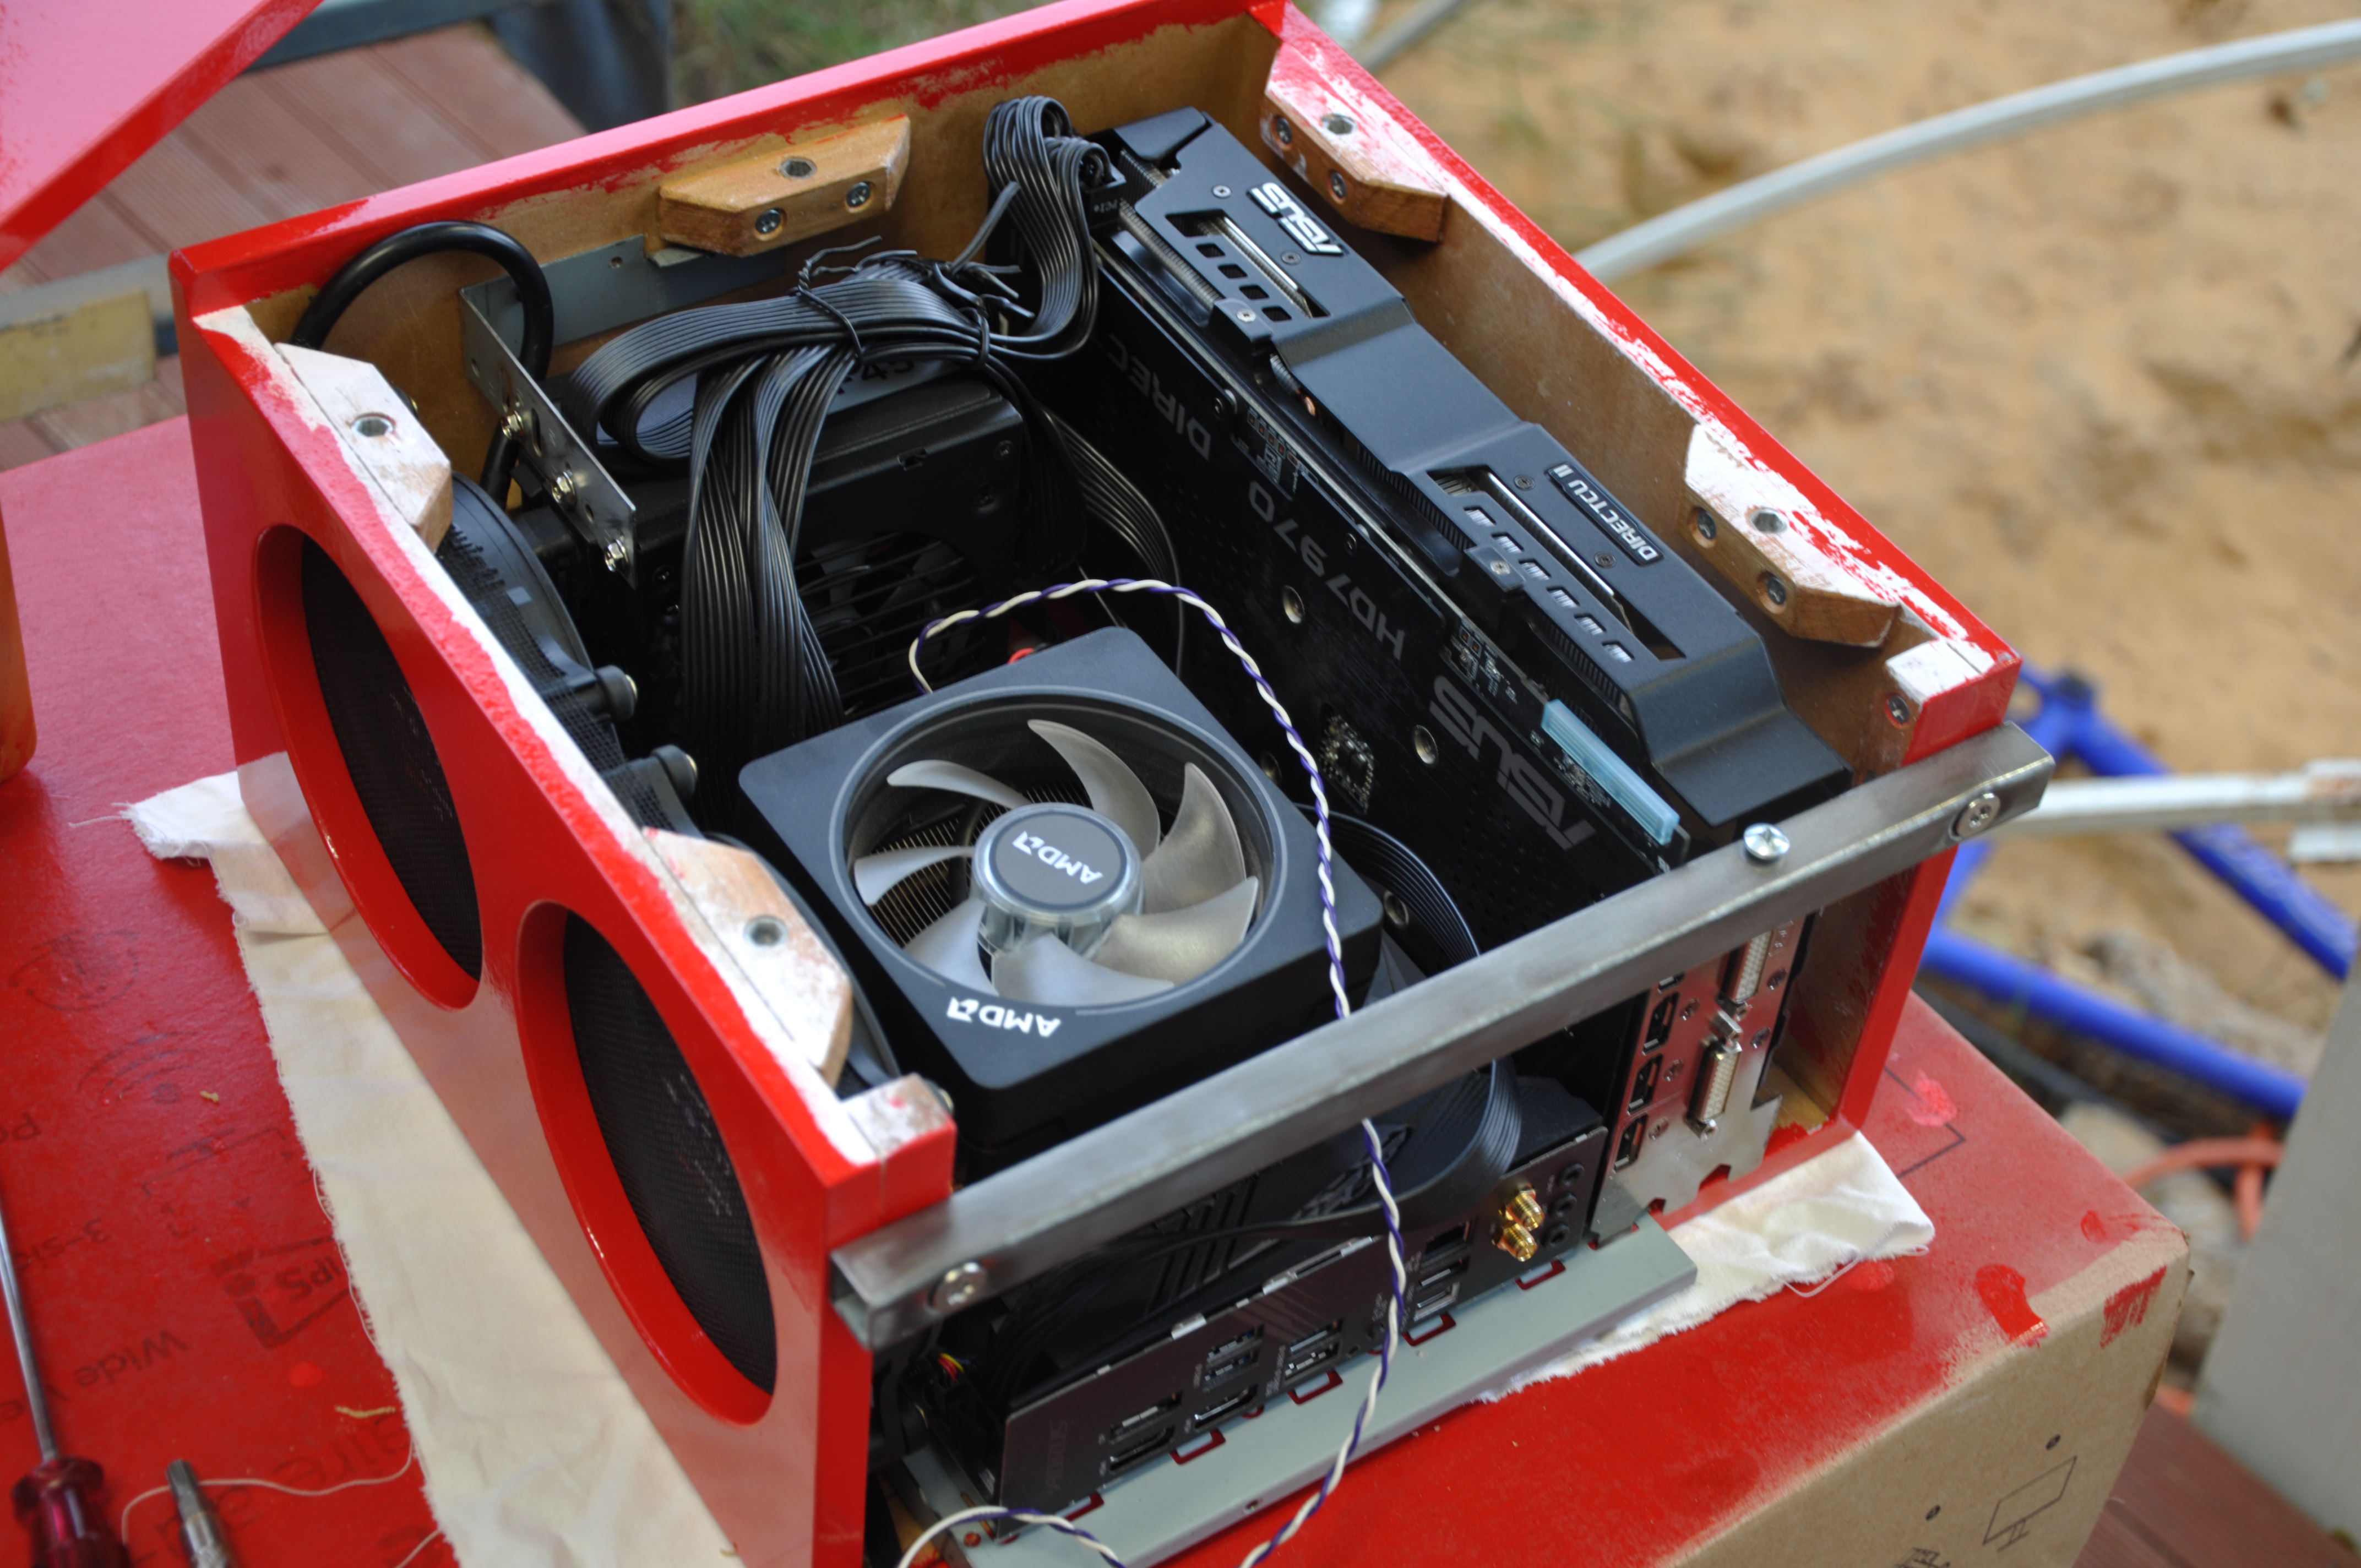
And that big-arse GPU is in now too! After tidying up the cables there is ample room.
I also detailed the galvanised square tubing - I ran a wire
brush over it with the drill to give it a satin finish and then
put on a couple of coats of Penetrol. I haven't used it before
but it's supposed to be 'the shit' for a natural metal finish (I
got it for my kilt belt buckle but haven't used it yet). The
steel bar doubles as a mounting point for the magnetic antenna
that came with the motherboard.
Due to the issues mentioned earlier there's no rear panel yet.
Maybe i'll do some steel and attach to the bar or something. In
hindesight the case could've been another 15mm long so the bar
could be recessed ... but it's too late now (unless I get a
shorter GPU). The case could have been any depth!
Despite 24 hours drying in good weather the Penetrol and paint
were still a little tacky feeling (or rather, set but soft).
Because of this I only did up the screws lightly, but perhaps I
should've waited a few more days for the paints to harden more.
I also should have sanded down the internal surfaces where the
paint created a thicker edge too, already a couple of bits have
pulled off but they're inside.
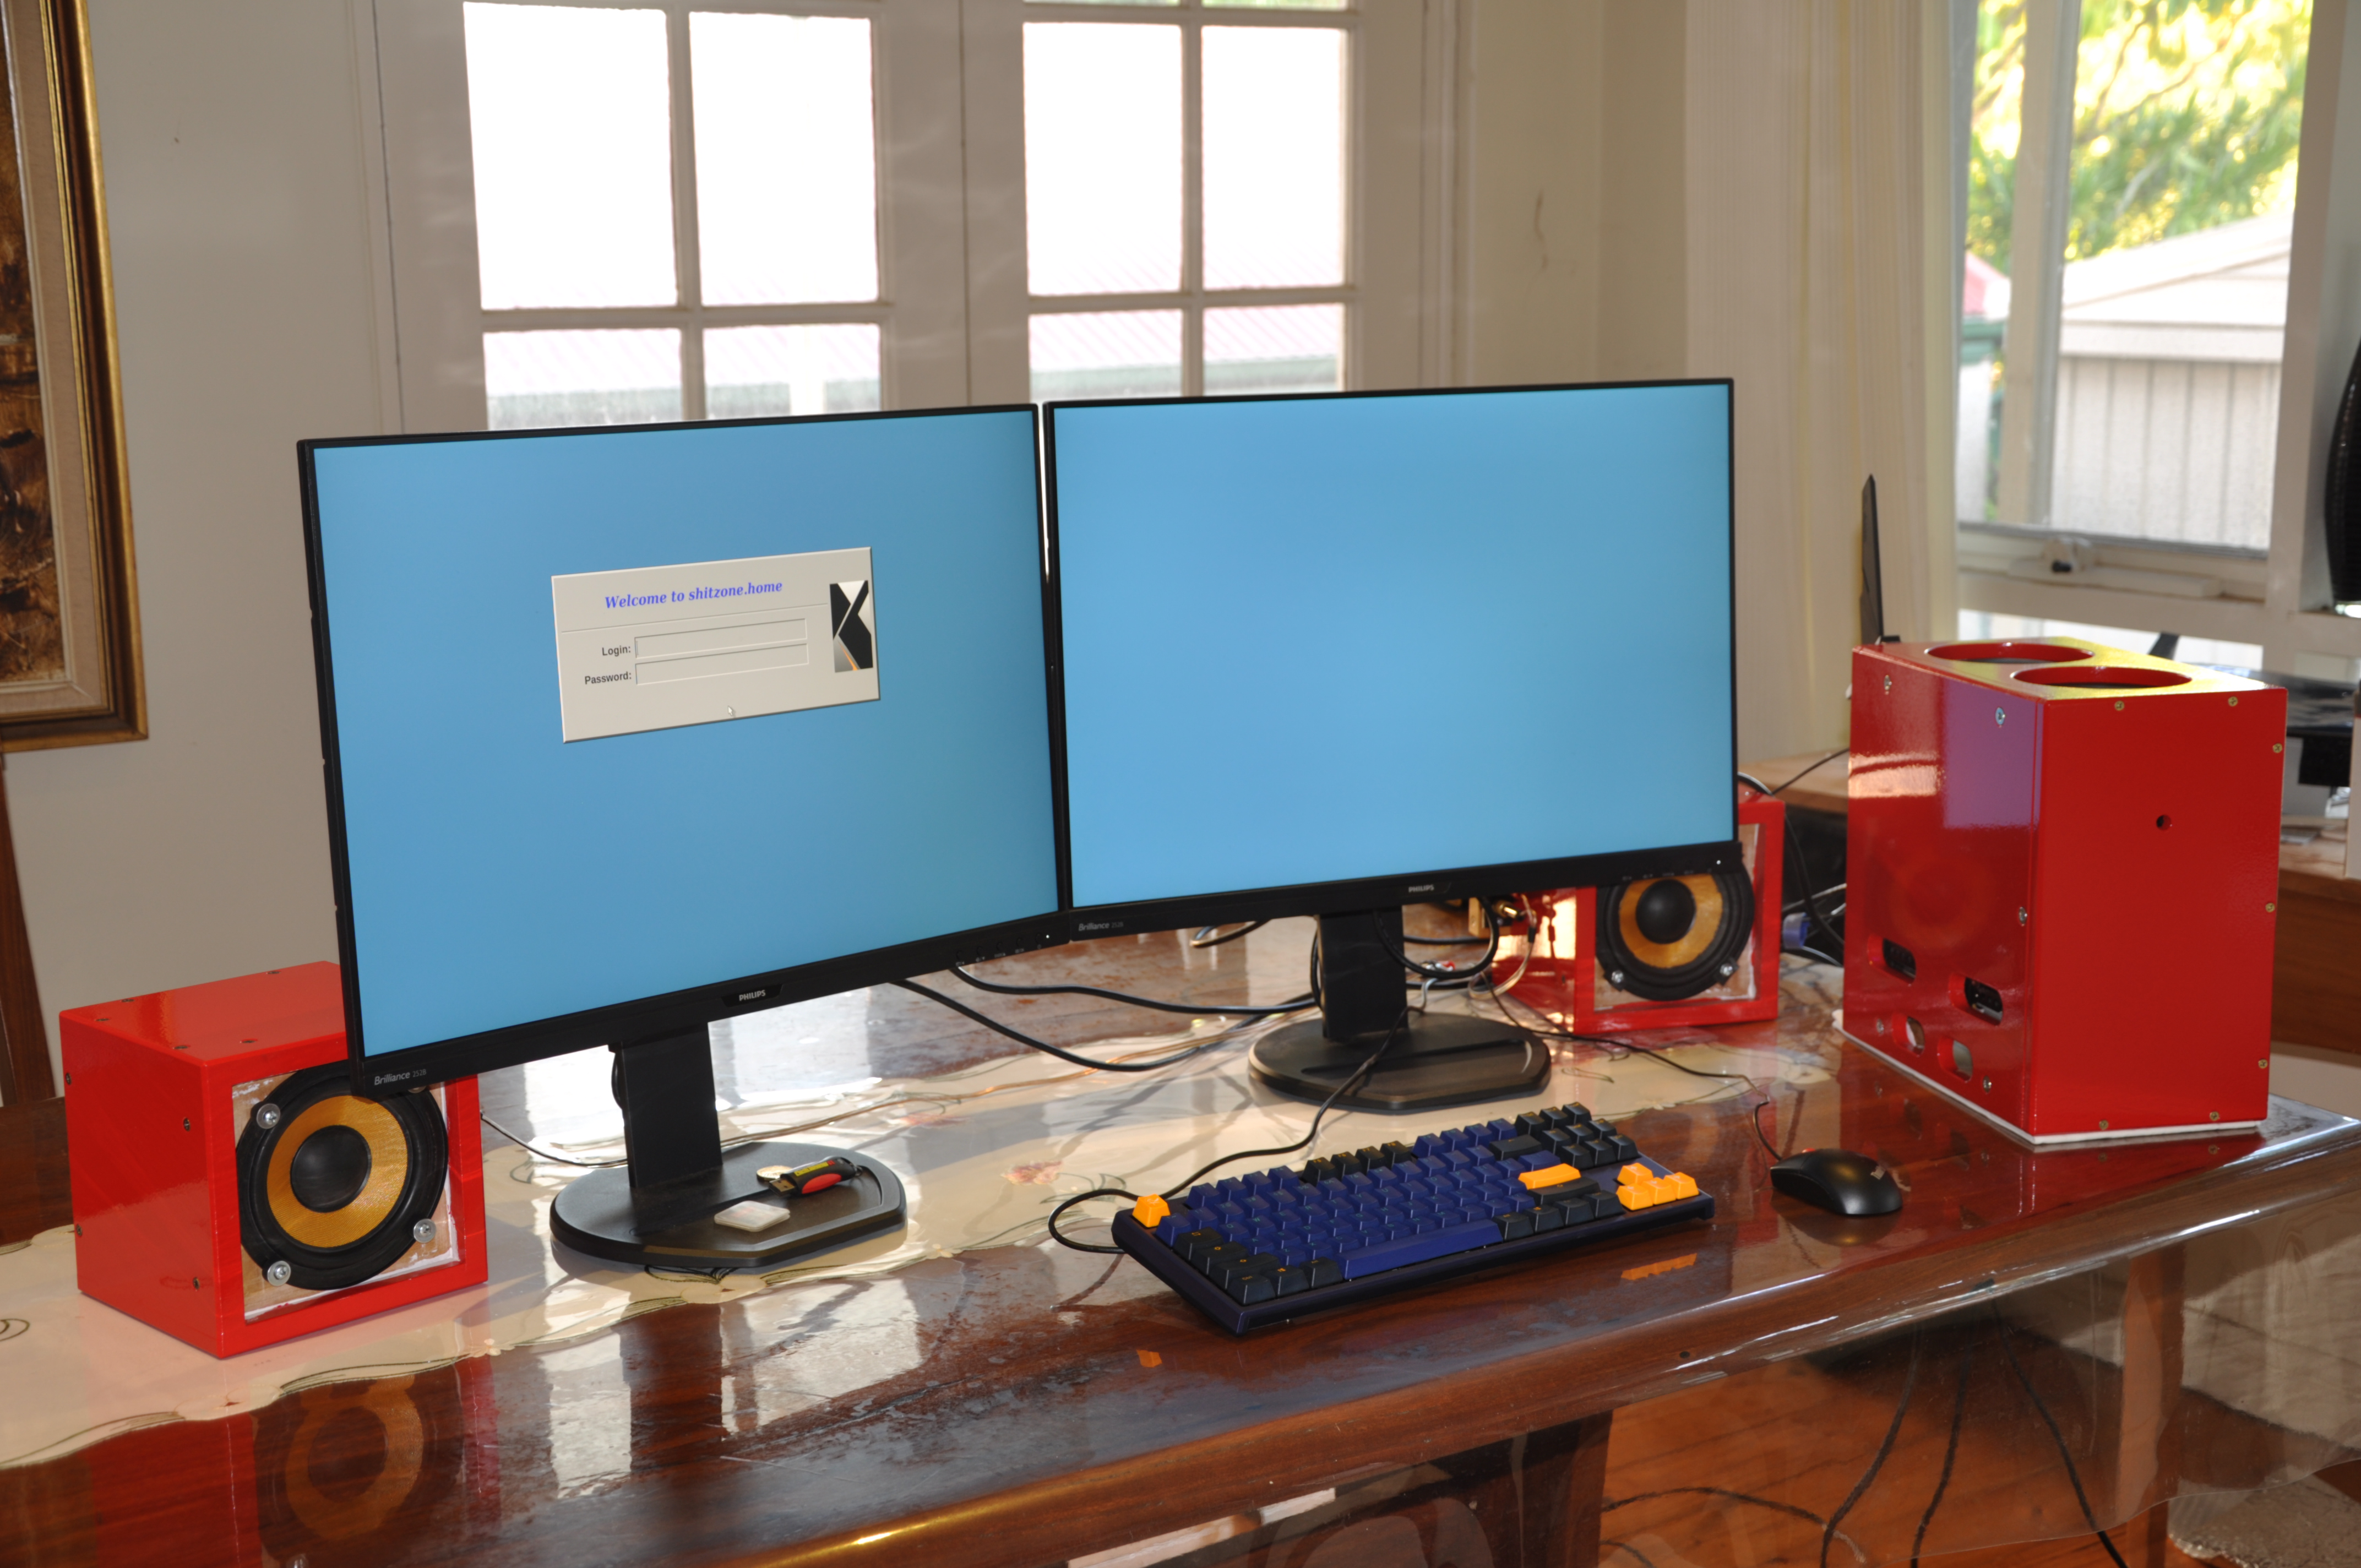
That's it!
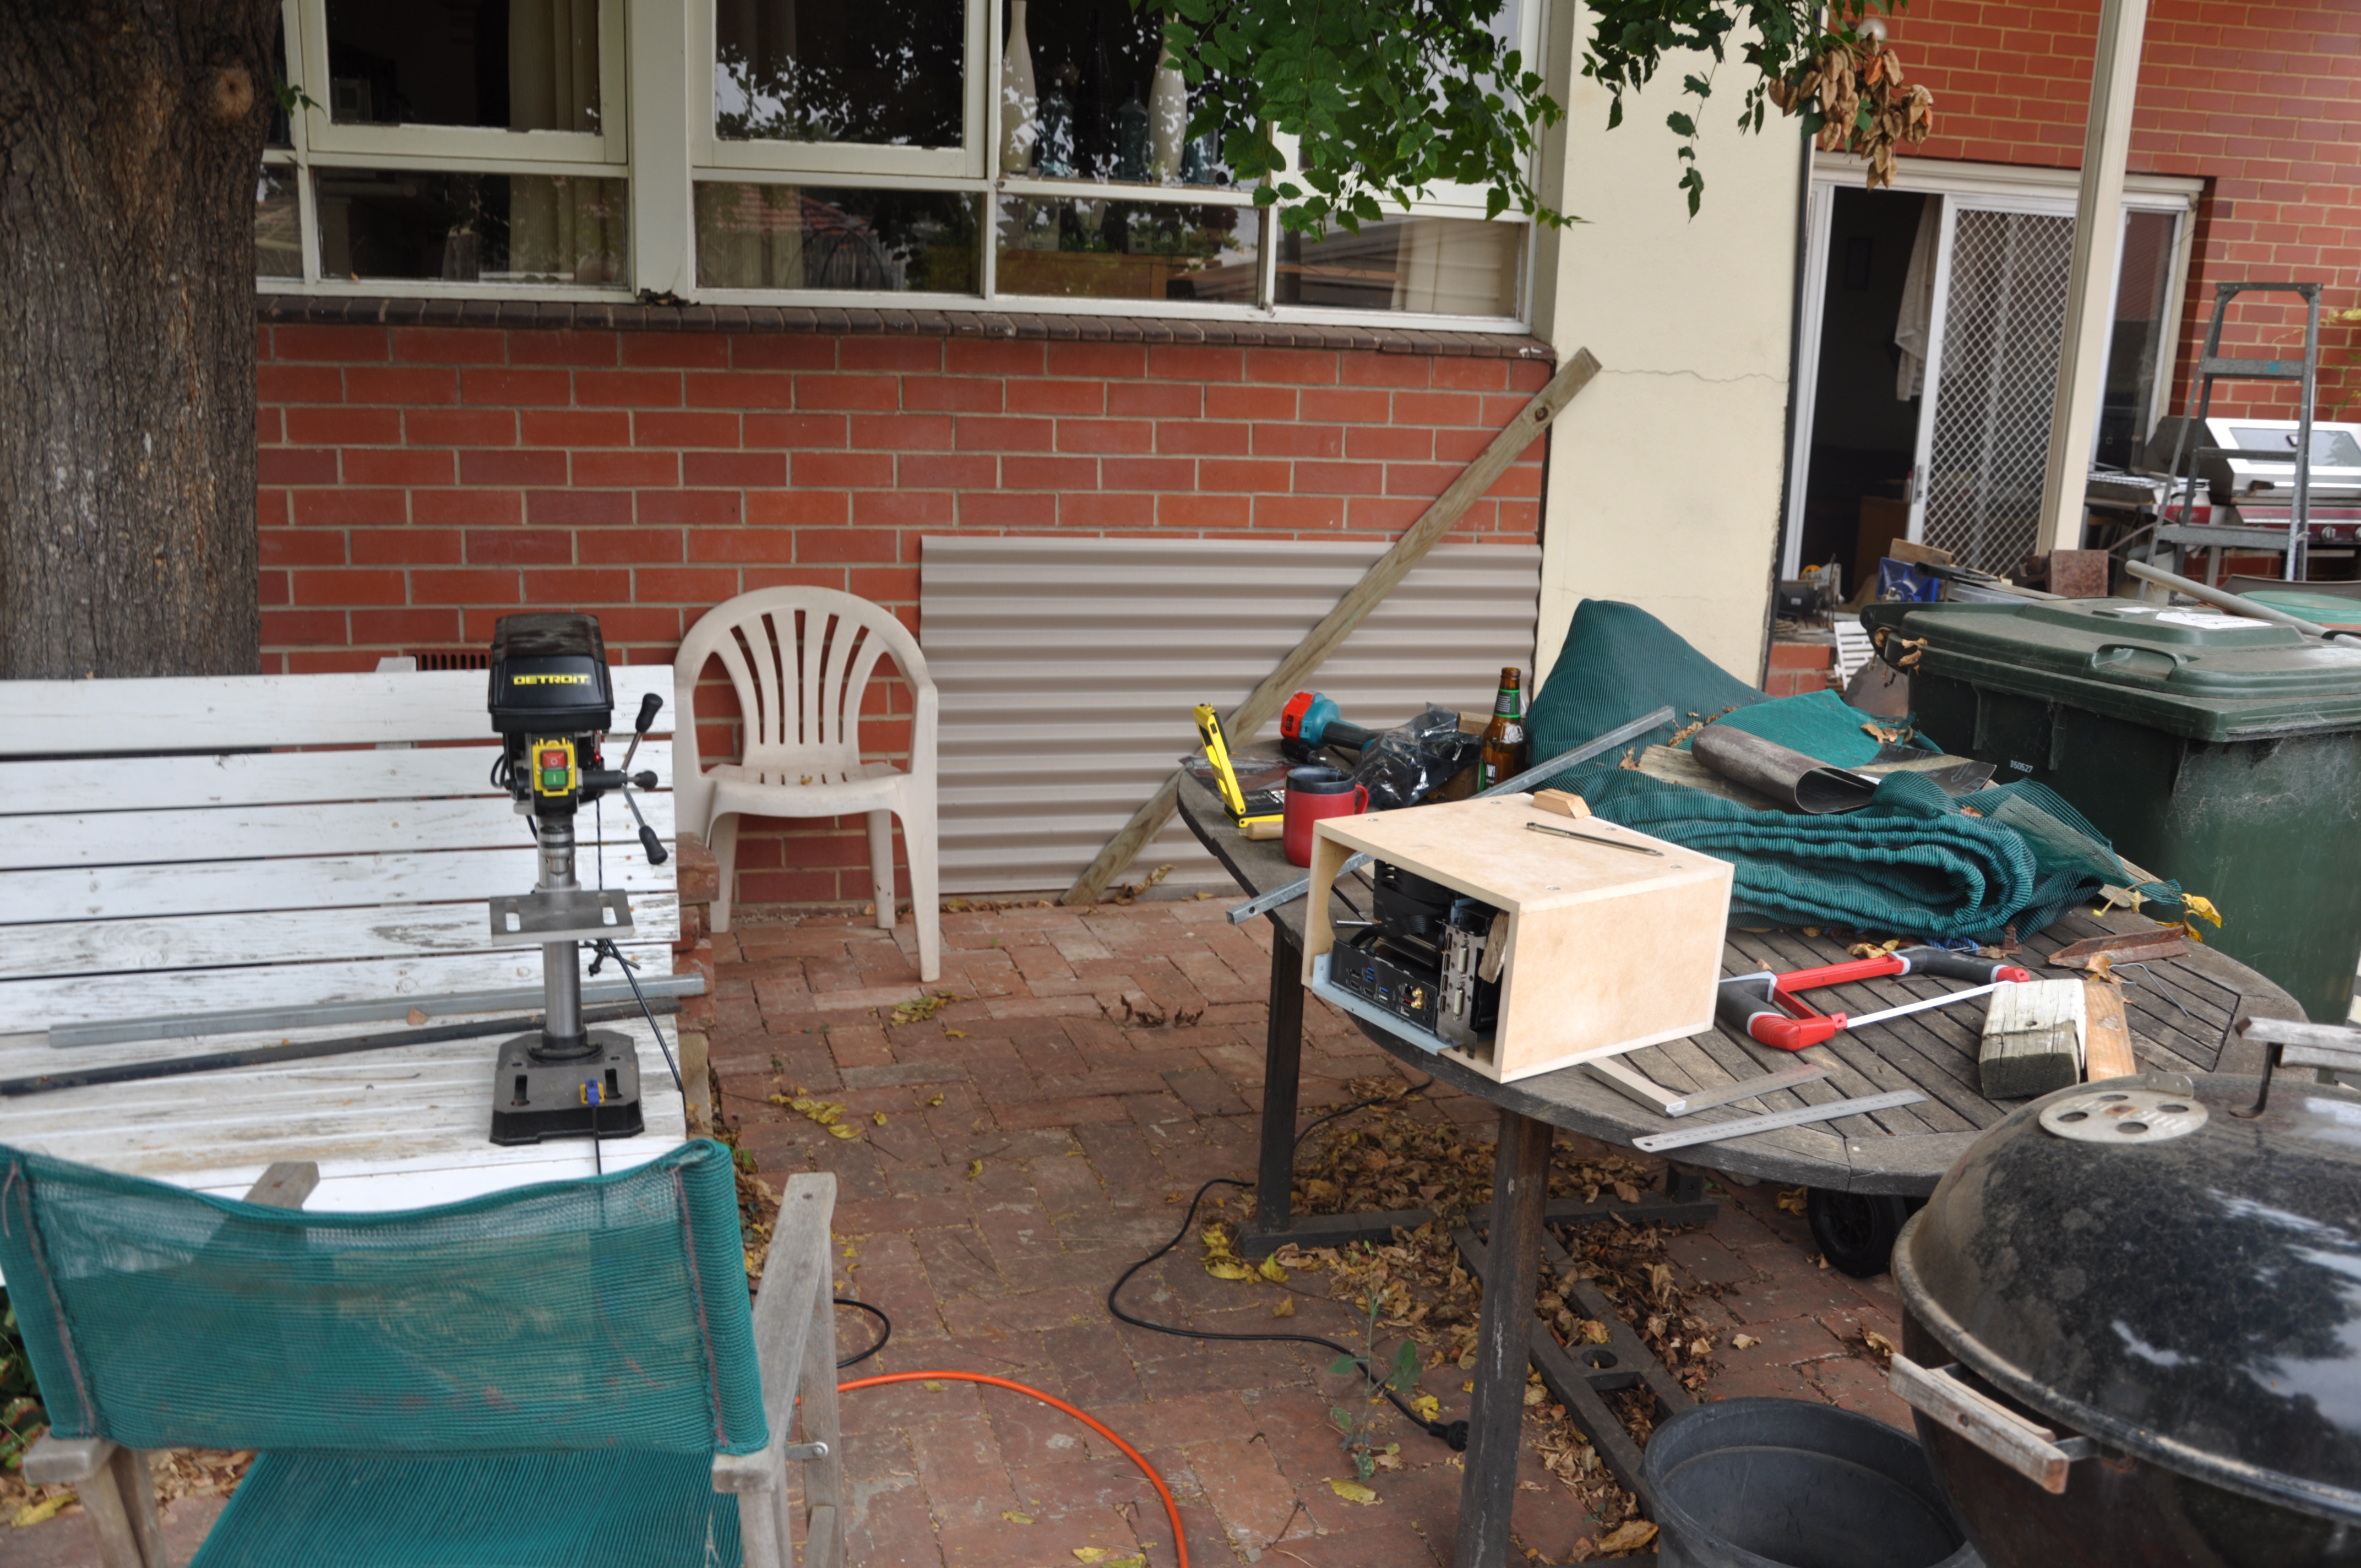
It is still on the dining table because my computer desk is occupied
with junk, my old Kaveri machine, and a giant old full-tower from work.
ZCL and Project Panama
So I've been really busy working on zcl again, porting it to the
foreign-abi branch
of project
panama.
Well that's after I ruffled some feathers on the mailing list, I
guess I just have strong opinions on C, but I thought I'd better
put my money where my mouth was before upsetting anyone too much.
To be honest the Oracle engineers have been the most polite and
overwhelmingly patient of all the projects I've interacted with
lately - guix guys just weren't very polite (that's not entirely
fair, some were nice), the google guys for clspv were just
condescending, and well the ffmpeg devs never did reply
to my patch for a kinect indev.
Anyway back to the topic at hand. I wrote a fairly rushed but
quite detailed overview of the issues I came across and some of
the features I implemented or needed to change. I titled
it JNI to
Java with project panama. The prose doesn't flow very well
but at least I ran it through ispell which is a habit I'm trying
to get into.
I was originally just going to put into a readme in project
panamaz but since I got so far with the development I just
published it separately and created a new branch
foreign-abi
in the zcl repository. The article above has some checkout
details about checking it out. It's still work in progress and
I'm still making some internal changes but I added a fun little
Mandelbrot zoomer to it. The javadocs are pretty shit but for
what it's
worth I've
uploaded those too and will try to keep them relatively up to
date while I work on it.
I'm also using the project to experiment with
the maven and junit, and now a
demo-runner snippet for GNU
Make.
It was sort of because I was working in the panamaz project but I
wrote almost all of this new code in emacs rather than netbeans.
Damn I knew it pissed me off but I didn't realise it wasn't
writing Java that was the problem, netbeans keeps just fucking
getting in the way when you're trying to write code and those
interruptions constantly break you out of 'flow'. I mean the
completion and the real-time syntax checking is pretty good but I
don't know why the editor has to be such an annoying prick all the
time.
Verified Maven Central from GNU Make
Well after the previous post I tried looking at the signature verification step. There isn't too much to it.
define maven_func=
bin/lib/$2-$3.jar:
        mkdir -p bin/lib
        wget -O $$@ $(CENTRAL)/$(subst .,/,$1)/$2/$3/$2-$3.jar
bin/lib/$2-$3.jar.asc: bin/lib/$2-$3.jar
        wget -O $$@ $(CENTRAL)/$(subst .,/,$1)/$2/$3/$2-$3.jar.asc
        gpg --batch --verify $$@ $$< || ( rm $$@ ; echo "GPG verification failed, you may need to import the public key." )
setup: bin/lib/$2-$3.jar.asc
endef
If it fails you need to import the keys using gpg manually. This
might be a bit annoying but otherwise you may as well not bother.
gpg will pass the check if the key simply exists in your key
store and ignores any trust setting, but that's just the way gpg works.
Maven Central from GNU Make
I had a look
at jmh
yesterday. It's all driven by maven so that's a bit of a pain but
using the ant example I trivially converted it to use GNU make.
As expected, it's somewhat fewer lines of code to just use a
generic build tool than either of the other tools which are
specifically designed for Java projects. I will integrate it into
java.make eventually, although as I don't use any projects that
require it I haven't done that yet.
So for this prototyping example you just define a couple of
variables. The interesting one just lists the
group:artifact:version in a relatively simple/readable format.
CENTRAL=https://repo1.maven.org/maven2

CENTRAL_JARS=					\
 org.openjdk.jmh:jmh-core:1.18			\
 org.openjdk.jmh:jmh-generator-annprocess:1.18	\
 net.sf.jopt-simple:jopt-simple:4.6		\
 org.apache.commons:commons-math3:3.2
And well that's about it. It hooks into the makefile system at
the right place to download the libraries. I don't do any
signature checks but I can't imagine that would be very to add
either.
It only requires a simple macro to download the packages.
define maven_func=
bin/lib/$2-$3.jar:
        mkdir -p bin/lib
        wget -O $$@ $(CENTRAL)/$(subst .,/,$1)/$2/$3/$2-$3.jar
setup: bin/lib/$2-$3.jar
endef
.PHONY: setup
$(foreach nver, $(CENTRAL_JARS), $(eval $(call maven_func,$(word 1,$(subst :, ,$(nver))),$(word 2,$(subst :, ,$(nver))),$(word 3,$(subst :, ,$(nver))))))
Although calling it is a little clumsy, but that's a hidden detail.
To hook it in you have to add jmh-core
and jmh-generator-annprocess to the class path of
the javac invocation.
bin/.classes: setup $(SOURCES)
        javac -d bin/classes \
                 -cp bin/lib/jmh-core-1.18.jar:bin/lib/jmh-generator-annprocess-1.18.jar \
                $(SOURCES)
        touch bin/.classes
jmh is typically run using a standalone jar file but for
simplicity it can just be run in-place from the build directory.
Creating a standalone jar wouldn't be that much hard to add, just
a few invocations of jar to explode and repack the classes.
bench: bin/.classes
        java -cp bin/classes:bin/lib/jmh-core-1.18.jar:bin/lib/jopt-simple-4.6.jar:bin/lib/commons-math3-3.2.jar \
                org.openjdk.jmh.Main
In the final iteration I will add some code to the macro to create
this classpath so it is easier to use.
panama/jextract
Regarding a previous post i've discovered that the annotation
mechanism i've been using is probably not the approach to use and
there is a lower-level interface. I'm still yet to start on
supporting that in the code generator but i've nutted out most of
the machinery it will require.
I've bugged the panama developers quite a bit about what I see as
some shortcomings in the api. Their idea of a 'C api' is very
limited, for example they think that Java shouldn't be able to
dereference a C-allocated pointer without signifying 'unsafe'
code and passing some scary arguments to the compiler and jvm.
Sure, many modern api's want to wrap trivial memory operations in
multiple layers of 'accessor' functions but even those typically
return a const char * for a string so you
can't even access those without a mess. This seems a little odd
because what you can do without resorting to 'unsafe' api's has no
safety guarantees already, and infact you can trivially implement
an arbitrary whole-memory-access function by just
invoking memcpy. Anyway there is hope it is changed
by release because it's an unecessary restriction that can be
bypassed trivially and just adds more developer work for no good
reason. In my experience such complexity just leads to more of
the type of errors they're trying to safeguard against.
GTK3 CSD theme improvements
I was frustrated at the inability to re-size gtk3 windows with CSD
as the hit-box for re-sizing was a 1x1 button, so I made some
improvements to the gtk3 part of my workbench theme.
Now the CSD window borders are more consistent with xfce4wm!
The main trick was finding out which @#$@#$ classes to use for the
css selectors. Almost every search sends you to out of date
information that references '.window-frame', which is wrong.
The GtkWindow
documentation actually has the correct names.
And using the :backdrop pseudo-class is required for
inactive windows.
I also used padding and border colours so you get the minor 3D
effect so they also match the xfce4wm theme.
Get the theme from code.zedzone.au, details are on
the project
page.
OpenJDK project Panama hacks
I had a look at
the OpenJDK
project panama last week. It's a way to replace using JNI to
bind Java to native libraries by using plain old java which
through annotations can be bound to the native libraries at
runtime inside the jvm.
Actually I had no idea how it worked just that one uses a tool
called jextract to convert header files into a jar
file which you can then link against. However I wasn't really
happy with the way it works (and it sounds like it's being changed
for mostly those reasons), so i ended up 'reverse engineering' the
tool and writing my own.
I probably should've looked harder for documentation but I didn't
find much that specified the details so I just ran jextract on
some files and tried to generate the same output.
I created a project page and
a
repository
and dubbed it 'panamaz' in an unimaginative following of
tradition.
export.cc
The first part of the problem is getting an accurate dump of the c
types and prototypes you want to use. jextract is built using
clang, but I've had a tiny bit of experience poking about that and
I really didn't like what I saw so I thought I'd try using a gcc
plugin.
I didn't look very far but i found a couple of bits of example
code and opened up gcc-internals.info and got to work. And it was
a lot of work. I can see why ICEs were once so common in gcc -
you get no compile time errors for bad type assumptions of the
syntax tree, and when you do the wrong thing sometimes it will
work anyway. The documentation isn't completely accurate either,
which is pretty annoying considering how complex the system is.
But anyway in the end of I have a nice tool that can dump
considerable information about c header files. The output format
is a better, more usable, canonically-decoding version of 'json',
or what one might term 'Perl, son'.
The following simple example:
struct bob {
    int a;
    float b;
};
Produces the descriptor file:
%data = (
'struct:bob' => { name => 'bob', type => 'struct', size => 64, fields => [
        { name => 'a', size => 32, offset => 0, ctype => 'int', type => 'i32',},
        { name => 'b', size => 32, offset => 32, ctype => 'float', type => 'f32',},
]},
# dumped structs:
# bob
);
generate
This is a (mostly!) better-than-i-usually-write bit of perl which
takes the 'perl-son', and turns it into a bunch of java files.
These are all interfaces which have the correct annotations to be
used by the project-panama jdk to perform runtime linking.
It's got a lot of flexible options but the one I like is that you
can specify the set of functions and/or types you want and it will
recursively drag in all the types they depend on automatically,
and only those. At least for most of it, I still haven't done the
same for callbacks yet because they're a bit fiddly.
It ignores enums for now because I just ran out of juice but it
covers all the other major parts of the language and even some of
the lesser parts.
panama jdk
Most of the information is conveyed in signature strings which are
passed to the jdk via annotations in interfaces. The simple
example above is translated to an interface with
the @NativeStruct annotation that includes the two
field names and their types in order.
import java.foreign.annotations.*;
import java.foreign.memory.*;
@NativeStruct(value="[i32(a)f32(b)](bob)", resolutionContext={})
public interface Bob extends Struct {
        @NativeGetter(value="a")
        public int getA();
        @NativeSetter(value="a")
        public void setA(int value);
        @NativeGetter(value="b")
        public float getB();
        @NativeSetter(value="b")
        public void setB(float value);
}
Accessors can be named anything (jextract uses the
uber-friendly notation of name$set(...)
and so forth) but the field they operate on is indicated using
the @NativeGetter or @NativeSetter
attribute and specifying the field name, which is defined in
the @NativeStruct annotation. There's also an
address-of annotation for a rather verbose equivalent of the &
operator.
I didn't come across a document describing this format (and I
didn't look beyond the annotation source code) but I worked it out
by seeing what jextract did. Most of it is pretty
straightforward.
| i32, i64, ... | Signed integer of the given bit width. |
| u32, u64, ... | Unsigned integer of the given bit width. |
| f32, f64 | IEEE float of the given bit width. |
| x8, x16, ... | Padding, artibrary number of bits. |
| ${type} | Named compound type |
| =u64[many of iX, uX, xX] | Bitfields in long (or u32= for
int), where X is an arbitrary number not limited to multiples of
8. |
| u64: | 64-bit pointer |
| u64(name):(argtypes)returntype | Function signature |
| [type(fieldname)type(fieldname)...](name) | struct name |
| [type(fieldname)|type(fieldname)|...](name) | union name |
| ... and others |
The bitfield one is a bit odd, I'm not sure why one has to specify
an internal detail such as the actual word-size used for storage,
but I don't use bitfields much. Perhaps it's to supports some
alignment/packing __attribute__ in bitfields which is
used to map hardware registers, although that seems rather obtuse
usage for Java api bindings.
So basically I kept banging at the exporter and the generator
until I got something working, then tried to compile it and then
fixed those problems. Then tried instantiating the object and
fixing the breakage. Then tried another type and so on and kept
going until it all worked. And then I rewrote the exporter almost
entirely to clean up the code. And then fixed the new bugs. Then
created a simple example.
Then created a repository and a project page, then sent an email
to the panama-dev list, then wrote a blog post ...
Vulkan + OpenCL?
I've been slowly working on some OpenCL on Vulkan stuff using
clspv. It's a bit too hot here, my heart isn't really in it, but
I'm slowly making progress.
The last thing I checked in was an example that uses more
complicated argument passing conventions and uses a small compiler
to turn the descriptor map file from clspv into some tables used
for initialisation and argument setting. Actually
I wrote a
patch for clspv to output the data type so the compiler can
use it.
Of course along the way I hit fairly obtuse errors from vulkan
regarding extensions and options which need to be enabled for the
small kernel I wrote, but thanks to the validation layer they were
able to be resolved without too much work.
I'm working on abstracting a lot of the details away into a more
OpenCL-like API, the first few examples were stand-alone but
there's really just so much boilerplate it makes it too confusing
for an example. I've discovered a few options like
VK_DESCRIPTOR_BINDING_UPDATE_AFTER_BIND_BIT_EXT and it's
associated settings that are required for the kernels to behave
somewhat like OpenCL where you can modify kernel arguments for
subsequent submission. From my preliminary work I think most of
the behaviour can be recreated, although the more limiting factor
is the compiler and SPIR-V.
It can be found inside the opencl-args directory
of zproto-vulkan,
but I'll probably re-arrange the directory structure at some point
and continue to work on the abstraction. As of this post it's
pretty much just when I got it working at all and I didn't try to
work on the queuing mechanism.
busymon - tool to force computer breaks
I had need of a tool to remind me (forcefully) to get off the
computer and get up and walk around for a while. I was surprised
I couldn't find anything simple to do this; I came across rsibreak
but it looked like a mess to compile (i mean, cmake, obviously).
I looked a bit more but nothing looked simple.
So here's a basic computer monitor that tells you off if you're at
the computer too long - as a proxy for sitting.
As usual busymon has a
software page and
a repository.
In short my bicycle accident has lead to further complications,
possibly in part due to sitting down for too long infront of my
computer. So now i'm riddled with clots (some poetic license)
and on blood thinners and should probably try not to make it
worse. Hourly walking breaks are now doctors orders, and well,
time just flies sometimes.
Copyright (C) 2019 Michael Zucchi, All Rights Reserved.
Powered by gcc & me!